Author: Sean Terry

Bryce Canyon National Park

24 Hours in Bryce Canyon National Park

When planning a trip to Southern Utah, it’s hard to go wrong when deciding between the five National Parks that span the area. Each park is quite unique, and all are spectacular. As the smallest of the National Parks in Southern Utah, Bryce Canyon National Park is suited perfectly for visitors who are dealing with a time constraint but would still like to experience nature and take in incredible views.

Bryce Canyon

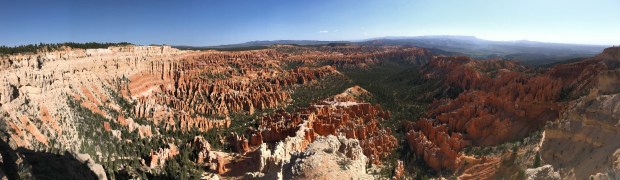
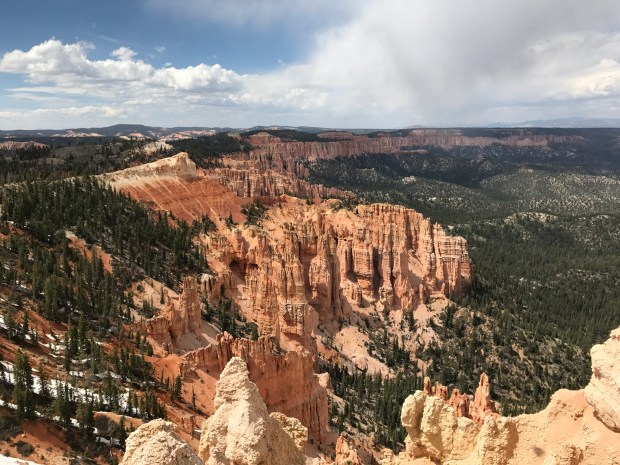
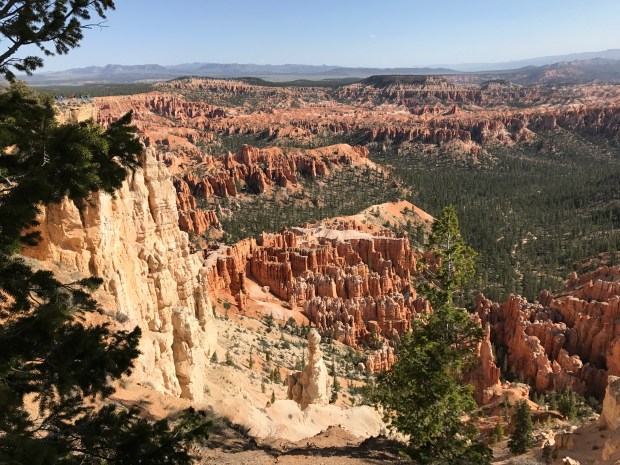
Bryce Canyon as seen from the Rim Trail

On a recent adventure, a good friend and I spent 24 hours in Bryce Canyon and can confidently say that we saw and explored a great deal of the park. While the park is small (only 18 miles long with paved roads from north to south) there is plenty to explore and visitors could easily spend several days in the National Park.

Bryce Canyon

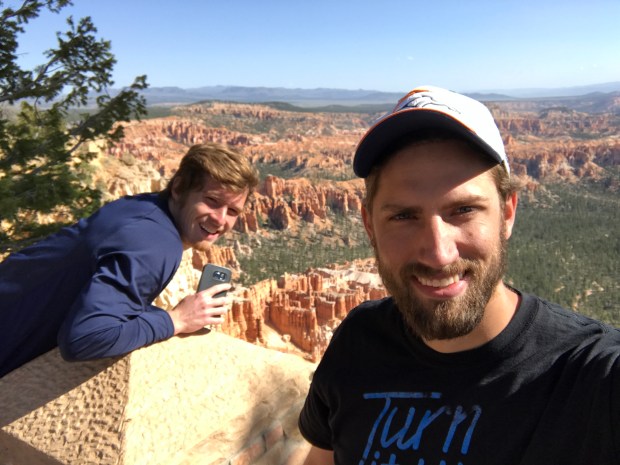
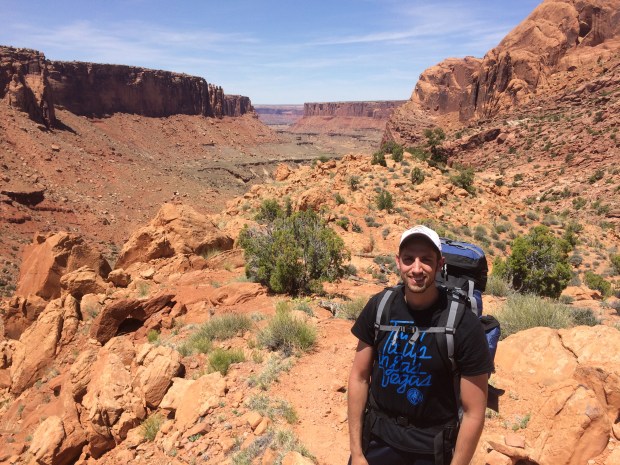
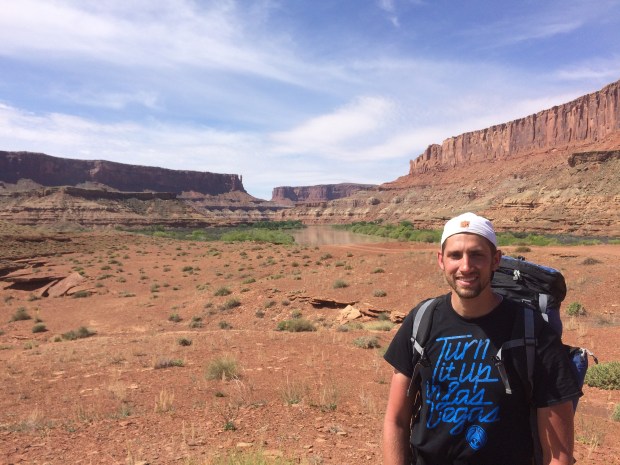
Durant and I at Bryce Point

My friend, Durant, and I planned to backpack Riggs Spring Loop Trail, an 8.6 mile loop out of Rainbow Point in the southern-most part of the park, and were also intent on stopping at as many viewpoints and exploring as many of the short hikes as we could.

Bryce Canyon

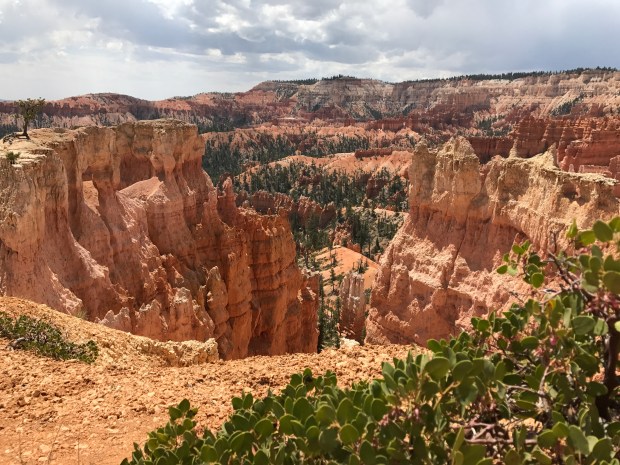
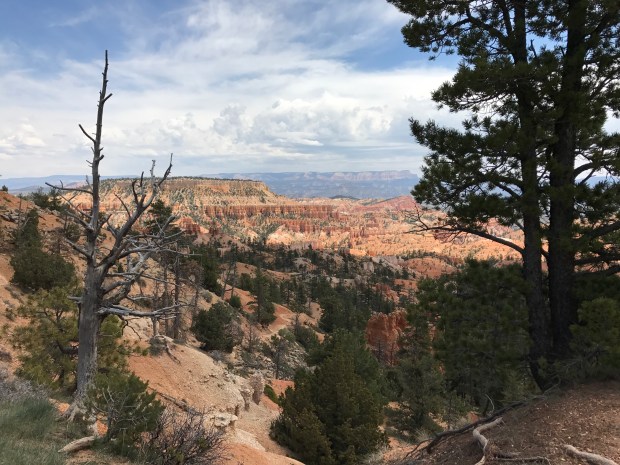
Taken near Sunrise Point along the Queens Garden Trail

A few notes on backpacking the Riggs Spring Loop: 1) backcountry permits are required and can be purchased at the Visitor Center for $5 per person, 2) backcountry camping is only permitted at designated campsites, of which there are four along the Riggs Spring Loop, 3) reservations may only be made at the Visitor Center, and only up to 48 hours in advance.

Bryce Canyon Thor's Hammer

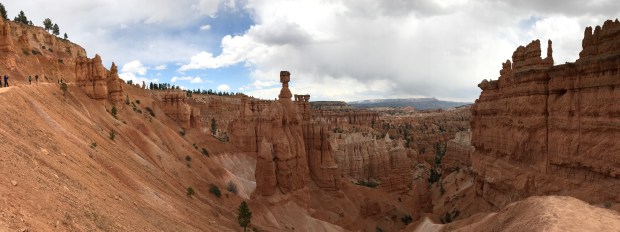
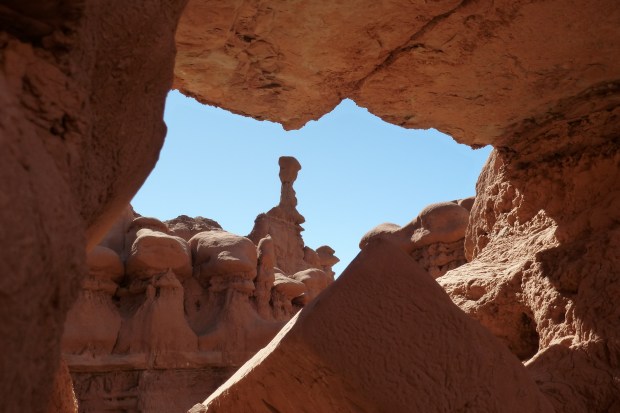
Taken near Sunset Point. The large hoodoo in the center of the photo is appropriately named, “Thor’s Hammer”

We arrived to Bryce Canyon National Park and the Visitor Center just before noon on a Saturday in the spring and had no problem securing one of the campsites along Riggs Spring Loop for that night.

Bryce Canyon

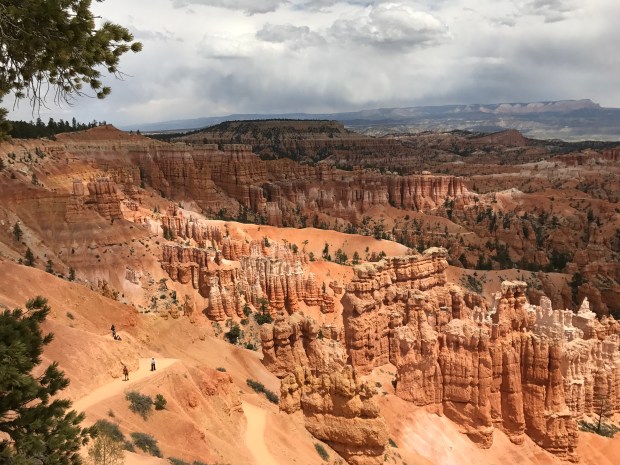
Taken from the Rim Trail, close to Sunset Point. Afternoon showers are common

With a few hours to “burn” before starting our overnighter we hit as many of the viewpoints as we could on our way to Rainbow Point. Each observation point is slightly different, and all are well worth the stop.

Bryce Canyon Piracy Point

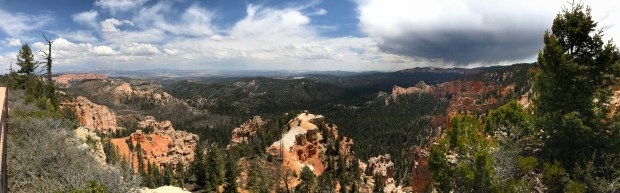
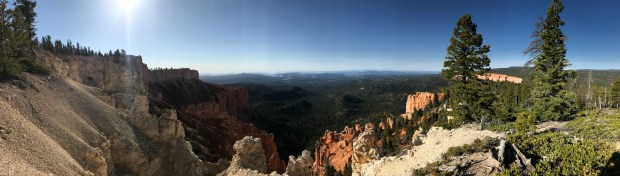
Taken from Piracy Point, with a view of Grand Staircase – Escalante National Monument to the East

To visitors who only have a couple of hours to explore Bryce Canyon, I would recommend the four viewpoints closest to the Visitor Center: Sunrise Point, Sunset Point, Inspiration Point, and Bryce Point. I would also recommend the 1.8 mile hike along the Queens Garden Trail.

Bryce Canyon Rainbow Point

Looking North from Rainbow Point

At around 3:30 pm, and after seeing both Rainbow and Yovimpa Points, we took off along the Riggs Spring Loop Trail heading east, clockwise around the Loop.

Riggs Spring Loop Bryce Canyon

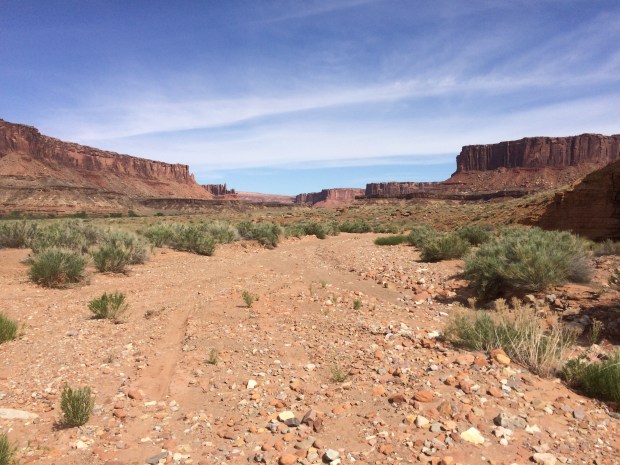
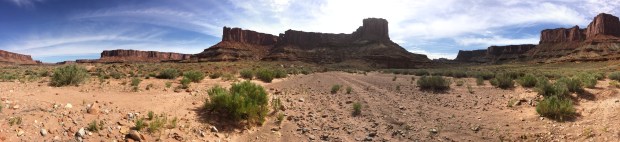
Taken from Riggs Spring Loop Trail

The hike from Rainbow Point to Riggs Spring Campsite (where we spent the night) is 5.3 miles and is all downhill. Rainbow Point is the highest point in Bryce Canyon at 9,115 feet, while Riggs Spring Campsite sits at only 7,514 feet. In this situation, what goes down must come up, and 1,600 feet of elevation gain is significant over the remaining 3.3 miles of the hike while carrying a backpack.

Riggs Spring Loop Bryce Canyon

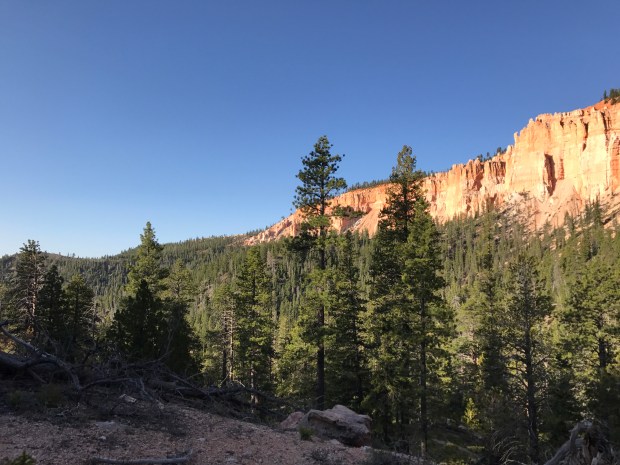
A view of Yovimpa Point from below

Corral Hollow Campsite Bryce Canyon

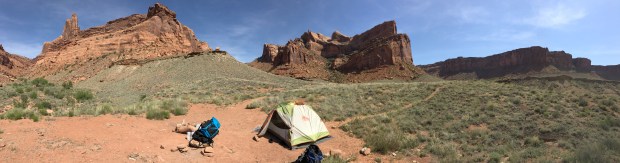
View from the Corral Hollow campsite along the Riggs Spring Loop Trail

We got to our campsite at about 6 pm (it’s typical to plan 2 miles per hour when backpacking), set up camp, ate our meager backpacking meals, and watched as the beautiful night sky crept over us.

Riggs Spring Loop Bryce Canyon

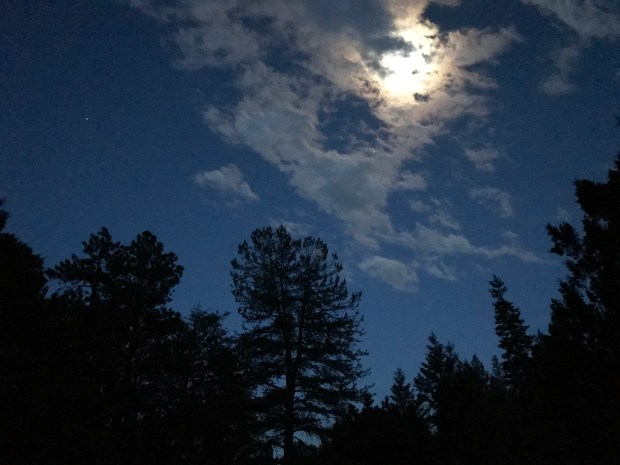
The night sky as seen from our campsite

Riggs Spring Loop Bryce Canyon

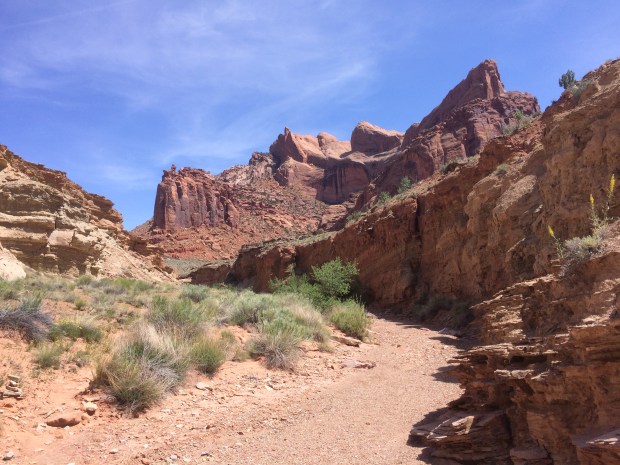
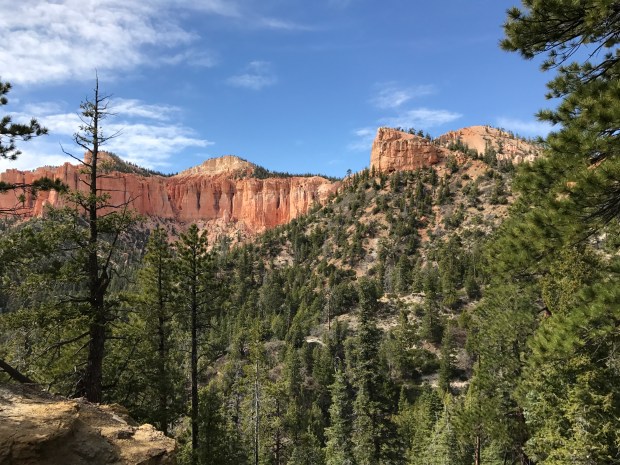
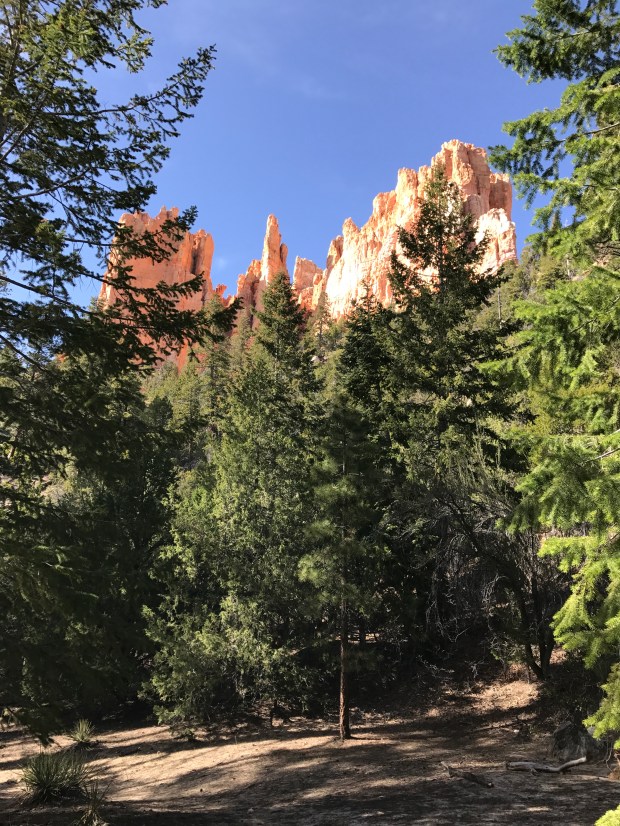
Surrounding cliffs on the climb to Yovimpa Pass from Riggs Spring campsite

After a typical night’s rest when camping (my small air mattress deflated on me several times throughout the night), we broke camp bright and early. We were out by 7:30 am, and made our way up Yovimpa Pass and back to Rainbow Point by 9 am.

Riggs Spring Loop Bryce Canyon

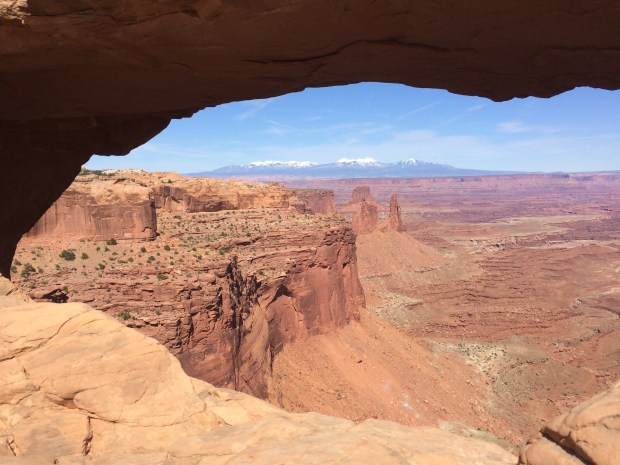
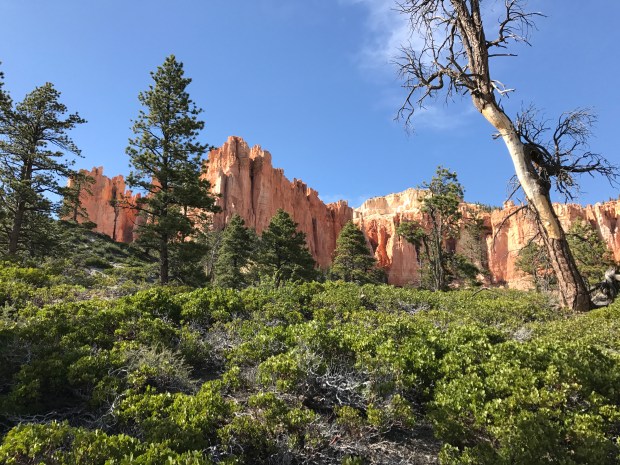
The view, looking South, between Yovimpa Pass and Rainbow Point

Once at Rainbow Point we got in our car and decided to stop at the remaining viewpoints we had yet to see. Several viewpoints and hundreds of photos later, we left Bryce Canyon National Park well before noon and headed home.

Bryce Canyon

Taken near Bryce Point

Bryce Canyon National Park features a great deal of amenities including two campgrounds, a lodge with 114 rooms (lodge suites, motel rooms, and cabins), showers, laundry, a restaurant, and a general store. Just outside of the park are several motels, gas stations, etc. There is also a $30 entrance fee per vehicle to enter the park.

Hoodoos in Bryce Canyon

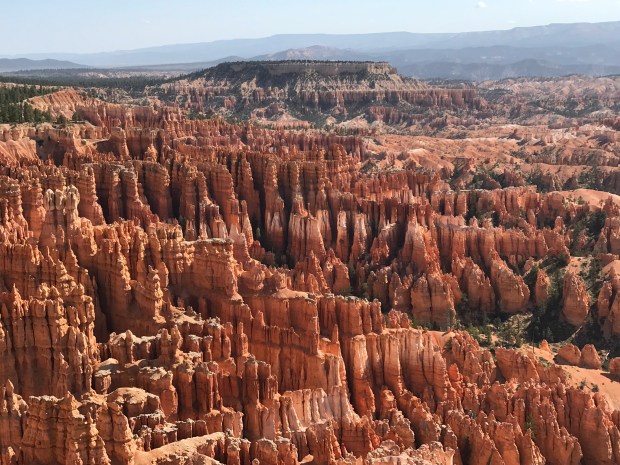
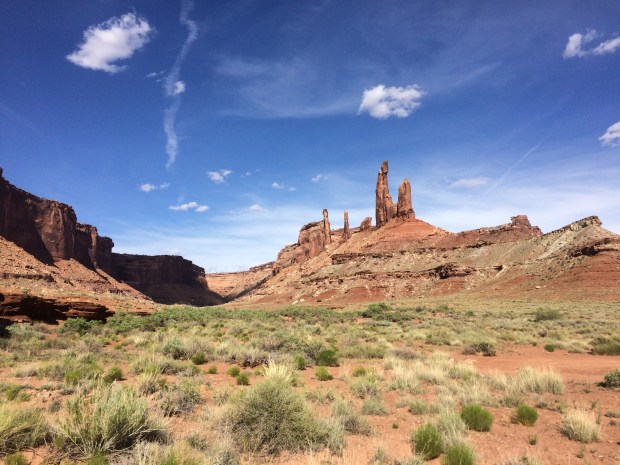
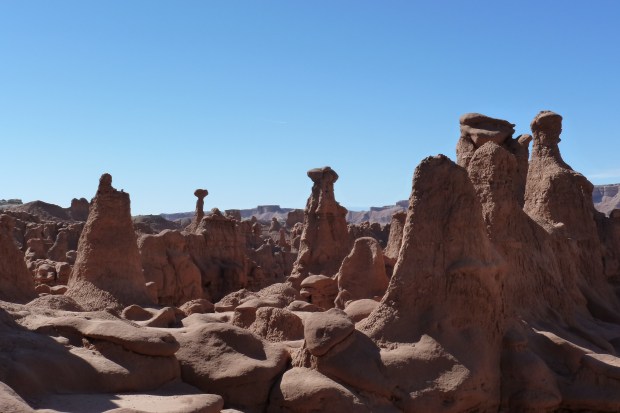
Bryce Canyon is famous for having one of the highest concentrations of hoodoos on Earth

Bryce Canyon is open year round. We visited in the spring and there were still trace amounts of snow on the ground. Other than that, the temperature was quite comfortable, although it does get cold at night.

Bryce Canyon

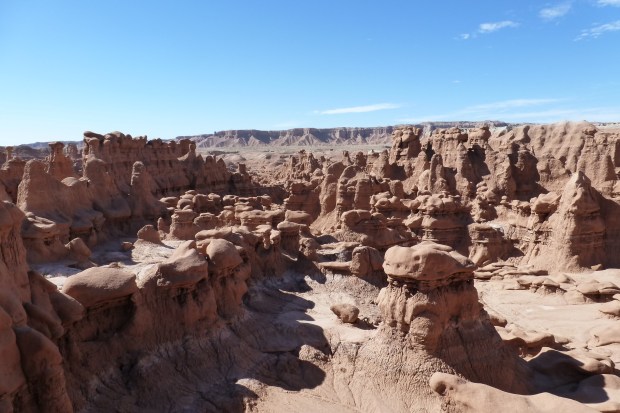
Another view of Bryce Canyon taken from near Bryce Point

For information regarding Bryce Canyon National Park, including camping, hiking, weather, permits, etc., please visit the National Parks website.

Grand Canyon Toroweap

Toroweap, the Lesser Known Observation Point at Grand Canyon National Park

Boasting close to six million visitors, Grand Canyon National Park was the second most visited National Park in 2016. In fact, the Grand Canyon has been the second most visited National Park since 1990, with numbers ranging from 4 to 5 million visitors per year. And why wouldn’t people want to see the Grand Canyon? With stunning views and breath taking heights, the canyon is a marvel to behold! However, for those of us who like to enjoy nature’s splendors in relative peace and calm, making the more traditional visit to the North or South Rim of the Grand Canyon can be slightly dissatisfying. Dealing with busloads of people at every observation point, fighting the hoards for the perfect photo op; somewhere along the line the spiritual experience that comes with beholding something truly magnificent is tainted.

Toroweap Grand Canyon

Looking East from Toroweap Overlook on the North Rim of the Grand Canyon

There is one observation point along the North Rim of the Grand Canyon that is still widely undiscovered, a place where visitors can enjoy the Grand Canyon in complete solitude, Toroweap, also known as Tuweep.

Toroweap Grand Canyon

You don’t want to fall from there! The Colorado River lies 3,000 ft below

The names Toroweap and Tuweep are used interchangeably when referring to the area. “Tuweep” is the Paiute word for “the earth” and is used to refer to the general area. “Toroweap” is the Paiute word for “dry or barren valley” and refers specifically to the valley and the overlook.

Tuweep Grand Canyon

At the entrance to the Grand Canyon National Park

In 1870, John Wesley Powell was led to Tuweep by a Paiute guide. He spent time mapping out the area and naming many of the prominent features.

Toroweap Grand Canyon

With my mom, Robyn, and my Grandma, Donna. We visited in the Spring and had beautiful weather.

Despite not being very far from civilization as the crow flies, Toroweap is a very remote area, with no amenities, so visitors need to be prepared with whatever they need for the excursion, water, food, gas for their vehicles, etc.

Toroweap Grand Canyon

Looking West from Toroweap Overlook

From St. George, Toroweap is roughly an 80 mile drive on unpaved roads. Taking the final Utah I-15 exit before entering Arizona, head South on County Hwy 5. The paved road becomes a dirt road the moment you cross into Arizona. Follow County Hwy 5 South to the old Mt. Trumbull Schoolhouse. Originally built in 1918, Mt. Trumbull Schoolhouse is a fun stop along the way to Toroweap. From the Schoolhouse, head East on County Hwy 5. You will be driving over Mt. Trumbull. Continue to follow the road as it turns South and into Grand Canyon National Park. Total driving time from St. George to Toroweap is between 3 and 3 ½ hours.

Note that the last 3 miles before arriving to the observation point are very rough. There is parking available at this point for vehicles with low clearance. Only vehicles with high clearance are suited to continue.

Toroweap Grand Canyon

Taken from the 4-wheel drive section of the trip. Toroweap, dry or barren valley, was certainly named appropriately.

There is no entrance fee to enter the National Park at Toroweap. Near the overlook, there are several hikes to explore. There is also a campground with several available campsites, however, backcountry permits are required for camping and there is a small fee to spend the night. As I previously mentioned, there are no amenities. Be sure to bring sufficient water, food, clothing, gas for your vehicle, etc. Also be sure that your vehicle is in good condition, that you have a quality spare tire, and that you are ready to change a flat tire if needs be.

Toroweap Grand Canyon

Nothing more fun than exploring nature’s beauty!)

For information regarding current conditions at Toroweap, hiking and camping in the area, etc. the National Parks website is very helpful.

Black Canyon of the Gunnison National Park

Descending into Black Canyon of the Gunnison

In his book, Images of America: The Black Canyon of the Gunnison, Duane Vandenbusche put it best by saying, “Several canyons of the American West are longer and some are deeper, but none combines the depth, sheerness, narrowness, darkness, and dread of the Black Canyon.” With depths ranging anywhere from 1,800 to 2,722 feet (at Warner Point) and a width of only 40 feet at its narrowest point along the river, Black Canyon of the Gunnison owes its name to the fact that some places along the canyon only receive 30 minutes of sunshine each day. Black Canyon of the Gunnison was made an official National Park in 1999 so that visitors could enjoy the spectacular views, the daring climbs, the breathtaking (literally) hikes, and the Class V rapids that the canyon offers. The National Park encompasses 14 miles of the 48 mile canyon.

Black Canyon, Sunset View

A view of the Black Canyon, looking North West, taken from Sunset View

In our recent adventure to the Black Canyon of the Gunnison National Park, my father and I somewhat tiptoed the line between bold adventurer and casual sightseer. We decided to descend into the canyon following the Gunnison Route, which is the most popular, and supposedly the “easiest” route to the bottom.

Black Canyon, South Rim Visitor Center

Black Canyon of the Gunnison as seen from the South Rim Visitor Center

Permits for the descent to the river are required and are issued (free), on a first-come first-serve basis from the visitor center. To that end, we arrived at the South Rim Visitor Center when it opened (8 am), applied for our permits, and got an early start to, what we figured to be a physically exhausting day.

Gunnison Route, Black Canyon

Taken along the descent into the Black Canyon

The Gunnison Route begins at the South Rim Visitor Center and initially follows the Oak Flat Trail for 1/3 miles until you reach a sign, “River Access. Permit Required.”

Gunnison Route, Black Canyon

The Gunnison Route follows the drainage seen on the far right side of the photo

At that point the true descent begins. The descent is steep, but very doable, we just made sure to take it slowly, and followed a drainage nearly the entire way to the river.

Descent into Black Canyon

My father, Paul, using the chain to help with the descent

About 1/3 of the way down, there is an 80 foot length of chain to hold onto. Although the chain isn’t necessary to use, we found it helpful for extra balance.

Black Canyon chain descent

I too, found the chain to be helpful

As we descended closer to the river, the temperature began warming up and it seemed as though we were entering a lush paradise, complete with thick foliage and stunning views of the rushing river and towering cliffs.

Black Canyon

Our view as we neared the bottom of the canyon

Along the river there are several backcountry campsites available. Although we had originally thought about camping in the canyon we decided to camp at the South Rim Campground and descend into the Black Canyon as a day hike.

Gunnison river in Black Canyon

Taken near the campsites along the river

Total, the hike took us about an hour and a half each way. Remember that the descent into, and the ascent out of the canyon is about 1800 foot change in altitude, so be prepared with good hiking shoes, water, snacks, knee braces, ankle supports, etc. We also found it extremely helpful to use gloves while descending/ascending the portion of the trail that has chain.

Gunnison River in the Black Canyon

My dad and I near the campsites. Happy to have successfully descended into the Black Canyon, but nervously awaiting the ascent.)

The South Rim of the Black Canyon of the Gunnison National Park is roughly 15 miles from Montrose and 64 miles from Gunnison. To get there from Montrose take Colorado State Highway 50 (Main St. in Montrose) heading East. After about 7 miles you’ll exit onto Highway 347 heading North East. Follow the highway for about 7 miles into the National Park.

Black Canyon of the Gunnison National Park

One more view of the paradisiacal setting along the Gunnison River in the Black Canyon

There are several campgrounds with access to water and electricity within the National Park. For more information regarding amenities, weather conditions, visitor center information, trail conditions, etc. please see the National Park website.

Black Canyon descent

A view the Black Canyon, not far from the South Rim Visitor Center


Syncline Trail Campsite Canyonlands

Backpacking Upheaval Dome in Canyonlands National Park, Utah

At over 500 square miles, Canyonlands National Park, in southeast Utah, covers a vast area and offers visitors a wide array of activities, including hiking, backpacking, off-roading, mountain biking, kayaking, rafting, etc.

Mesa Arch Canyonlands

A view of La Sal Mountains from Mesa Arch

On our most recent adventure to Canyonlands, my father, Paul Terry, and I chose to explore the Upheaval Dome area in the northwest corner of the National Park, also known as the Island in the Sky District.

Upheaval Dome Canyonlands

At the entrance of the Upheaval Dome crater

Of the many incredible sights in Canyonlands, Upheaval Dome is one of the most intriguing. Upheaval Dome is a massive (three miles in diameter) almost-perfectly circular crater cut deep into the many rock layers. In the center of the crater there are enormous rocks and many layers of sediments pushed vertically upward forming a dome. While no one actually knows the origin of Upheaval Dome, there are two main theories of the formation, the Salt Dome Theory, and the Impact Crater Theory. You can read more information about these two theories on the park brochure.

Syncline Loop Trail Canyonlands

Descending from the high plateau into the canyon along the Syncline Loop Trail

Our backpacking adventure consisted of an 18 mile loop starting at the Upheaval Dome Trailhead and finishing at the Alpine Spring Trailhead, where my dad had parked the car (it is about a 0.5 mile walk between the two trailheads). We took three days and two nights to complete the loop, although we met a few people along the way who did the same loop in only two days.

Upheaval Dome Canyonlands

Paul, with a view of Upheaval Dome, taken from inside the crater

We took off around midday on the first day from the Upheaval Dome trailhead and worked our way along the southern portion of the Syncline Trail. The trail down into the canyon is steep, dropping roughly 1300 feet into the canyon, but well-marked with cairns, and very doable (just take your time). We set up camp for the night at the Syncline Campsite (see featured image), at the entrance to the Upheaval Dome, and spent a couple hours that same afternoon exploring the crater.

Upheaval Canyon Canyonlands

Looking westward from inside Upheaval Canyon

The next morning we packed up and headed down Upheaval Canyon, west to the Green River. The Green River is approximately a 3.5 mile hike from the Syncline Trail. From there we followed the White Rim Road north for about a half of a mile looking for a good place to fill up on water. The river is very muddy, and even after finding a spot where the water flowed very slowly, our water pump got clogged after only pumping out about a gallon of clean water. Not knowing how much water we would need for the rest of the journey, we collected another gallon of river water, for cleaning up, cooking, and boiling it to drink if it came down to it.

Panorama Upheaval Canyon Canyonlands

Taken from near the Green River, the Canyon to the right being Upheaval Canyon

Green River White Rim Road

Taken along the White Rim Road, the Green River flowing in the background

After collecting our water, we headed east from the White Rim Road into Taylor Canyon for another five miles, passing the picturesque Moses and Zeus pinnacles.

Moses and Zeus Taylor Canyon

Taylor Canyon with a view of Moses and Zeus in the background)

After a short rest in the shade of the Taylor Campsite outhouse, we cut off to the southeast following the Alcove Spring Trail for about a half of a mile until we found a suitable spot to set up camp. As long as you are out of the sight of the campers at the Taylor Campground, and 100 feet off of the main trail, you are free to set up camp anywhere in Taylor Canyon.

Moses and Zeus Canyonlands

The stunning Moses and Zeus spires

On the morning of the third day we broke camp early knowing that we had a long ascent in front of us. Total, it was about a five mile hike from our campsite to the Alcove Spring Trailhead, however that included a 1300 foot ascent to get out of the canyon. Unfortunately, most of that elevation is gained over the last quarter to half of a mile. Once again, we just took our time, took plenty of rests, and by midday we were able to reach the trailhead.

Alcove Spring Trail Canyonlands

Our campsite along the Alcove Spring Trail, with a view of Moses and Zeus in the background

We finally reached the car – thirsty, sunburned, sore, tired, and with hundreds of bug bites – but we had an amazing time. The scenery in Canyonlands is absolutely stunning. Walking through the desert canyons, seeing the incredible rock formations makes you feel as though you are a part of some old Western movie.

Alcove Spring Trail Canyonlands

Ascending Alcove Spring Trail

On a practical side, water is a must! We each brought a gallon and a half of water, hoping to be able to replenish our supply at the Green River. Always plan to have extra water, sometimes we forget that in addition to drinking it, water is very useful for cleaning up, for cooking, etc. While water can be pumped out of the river, make sure that you bring a pump with a filter that can be cleaned out easily, on the spot, or bring some other filtration system that can better handle the thick mud and silt in the river. There is some accessible water, that has seeped up from the ground, along the Syncline Trail. Once again, you are going to want to have some sort of filtration device to drink that water. Also make sure to pack plenty of energy replenishing foods, sunscreen, bug repellent, etc.

Alcove Spring Trail Canyonlands

A view from the plateau near the Alcove Spring Trailhead

We visited Canyonlands during Spring and had beautiful weather (temperatures in the mid 70’s during the day and reasonably warm at night), and I would highly recommend to others to visit either in the Spring or in the Fall as Summer temperatures can get extremely hot.

Taylor Canyon Canyonlands

Cooling off in the shade in Taylor Canyon, a half-gallon of river water in tote

Canyonlands is located in southeastern Utah, and is only about 30 miles southwest of Moab. For other information on Canyonlands, including campground information, refer to the National Parks website.

Exploring Goblin Valley State Park, Utah

Although Goblin Valley State Park is often overlooked by tourists who head to the more well-known national parks of south-east Utah, Goblin Valley is a beautiful park which offers a wide array of attractions for the casual visitor as well as the rugged explorer.

Hoodoos Goblin Valley

From Valley 2 looking westward

Hoodoo Goblin Valley

One of thousands of Hoodoos in the valley

In addition to many marked hikes throughout the park, visitors are permitted, and even encouraged, to freely wander and explore the more than three square miles that make up the Valley of Goblins.

Goblin Valley State Park

Within Valley 3 facing to the West

Goblin Valley

A small, picturesque opening in Valley 3

Goblin Valley State Park consists of thousands of hoodoos (mushroom-shaped rock spires) more affectionately known as “Goblins”, giving the park its name.

Molly's Castle Goblin Valley

Hundreds of hoodoos defending Molly’s Castle

Hoodoo Goblin Valley

A view of the “goblins” in Valley 3

The area was first discovered by cowboys, in the 1920’s, who were searching for their cattle and noticed the strange rock formations from an overlook. Others began exploring and photographing the area; and in August of 1964, the area was officially designated as a state park.

Goblin Valley Overlook

Valley 3 in Goblin Valley State Park

Depending on the time constraints, visitors can comfortably explore the park in a few hours. If more time is available, patrons could spend an active couple of days discovering Goblin Valley as well as the surrounding area.

Goblin Valley

Another view of Valley 3

Goblin Valley is about an hour drive southwest of Green River, Utah. From Green River you’ll take I-70 heading west until you reach Hwy 24 (roughly 13 miles). Then take Hwy 24 south (heading towards Capitol Reef National Park) until you reach Goblin Valley Cutoff Rd. Take Goblin Valley Cutoff Rd. west and follow signs to the visitor’s center.

Wild Horse Butte

A view of Wild Horse Butte from the Valley of Goblins

There are few amenities in the park so make sure you bring plenty of food and water. For those wanting to spend the night, there is a campground available with running water. For more information of Goblin Valley State Park visit the state park website and check out the park brochure.

Five Must-See Arches in Arches National Park, Utah

Located in south-east Utah, Arches National Park was designated as a National Monument in 1929 (later designated as a National Park in 1971) to protect and showcase over 2,000 natural arches along with countless other interesting rock formations. Even with so much to see, visitors can get a great feel for the park and see a good portion of the arches and natural formations during a 24-hour visit. Highlighted in this post are my top 5 recommended arches (including an honorary 6th) for all Arches National Park patrons, and especially those with a time constraint. All of the arches below are accessible via well-marked trails and none are more than 3 miles round trip.

Delicate Arch

This is the most well-known arch in the world, and the design for the Utah auto license plate—do I need to give any other reasons?

Delicate Arch

A view of Delicate Arch from Frame Arch

Located on the eastern side of the park, the trailhead for Delicate Arch is a 13 mile drive north from the visitor’s center. From the trailhead, the hike to Delicate Arch is 3 miles, round trip, with a steady moderate incline going out to the arch. I would highly recommend visiting at sunrise or sunset.

Delicate Arch

Delicate Arch at sunset with the La Sal mountain range in the background

Double Arch

Most famous from a brief appearance in the movie Indiana Jones and the Last Crusade, Double Arch is unique in that two massive arches protrude from the same sandstone façade.

Double Arch

Double Arch

Double Arch is only a short walk (0.5 miles round trip) from the parking lot and is in close proximity to many other sites including North and South Windows, and the Turret Arch.

Balanced Rock

A view of another formation, Balanced Rock, from underneath Double Arch

Landscape Arch

Landscape Arch is the longest arch in Arches National Park, and at 290 feet wide at the base, it is considered to be the 5th longest natural arch in the world. Landscape Arch is located along the Devil’s Garden Trail (northern-most part of the park) and is approximately a 1.3 mile hike from the trailhead.

Landscape Arch

Landscape Arch

Navajo Arch

Not far from Landscape Arch, Navajo Arch is tucked away among sandstone rock faces. The arch itself acts as an entryway into a protected cove that gives the feeling of security and solitude. Navajo Arch likewise sits along the Devil’s Garden Trail, less than 0.5 miles beyond Landscape Arch.

Navajo Arch

Navajo Arch, from the protected cove, facing westward

Double O Arch

Double O Arch (not to be confused with Double Arch) is a set of two arches cut out of the same sandstone façade.

Double O Arch

Double O Arch taken from the East side of the arches

Not only is Double O Arch a spectacular sight, but the hike to Double O Arch gives an incredible view of the surrounding landscape and northern section of the park. Double O Arch is also located on the Devil’s Garden Trail, roughly an additional 0.5 miles beyond Navajo Arch.

Double O Arch

Double O Arch as seen from the West side

Corona Arch

While not located in the National Park, Corona Arch is well worth the visit for anyone spending time in the town of Moab and Arches National Park.

Corona Arch

Corona Arch

Until a couple of years ago, Corona Arch was a popular spot for extreme sports enthusiasts who set up a rope swing from the top of the arch (See YouTube videos). BLM has since banned such activities at the arch. The trailhead for Corona Arch is located south of Arches National Park (take Potash Road from Highway 191 for 10 miles) along Potash Road. The trail itself is 3 miles round trip and is very well marked.

Corona Arch

Another view of Corona Arch

For more information on Arches and other National Parks in southern Utah click here.