U.S.A.

Hidden Gems: Lakes and Waterfalls in Colorado Worth the Hike

Colorado is a western US state. The second name of Colorado is the Centennial State. The capital of Colorado is Denver. Colorado’s capital is known as the Mile High City due to its elevation at 5,280 feet above sea level. Colorado is famous for its Rocky Mountain outdoor adventures and stunning landscapes. It is also known for its picturesque valleys and vibrant cities. For adventure and nature lovers, Colorado is a heaven because it offers many activities like hiking, skiing, rafting, and camping. From native American heritage to ghost towns and cattlemen’s culture, Colorado is full of history.

Hidden Gems of Colorado

Colorado is a place full of hidden gems. All the hidden gems of the state reveal beauty. It is also famous for ski resorts and National Parks. Colorado is also renowned for its theatrical views and endless outdoor amazements. The sunrise with golden rays in the blue sky looks so mesmerising in the Colorado Rocky Mountains. Rocky Mountain National Park, Garden of the Gods, Maroon Bells, Mesa Verde National Park, Great Sand Dunes National Park, Colorado National Monument, and Hanging Lake are some of the beautiful spots in Colorado. Colorado’s natural beauty is a blend of variety, adventure, and harmony. Each season makes Colorado a magical place. The stunning lakes and must-see waterfalls of Colorado are famous in the world. All the lakes and waterfalls of Colorado make it special among visitors.

Maroon Lake

From Aspen, Maroon Lake is 10 miles away. It is one of the most legendary and photographed places in Colorado. The beauty of Maroon Bells area changes in every season. Maroon Lake is an ideal place for hikers. The Maroon Lake trail provides scenic views or an easy walk. Maroon Lake is a bell-shaped, wine-coloured lake, taken from the reddish-maroon color of the peaks behind it, called the Maroon Bells. Hiking in the Maroon Bells area gives you access to mesmerising views and 14,000 foot peaks.

Crater Lake

Also near Aspen, Crater Lake is a hidden gem. For hiking, photography, and picnicking, this space is famous among visitors. The lake is not very deep and is smaller in size. It is surrounded by amazing natural beauty, and you can also see the tall Maroon Bells from the crater lake. From Maroon Lake, you can reach it after hiking about 3.6 miles in summer, where you can experience the flowers. The golden aspen trees make it more beautiful in the fall; it looks like a postcard from right above Maroon Lake. Hiking the path shows you beautiful aspen trees and mountain views. 

Blue Lakes

One of the most breathtaking places in the Alpine treasures is the Blue Lakes. It is known as Blue Lakes because of its turquoise waters and stunning mountain backdrops. For hiking, hikers cover 8 miles round-trip to reach the path, which is considered challenging. The lower, middle, and upper are the three lakes in the Blue Lakes chain. Lower Lake is the largest one, and it is easier to reach. It is filled with turquoise water. Upper and Middle lakes are smaller in size, but closer to the 14,150 ft. peak of Mount Sneffels. The best time to visit the Blue Lakes is in late June to September. During this time, the trail is clear of snow. For hiking, fishing, and camping, this place is famous among travellers.

Helen Hunt Falls

Near Colorado Springs, Helen Hunt Falls is located in North Cheyenne Cañon Park. This fall is very accessible to visitors. By car, you can easily reach the base of the waterfall. For families and casual travellers, it is a popular stop. A short trail leads you to the top of the Falls, which offers you stunning views of the surrounding canyon. In late spring and early summer, this area is most beautiful. Autumn also brings vibrant colours that make the waterfall perfect. Helen Hunt Falls is a must-see falls in Colorado.

Seven Falls

The most famous falls in Colorado are Seven Falls, near Colorado Springs. Water flows down from the seven different spots, which is why it is known as the seven falls. This series of falls is about 181 feet tall. To see it from above, travellers climb the 224-step staircase. There are trails for hiking with views of rock cliffs and forest near the falls. You can also experience wildlife like deer and birds near the Fall.

Zapata Falls

Near the Great Sand Dunes National Park, Zapata Falls is a hidden waterfall. Inside a small rocky canyon, it falls from 30 feet. To experience this fall, visitors hike a short half-mile trail. It is a part of the fun and adventure reaching the Zapata Falls. The water freezes into stunning blue and white ice in the winter.

Conclusion

Colorado is a place where dreamy vibes and the ancient charm of the city truly captivate your heart. Colorado’s lakes and waterfalls are beautiful treasures in the state. The Peaceful, emerald green water of Alpine lakes and the turquoise water of Crater Lake are must-see wonders. Travellers enjoy hiking through the forest for breathtaking views as they climb the mountains. For peace, enjoy the sound of the water. If you are planning a trip, then you must consider Colorado as part of your itinerary.

Featured image courtesy of pixabay.com.


10 Travel Mistakes I’ll Never Make Again in the USA

The USA is known for its varying experiences and landscapes that are truly magical. From road trips to beach destinations, you get it all in the USA. However, some travel mistakes can hinder your chances of enjoying your trip to the USA to the fullest. I have learned from my mistakes and now want to share with you the travel mistakes I’ll never make again in the USA so that you can have the most unforgettable time. 

Travelling across the USA is truly a rewarding experience. But travelling to new destinations comes with its complications. We all make mistakes that cause us many inconveniences while travelling. But you can surely avoid many of them with the help of this post. So, if you have booked a flight to USA from the UK, keep reading to learn about the mistakes that you should avoid while exploring the country. 

10 Travel Mistakes to Avoid While Exploring the USA

Here is a list of some of the travel mistakes to avoid while travelling in the USA. 

1. Underestimating Travel Distances 

Even though we all know how big the U.S. is, we sometimes underestimate the distance between two cities or states. Once you start exploring these destinations, you will realise that they are farther apart than you might think. I thought that I could travel from New York City to Miami in one weekend. I didn’t realise it was a 19-hour road trip, and that was just one way! You might be surprised to learn about the vastness of the US, and the distances between major cities are truly bewildering. So, make sure to check the maps and review the flight routes before making your plan. 

2. Ignoring Regional Weather Patterns

Due to its vast size, the USA’s weather varies significantly from state to state and even from city to city. You don’t want to be like me, who visited San Francisco in the summer and didn’t carry any layers, thinking it would be hot. You will not believe me when I say that even the summer mornings in the region were so chilly and foggy that I regretted not carrying my layers with me. Additionally, even within the same season, weather conditions vary from state to state. So, keep an eye on the weather forecasts. 

3. Skipping Travel Insurance

You cannot avoid inconveniences while travelling. There is always a possibility that your bags will get lost or your rental car will break down on the road. We might think that we don’t need travel insurance — what could possibly go wrong? But we are mistaken. These kinds of issues can lead to significant financial losses in the long run. Therefore, make sure to obtain reliable travel insurance before travelling to the USA. 

4. Not Factoring in Sales Tax and Tips

You might not know this, like I didn’t, that the prices in U.S. stores and restaurants usually do not include taxes. This can disturb your budget. Another essential thing to keep in mind is that tipping is not really optional. Most waiters and restaurant workers rely on tips as their primary source of income. People in the U.S. tend to tip a significant amount. So, be sure to include the tax and tip costs in your budget. 

5. Trying to See Too Much in One Trip

As you may already be aware, exploring the entire country in one trip is nearly impossible. No doubt, we all try to create comprehensive, jam-packed itineraries that visit multiple cities in a single trip. You might do it, but you won’t have any time to enjoy the places you see, and it will also exhaust you. So, try to slow down when you visit the country. 

6. Driving Without Understanding the Rules

There is nothing too tricky about driving in the USA. However, it is essential to be aware of the local rules. There can be some unusual parking signs or stops that might not be known in your home country. The driving rules vary from state to state. So, learn the driving rules before travelling to the USA. 

7. Overlooking National Park Reservations

If you plan to visit the famous national parks of the USA, you cannot overlook making reservations, especially during the peak season. Learn from my mistake, who went to Yosemite National Park during the summer season and was turned away at the gate. Therefore, be sure to add the official NPS website to your planning for a national park trip. 

8. Booking Cheap Accommodations in the Wrong Neighbourhood

It is not always safe and convenient to book accommodations in random, suspicious neighbourhoods just because they are cheap. You shouldn’t compromise on your safety to save some money. Additionally, some of these neighbourhoods may have limited transportation options. So, make sure to look for safe neighbourhoods and hotels with good reviews.

9. Assuming Public Transport is Always Available

Those who travel to Asia and Europe frequently might think that the USA has a similar public transport system, as it is well-developed and has excellent infrastructure. However, this is not the case. Therefore, ensure that you research the transportation options available in the cities you plan to visit. 

10. Not Carrying Physical ID

To purchase alcoholic beverages you will need to show your physical ID, passport, or driver’s license at most restaurants and bars in the USA. If it is pretty clear that you are above 21, they will still ask for your ID and have strict rules. So, make sure to carry your physical ID with you at all times. 

Final Words

There is no denying that travelling to the USA is worth every mile, second and penny. The experience is unmatched, whether you plan to explore coastal areas, natural wonders, take glorious road trips, visit world-famous national parks, or experience the most iconic cities. Learning about the mistakes to avoid during this journey will make your trip to the USA much easier. But before that, book your flight to the USA. You can fly from the UK to the USA through British Airways, Aer Lingus, United Airlines, Air Canada, and numerous other airlines. 

Guest post by Elsie. Elsie is a passionate travel blogger who explores the world one city at a time. Through her stories and tips, she shares hidden gems, cultural insights, and travel inspiration to help others make the most of every journey. Follow her adventures and get inspired to explore beyond the map. She can be reached at elsieblogger5@gmail.com.

Image courtesy one of several sources, including pixabay.com, freepik.com and istockphoto.com

10 Family-Friendly U.S. Destinations That Actually Live Up to the Hype

Choosing the perfect destination for a family holiday is not an easy task. Although the USA promises incredible family-friendly destinations, not all of them live up to their hype. Family holidays are not just about sightseeing. You will want to look for memorable experiences for all the family members, and that is undoubtedly not easy. But don’t stress out, we are here to tell you about some of the family-friendly U.S. destinations that actually live up to the hype and give you unforgettable memories with your family. 

After reading this post, you will likely have a better idea of some of the best family-friendly destinations. We have done our research to bring you an incredible list of some of the best destinations for a family holiday in the U.S. this holiday season. So, let’s not waste any time and help you decide your next family holiday destination. 

1. Orlando, Florida

Orlando, Florida, is likely one of the most popular family holiday destinations in the country. As the theme park capital of the world, this vibrant city attracts numerous families and offers an array of activities for people of all ages. It won’t be wrong to say that this city is the gold standard of family fun. This city is ground zero to some of the most iconic theme parks and themed hotels. Also, the shopping scene here is incredible. It is truly packed with all the family fun that you might be looking for in your family holidays in the U.S. 

2. Miami, Florida


Here is another Florida destination that is among the family-friendly destinations that actually live up to the hype. We are all familiar with Miami’s electric nightlife scenes and beach parties. But there is another separate side that is truly family-friendly. There are numerous parks, kid-friendly beaches, and many other attractions to explore. So, if this is what you want, it’s time to book your holidays in Miami from the UK and start preparing for the most incredible family holidays. 

3. San Diego, California


If beaches, sun, and the perfect weather are what your family is looking for in their holidays, San Diego is truly the most incredible option. Everyone loves the family-friendly beaches and the laid-back vibes of the region, along with endless activities that will make your family holiday worthwhile. In addition to the glorious beaches, you get numerous other attractions like the San Diego Zoo, the USS Midway Museum, Balboa Park, and many others that you must explore with your family. 

4. Yellowstone National Park, Wyoming/Montana/Idaho

Yellowstone National Park is quite a popular destination among families for all the right reasons. You will be glad to know that it surely justifies its hype. The natural beauty, diverse wildlife, and a wide range of activities make it perfect to spend some unforgettable time with your family. There are only a few destinations like this one that seamlessly blend education, adventure, and relaxation in a natural setting. You and the kids will surely fall in love with the pure nature here that gives you time to bond and have a screen detox. 

5. New York City, New York


You can never go wrong with planning a trip to New York City with your family. There are magical parks and Broadway shows in the city that your family will enjoy. Also, the bustling city charm of this incredible world-famous destination makes everyone fall in love with it. There are also numerous museums and iconic landmarks to explore while in the city. Every year, many people plan holidays in New York from the UK to experience its charm. 

6. Myrtle Beach, South Carolina

There is no denying that Myrtle Beach is ideally suited for family holidays. You get the perfect beaches here, along with amusement rides that add to the whole experience. Another great thing about this destination is that the beachfront boardwalk is lined with ice cream shops, arcades, and mini golf courses. Additionally, you can easily find affordable accommodation here, which also attracts many families. 

7. Williamsburg, Virginia


Williamsburg is another incredible US destination that lives up to the hype. This is the place where history combines with hands-on fun to create an unforgettable experience for your family. Don’t miss out on visiting Colonial Williamsburg, where kids can dress up, try colonial crafts, and interact with the actors. There are also numerous modern entertainment opportunities here that you won’t want to miss.

8. Chicago, Illinois


If you’re looking for urban fun in the USA, Chicago won’t disappoint. This beautiful city is full of family-friendly attractions and scenic boat rides that will give you some unforgettable time with your family. Get ready to explore the famous attractions like Navy Pier, the Field Museum, and the Shedd Aquarium. Also, treat yourself and your family to some of the delicious deep-dish pizza while you’re in Chicago. 

9. Lake Tahoe, California/Nevada


Families looking forward to spending time in glorious nature and indulging in adventurous activities will fall in love with Lake Tahoe. This natural wonder is breathtaking in all seasons. Also, you can indulge in endless thrilling activities around this natural wonder. From hiking, swimming, and skiing to paddleboarding and snowboarding, countless adventures await you at Lake Tahoe. 

10. Asheville, North Carolina


Another beautiful destination that lives up to its hype is Asheville, known for its natural charm. It is located in the Blue Ridge Mountains, which are not only unmatched in their natural beauty but also offer a quirky charm and a rich culture that is truly worth exploring. There are numerous kid-friendly trails here that you and your kids will enjoy. Also, visit the fascinating Biltmore Estate. 

Summing Up…

The US is full of incredible family-friendly destinations, but not all of them live up to the hype. We have mentioned some of the destinations that truly live up to the hype and will give your family the most unforgettable time. Now is the time to decide on a destination and contact Zippy Holidays to make your dream family holiday a reality. 

Guest post by Elsie. Elsie is a passionate travel blogger who explores the world one city at a time. Through her stories and tips, she shares hidden gems, cultural insights, and travel inspiration to help others make the most of every journey. Follow her adventures and get inspired to explore beyond the map. She can be reached at elsieblogger5@gmail.com.

Images courtesy of pixabay.com, freepik.com and istockphoto.com

A Short Visit to Sequoia and Kings Canyon National Parks

Overview

After a few days in Yosemite National Park in California we drove south through Fresno and then east, climbing the hills up into Sequoia and Kings Canyon National Parks via Highway 180 that enters Kings Canyon National Park from the northwest. These two Parks adjoin one another. We spent two nights in Sequoia National Park and that was just enough time to see the major sights. Sequoia National Park felt very quiet compared to Yosemite, even with pretty full campgrounds and regular shuttle buses operating. It’s all relative!

Map of Kings Canyon and Sequoia National Parks.

The giant sequoias are unique to this area, with climate conditions that are perfect for their growth over thousands of years. These trees are also naturally resistant to fire, disease and insects due to the high concentration of tannin in the sequoia’s bark. In the Parks, you will see evidence of fire and how the trees have survived.

Below are a few highlights of our visit.

General Grant Tree (Kings Canyon NP)

The General Grant tree was not far from the entrance to Kings Canyon and we made this our first stop. General Grant is 40 feet wide at its base, the widest-known sequoia tree and “just” 1,700 years old (some sequoias are 1,000 years older!). It was proclaimed to be the Nation’s Christmas tree in 1926. Good thing they didn’t cut it down! Other fun facts are shown in an image below.

The General Grant Tree in Kings Canyon National Park is the 2nd (or 3rd, depending on which literature you read) largest tree by volume in the world.
A few facts about the General Grant Tree.

Since we arrived late in the afternoon, after visiting General Grant we drove to Lodgepole Village and Campground in Sequoia National Park, passing through a small burn area at the entrance.

The Northwest entrance to Sequoia National Park, on the Generals Highway.

After getting settled in camp, we enjoyed a great park ranger talk that evening at the nearby amphitheater where we learned a great deal about the local black bear population (we learned that that black bears can be white, brown as well as black!).

General Sherman Tree

During the summer, shuttles operate between Lodgepole Village/Visitors Center and Moro Rock, so rather than drive and try to find parking at each stop, we took the shuttle, a very convenient way to go.

Our first stop was the General Sherman Tree, the largest tree in the world by volume, it’s 2,200 years old. A half-mile trail from the shuttle stop leads to General Sherman and provides access to other nearby trails.

A few fun facts about the General Sherman tree.

Big Trees Trail

A short distance south of General Sherman is the Big Trees Trail, a 1/2 mile loop that will take you on a tour of some of the other massive sequoias in the Park. Everywhere you look are these giant trees, making you feel very small! Also, along another 1/4 mile path, you can visit the Giant Forest Museum where the geology and history of these trees and area is explained.

Near the Big Trees trail we saw a couple bears – we were a little way off and they didn’t pay much attention to us.

Moro Rock & Tunnel Log

Continuing south from Big Trees Trail, and a short drive off the main road is Moro Rock. You can climb to the top via a 1/4 mile stairway taking you 300 feet up this granite dome for some amazing views of the surrounding mountains.

View of Moro Rock.
Stairway up Moro Rock.
View from the top of Moro Rock, looking east. Mt. Whitney, the tallest mountain in the continental U.S., is at the eastern edge of Sequoia National Park (not quite visible here).
The shuttle also travels past “Tunnel Log” near Moro Rock. Our camper van is too tall to take this tunnel, but if you have a car, go for it!

We camped at Lodgepole Campground in Sequoia NP, a good location for visiting the primary sights in the Park. Lodgepole Village has showers (although they are not the cleanest showers I’ve seen), laundry facilities and a small cafe and convenience store. As with Yosemite, we planned ahead (3-4 months) to ensure we got our campsite reservations.

Entrance to Lodgepole Campground.

Unfortunately we did not have time to really explore Kings Canyon National Park, I wish we could have. Please note there is really only one road into the primary area of Kings Canyon National Park (north of Sequoia NP) and it’s a pretty long drive. My recommendation would be to spend a least one night in Kings Canyon and then two nights in Sequoia National Park. Plan enough time for your visit, the roads are not fast, as with other roads in the area, they are windy, narrow and slow. We exited the Park on the southwest corner via Highway 198 towards Visalia and Bakersfield.

Visiting Yosemite National Park – Some Images and Tips

As much as I’ve traveled within the U.S., once place I’d never visited until this year was Yosemite National Park in California. When we bought a camper van last year we put Yosemite on our list as one of the places we definitely wanted to visit. Yosemite is certainly one of the most stunningly beautiful places I have ever been, and the world knows it. You will find many Californians here (of course), plus people from around the world – we heard a lot of different languages being spoken on the trails and around the sights.

Yosemite Falls

You can hike to the base of Lower Yosemite Falls if you don’t mind scrambling over big granite boulders – it was fun!

Merced River

Glacier Point Road

This 30 mile (or so) drive from Yosemite Valley is so worth it! The views from Glacier Point are awe-inspiring. If you plan ahead, you can get a tour shuttle up to the Point and take a steep one-way hike down to the Valley (about 4 miles). If I had been smart, we would have done this – the shuttle was already full when I called just a day or two in advance. There’s lots of parking at Glacier Point, but it does fill up – the good news is that people are coming and going all day long. There’s also a small gift shop and restrooms at the Point.

This was the view (called Tunnel View) coming down from Glacier Point- every spot is a “Kodak Moment!”

Mirror Lake

Another great short hike (or bike ride most of the way) in Yosemite Valley (from Upper Pines campground) is to Mirror Lake, formed by Tenaya Creek. The lake is seasonal and in July it was more of a wide spot in the Creek, but with nice sandy play area!

Tips for Camping In Yosemite

If you want to camp within Yosemite and especially within Yosemite Valley, you need to plan (way) ahead. We started looking at campgrounds in February for a July trip and learned there is a four month rolling reservation window, meaning we had to book our campsite in March for July dates. We wanted to be in the Yosemite Village area, right in the heart of Yosemite Valley for my first visit (my wife had visited Yosemite as a child with her parents on several occasions). We spent 3 nights/2 full days in the Park. This was long enough to give us a good introduction to Yosemite. If you wanted to hike a lot of trails and explore the far reaches of the Park, then you might want to spend a week here.

Camping in Yosemite Valley has its pluses and minuses. The main plus is that you are very close to the well-known Yosemite attractions, the main minus is the lack of solitude. Even if you book (on recreation.gov) at the right time and date (at 7 am Pacific exactly 4 months from the date of your planned visit) there is no guarantee you will get a camping spot, they fill up within seconds of being released. We were lucky and were able to get a spot in Upper Pines Campground, right next to the Merced River, almost directly below Half Dome and within minutes of many Valley attractions. I wish I had taken photos of the campground. Don’t expect privacy – the campgrounds are always full, the spots are close together with a few pine trees scattered about. Bear lockers are provided and essential. While the campgrounds have the standard restrooms and water spigots, I don’t believe any of the campgrounds have RV hookups (e.g., water, electricity, sewer), but they do have dump stations where you can take care of your RV’s needs. There are several small stores in the Valley where you can get supplies and snacks, and several restaurants as well.

In addition to typical tent/RV campgrounds, you will find other accommodation options in the Park – from luxurious lodges to cabins, established tent communities and prison-like bunks in semi-open cinder block structures that have a table and not much else (the least appealing option in my mind, these are located in Housekeeping Village).

Some of the canvas tent accommodations available at Curry Village in Yosemite National Park.

Since we were on an extended camping trip (having also visited Lake Tahoe and Sequoia National Park as part of the same trip), access to laundry and shower facilities was helpful, these can be found at Curry Village and Housekeeping Village.

Getting Around

Given the volume of traffic and day trippers into Yosemite, car parking can be a challenge. If you can, bring your bicycle and leave your car or truck at the campsite, bikes are a great way to get around Yosemite Valley, the Village and adjacent hiking trails. I was glad we brought our bikes. You can also rent bicycles there.

Other Tips

The roads in Yosemite National Park are narrow, steep and windy, so driving is slow–it’s a big Park, so plan your time accordingly. During the summer months, if you do not have a camping (or other accommodation) reservations inside the Park you will need a timed reservation just to enter the Park, even for a day visit. The lines to enter the Park on a summer morning can be long (miles long). We came in via the Big Oak Flat entrance on the western side of the Park in the afternoon and had no wait. We left via the southwest entrance (Wawona, near Fish Camp) and saw a very long line of cars waiting to enter the Park at around 9 am. There are public buses that come to Yosemite as well from neighboring towns, and this might be an option depending on how long you want to stay.

I know my comments above may scare you away from visiting Yosemite, but in spite of the crowds, it is definitely worth the effort, just plan ahead and figure out your best options.

Laupahoehoe Point Beach Park, Hawaii

Visiting the Big Island of Hawai’i

I’ve had the privilege of visiting the islands that make up the state of Hawai’i a few times: twice to Oahu, once each to Maui and Kauai and most recently the Big Island of Hawai’i. All of the islands have their charms, but the Big Island is the most unique island in many ways. It felt more laid back, quiet and rural with fewer tourists and big resorts.

The island of Hawai’i is not only big (bigger than the rest of the Hawaiian Islands combined), but has some amazing diversity in its climate zones – from a dry and very (volcanic) rocky western shore, to the more tropical eastern side, with active volcanoes in the middle and southern central parts of the island and farm and ranch lands in the north central part of the island. The Big Island is also far less touristy than Oahu and Maui and receives about the same number of tourists as Kauai.

Below are a few sights around the island starting on the western side and working our way north and south along the west coast and then east over to Hilo and further south to Hawai’i Volcanoes National Park.

Waikoloa Village – West Coast

This trip was sponsored in part by Hilton Grand Vacations. On a snowy day in Colorado after booking a business trip, I was susceptible to one of those calls telling me that I could experience a vacation package on the Big Island for almost nothing, with the caveat that we listen to a presentation on the wonders of purchasing a share of an available property. To Hilton’s credit, the actual sales pitch was very low key and within an hour or we were on our way again (resort living is just not our type of vacation thing–it took us a while to convince them of this).

You could easily land at the Kona airport, head north 20 minutes to Waikoloa Village resort, and have a full, relaxing (and expensive) vacation never leaving the Village–eating, golfing and swimming all day every day. While all of this was tempting (and fun), we wanted to see more of the island, since we knew it was unlikely we would be back.

Waikoloa Village, Hawaii.

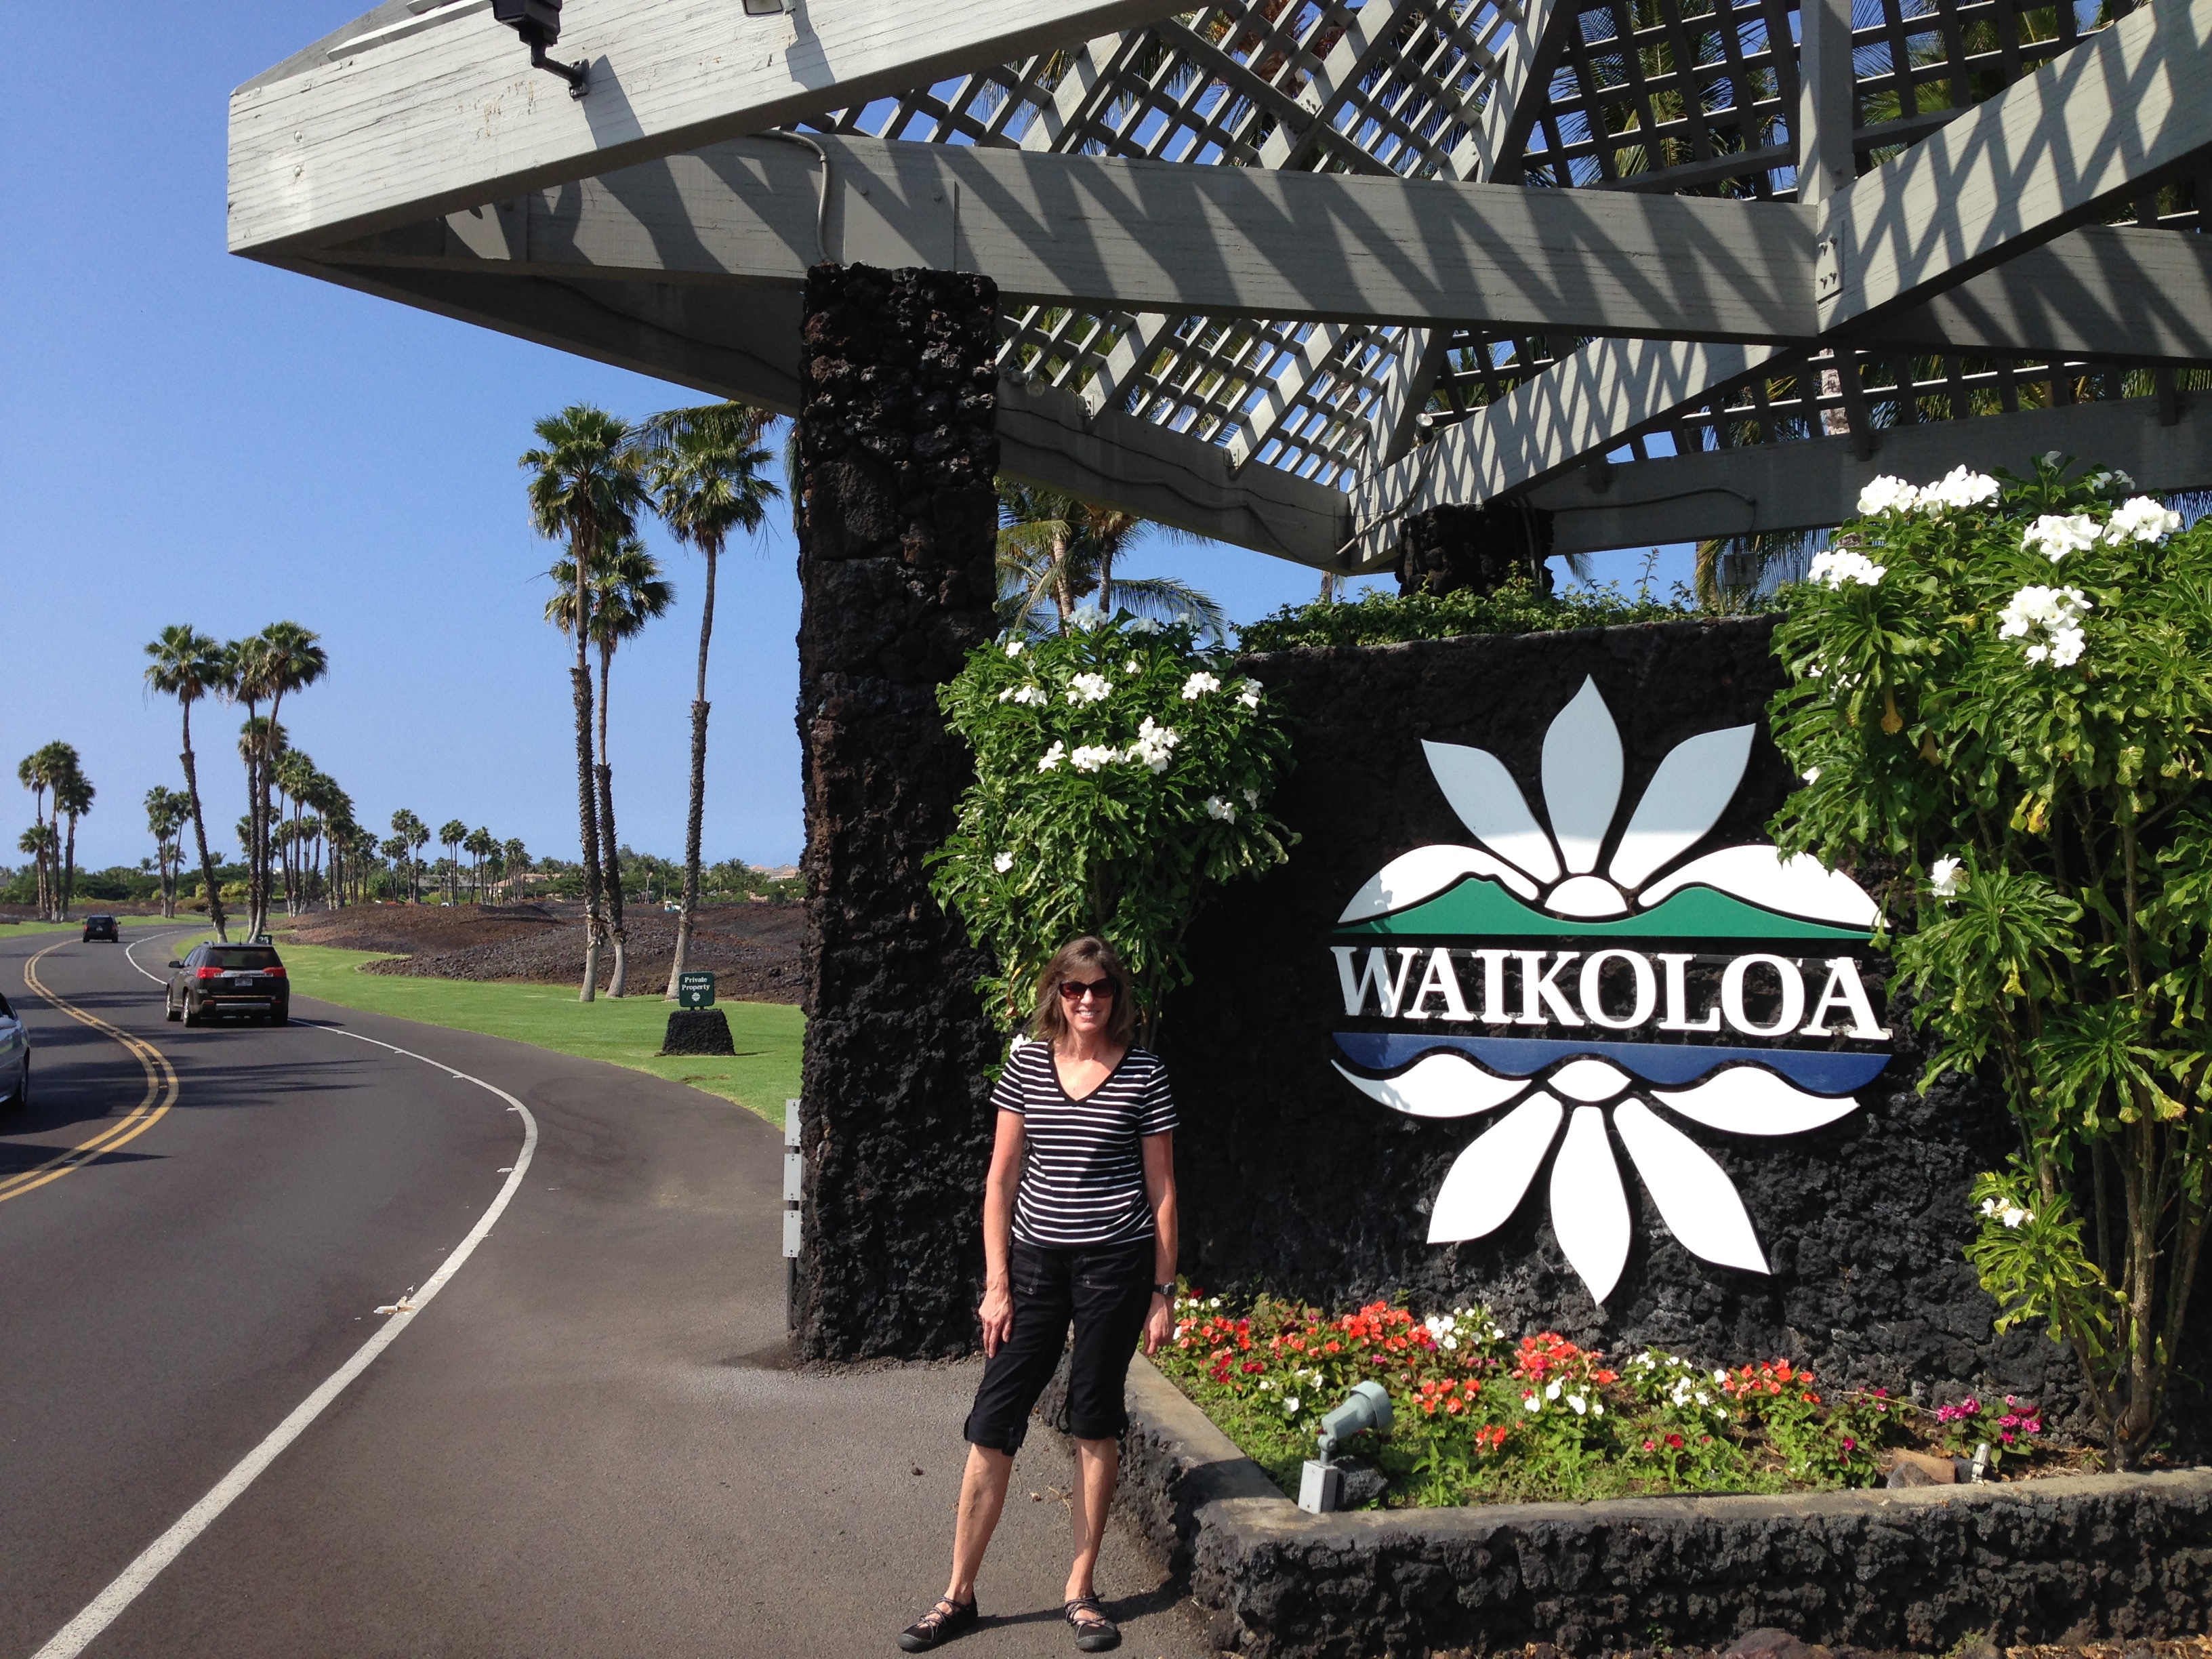
We stayed at the Waikoloa Village Resort, a Hilton property on the northwest coast of Hawaii. The resort has hotel rooms and condo properties. It’s about 20 minutes north of the Kona Airport.

Waikoloa Village Resort, Hawaii

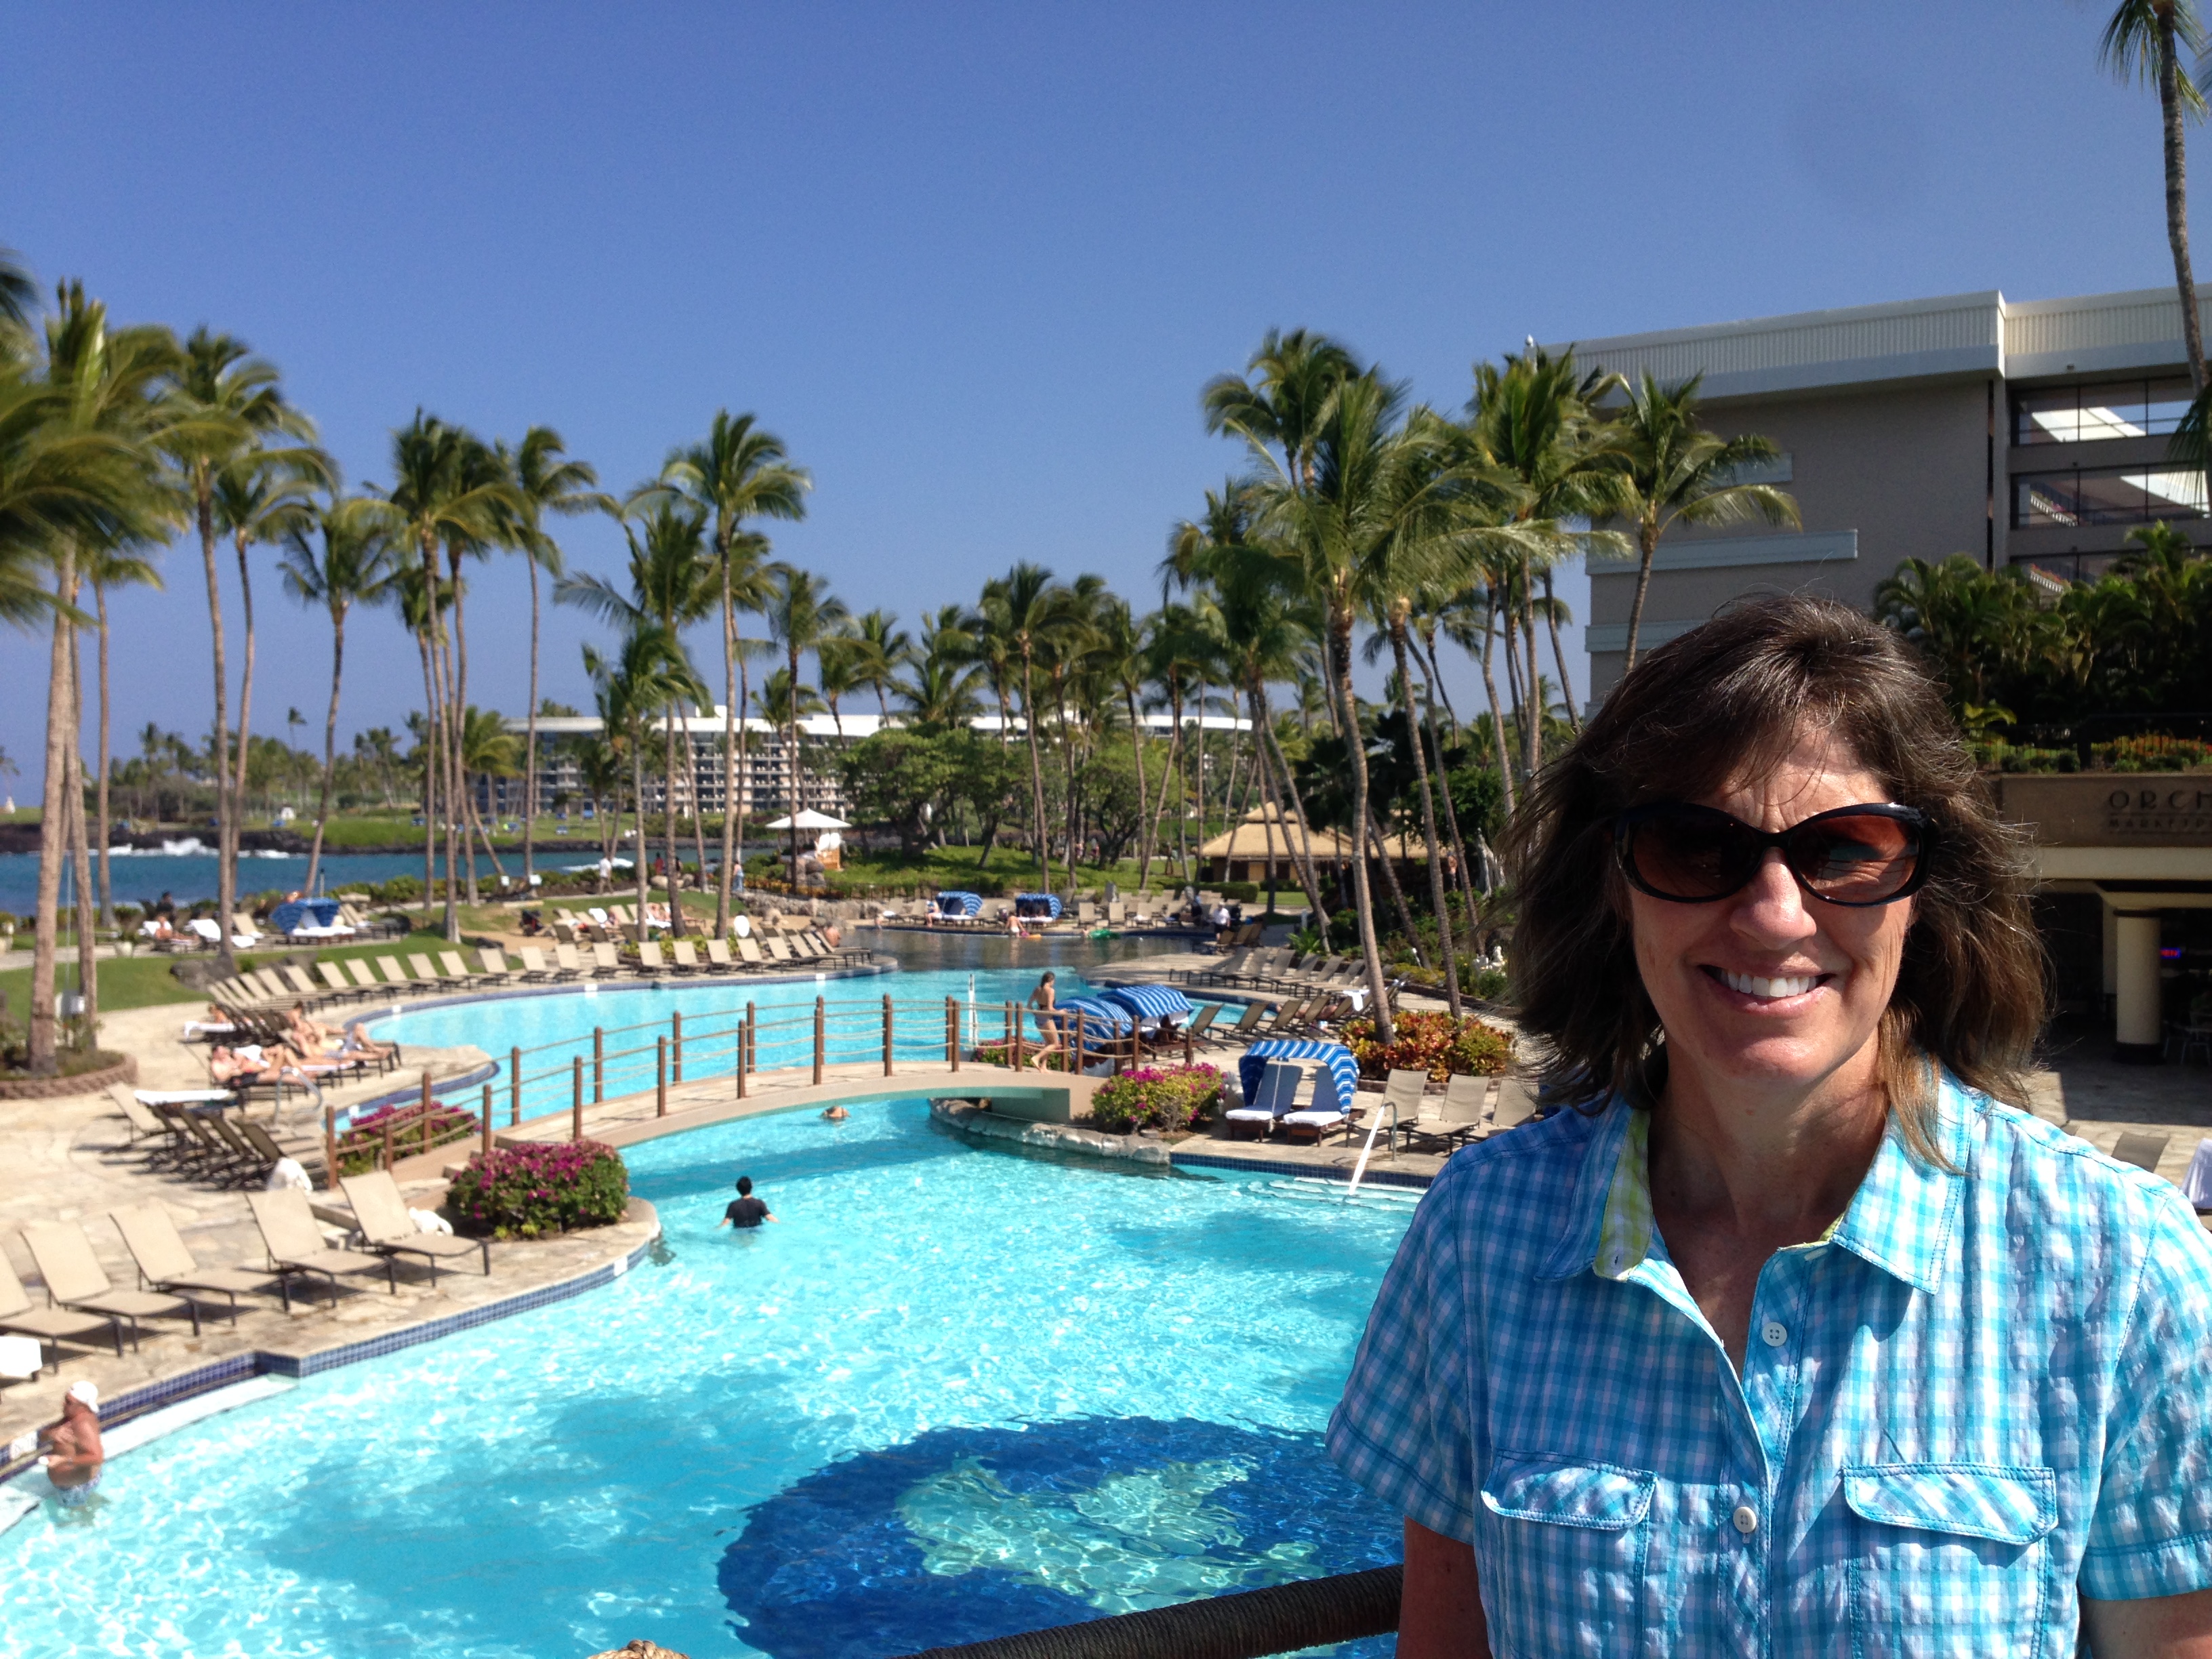
The Waikoloa Village is of course beautiful, set right along the rugged volcanic coast with many amenities.

Waikoloa Resort, Hawaii

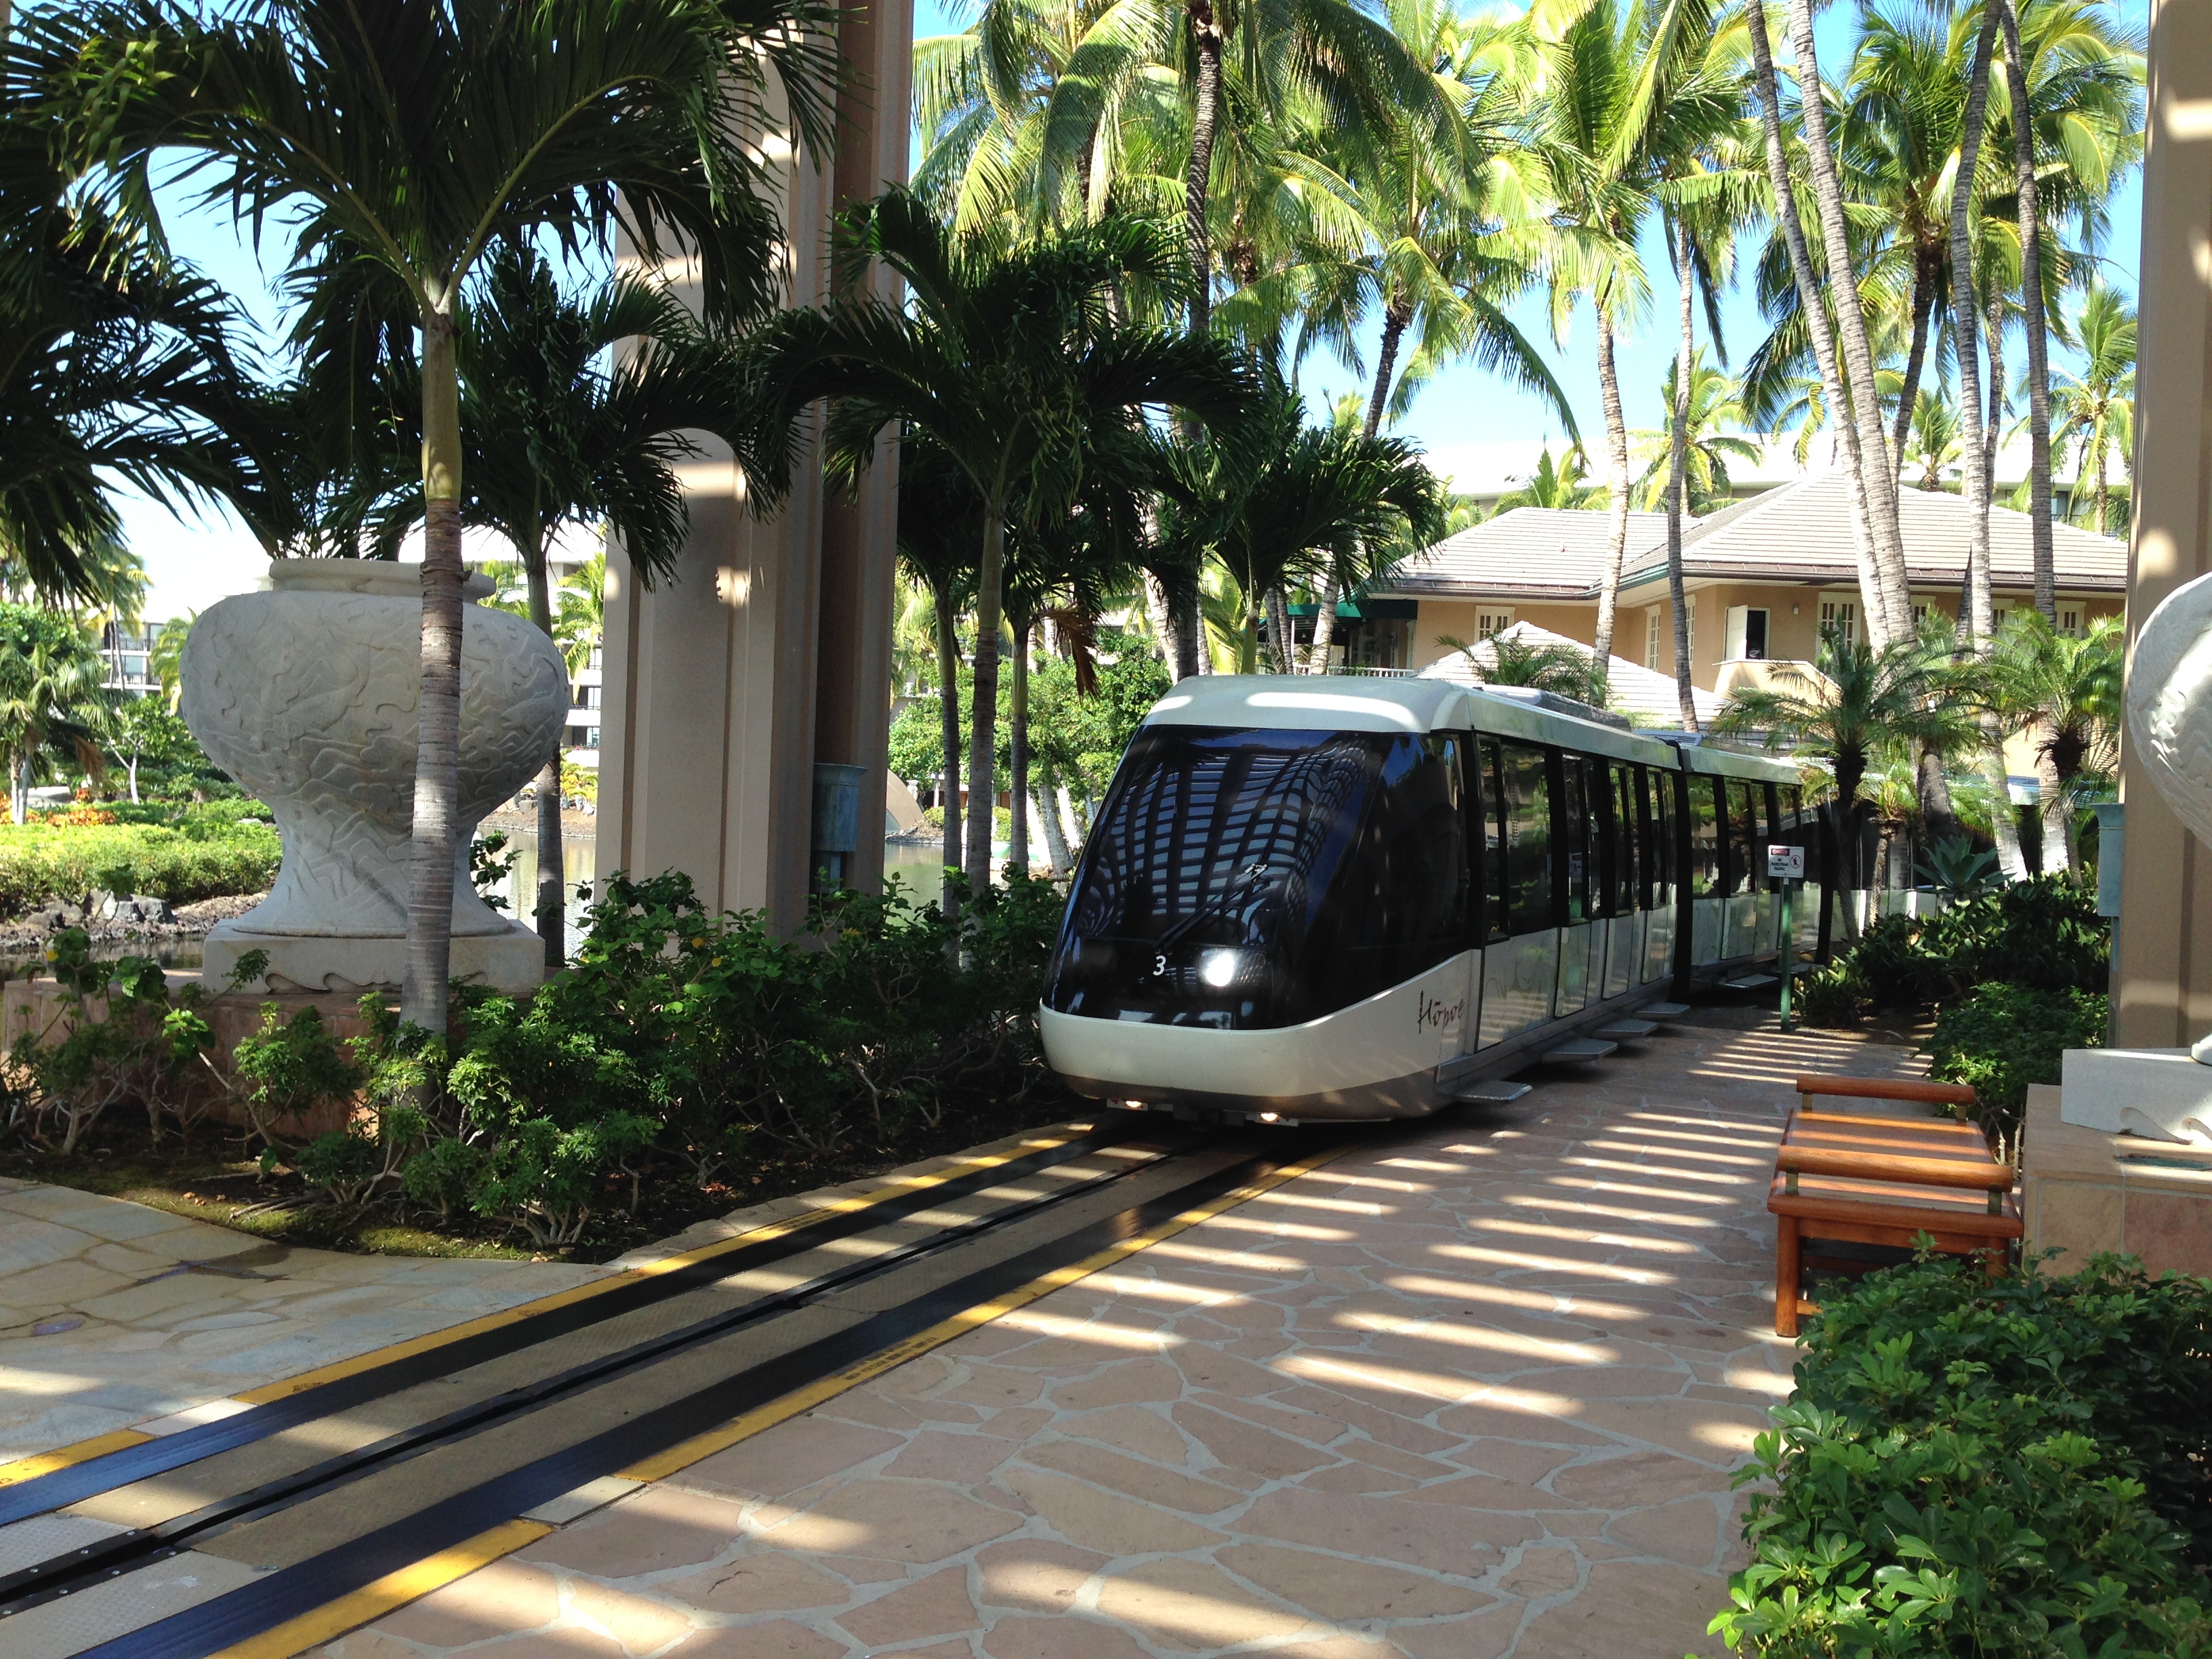
The Waikoloa Resort is so big that you take a tram or water taxi to your room from the main entrance.

Kohala Coast, Hawaii

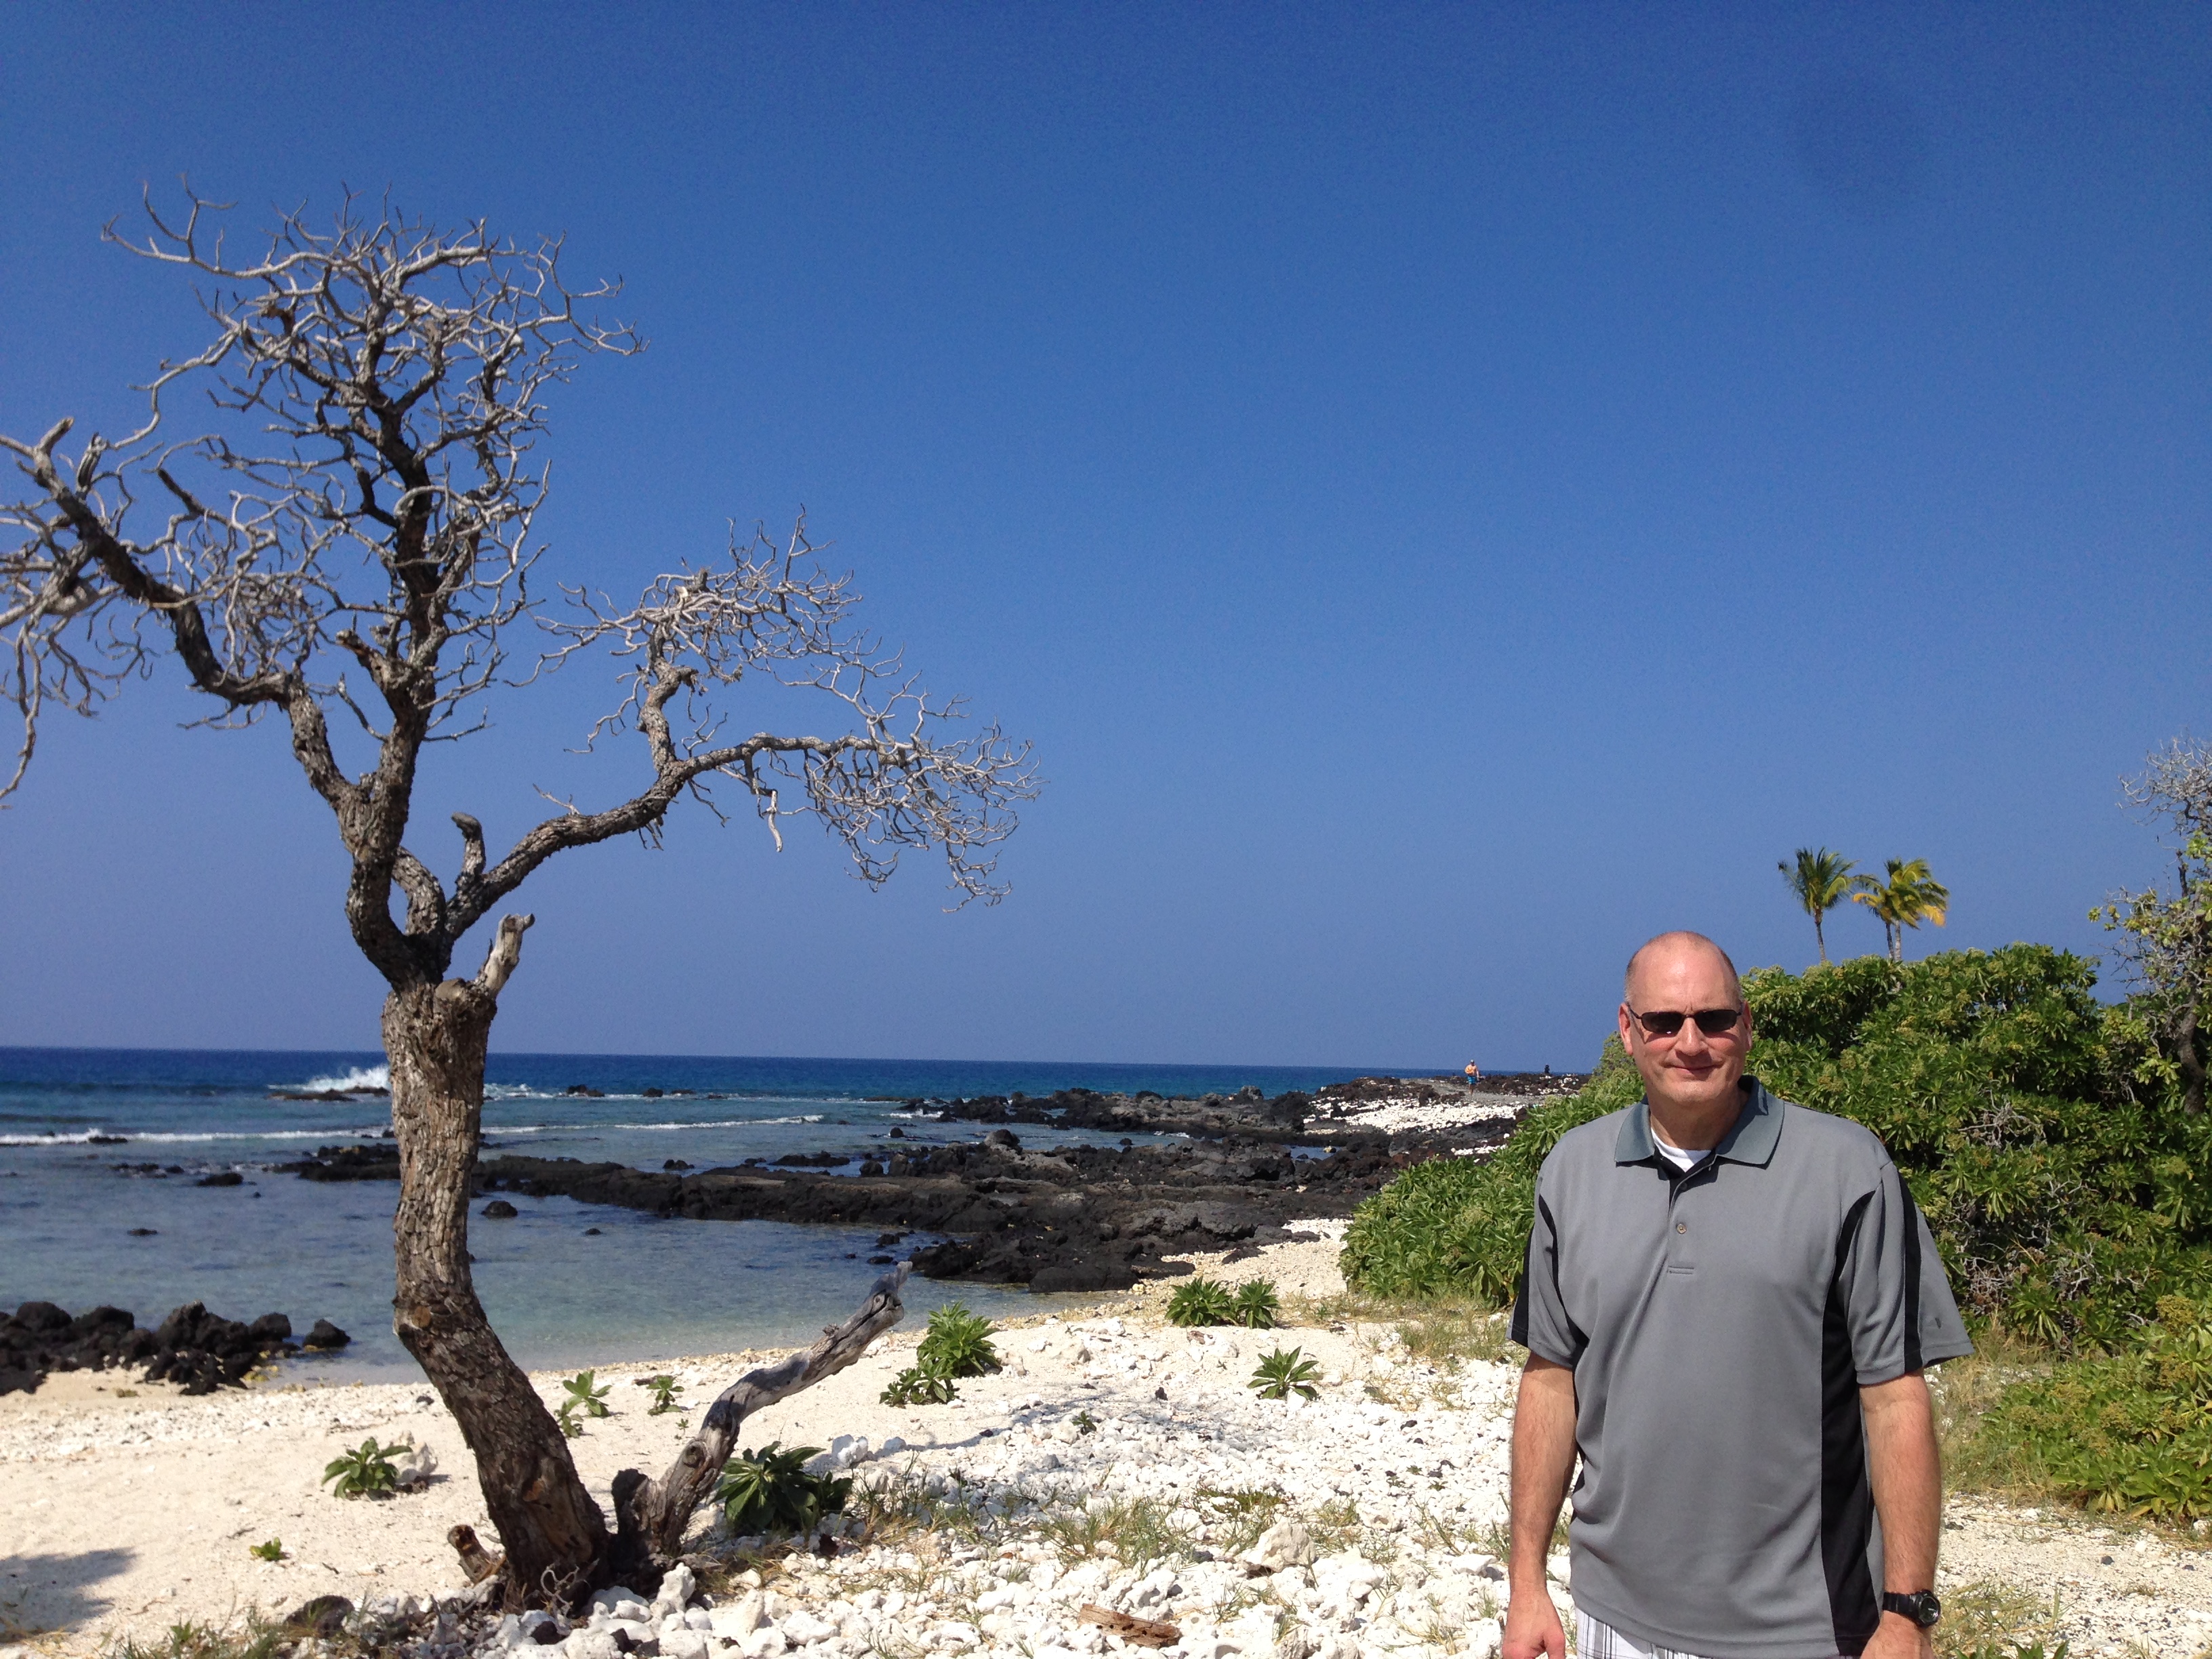
This photo was taken just south of the Waikoloa Resort, along the Kohala Coast. Much of the island is volcanic rock meaning white sand beaches are few and far between. Since the coast is not heavily developed, many spots can be found for a quiet picnic.

Waikoloa King’s Trail

Near the Waikoloa Village is the ancient King’s Trail. This trail was used by Hawaiians from about 1400 – 1800 CE as a transportation route along the coast. You can walk along parts of the trail, with signs to guide your way and explain the historical features.

Waikoloa Kings Trail, Hawaii

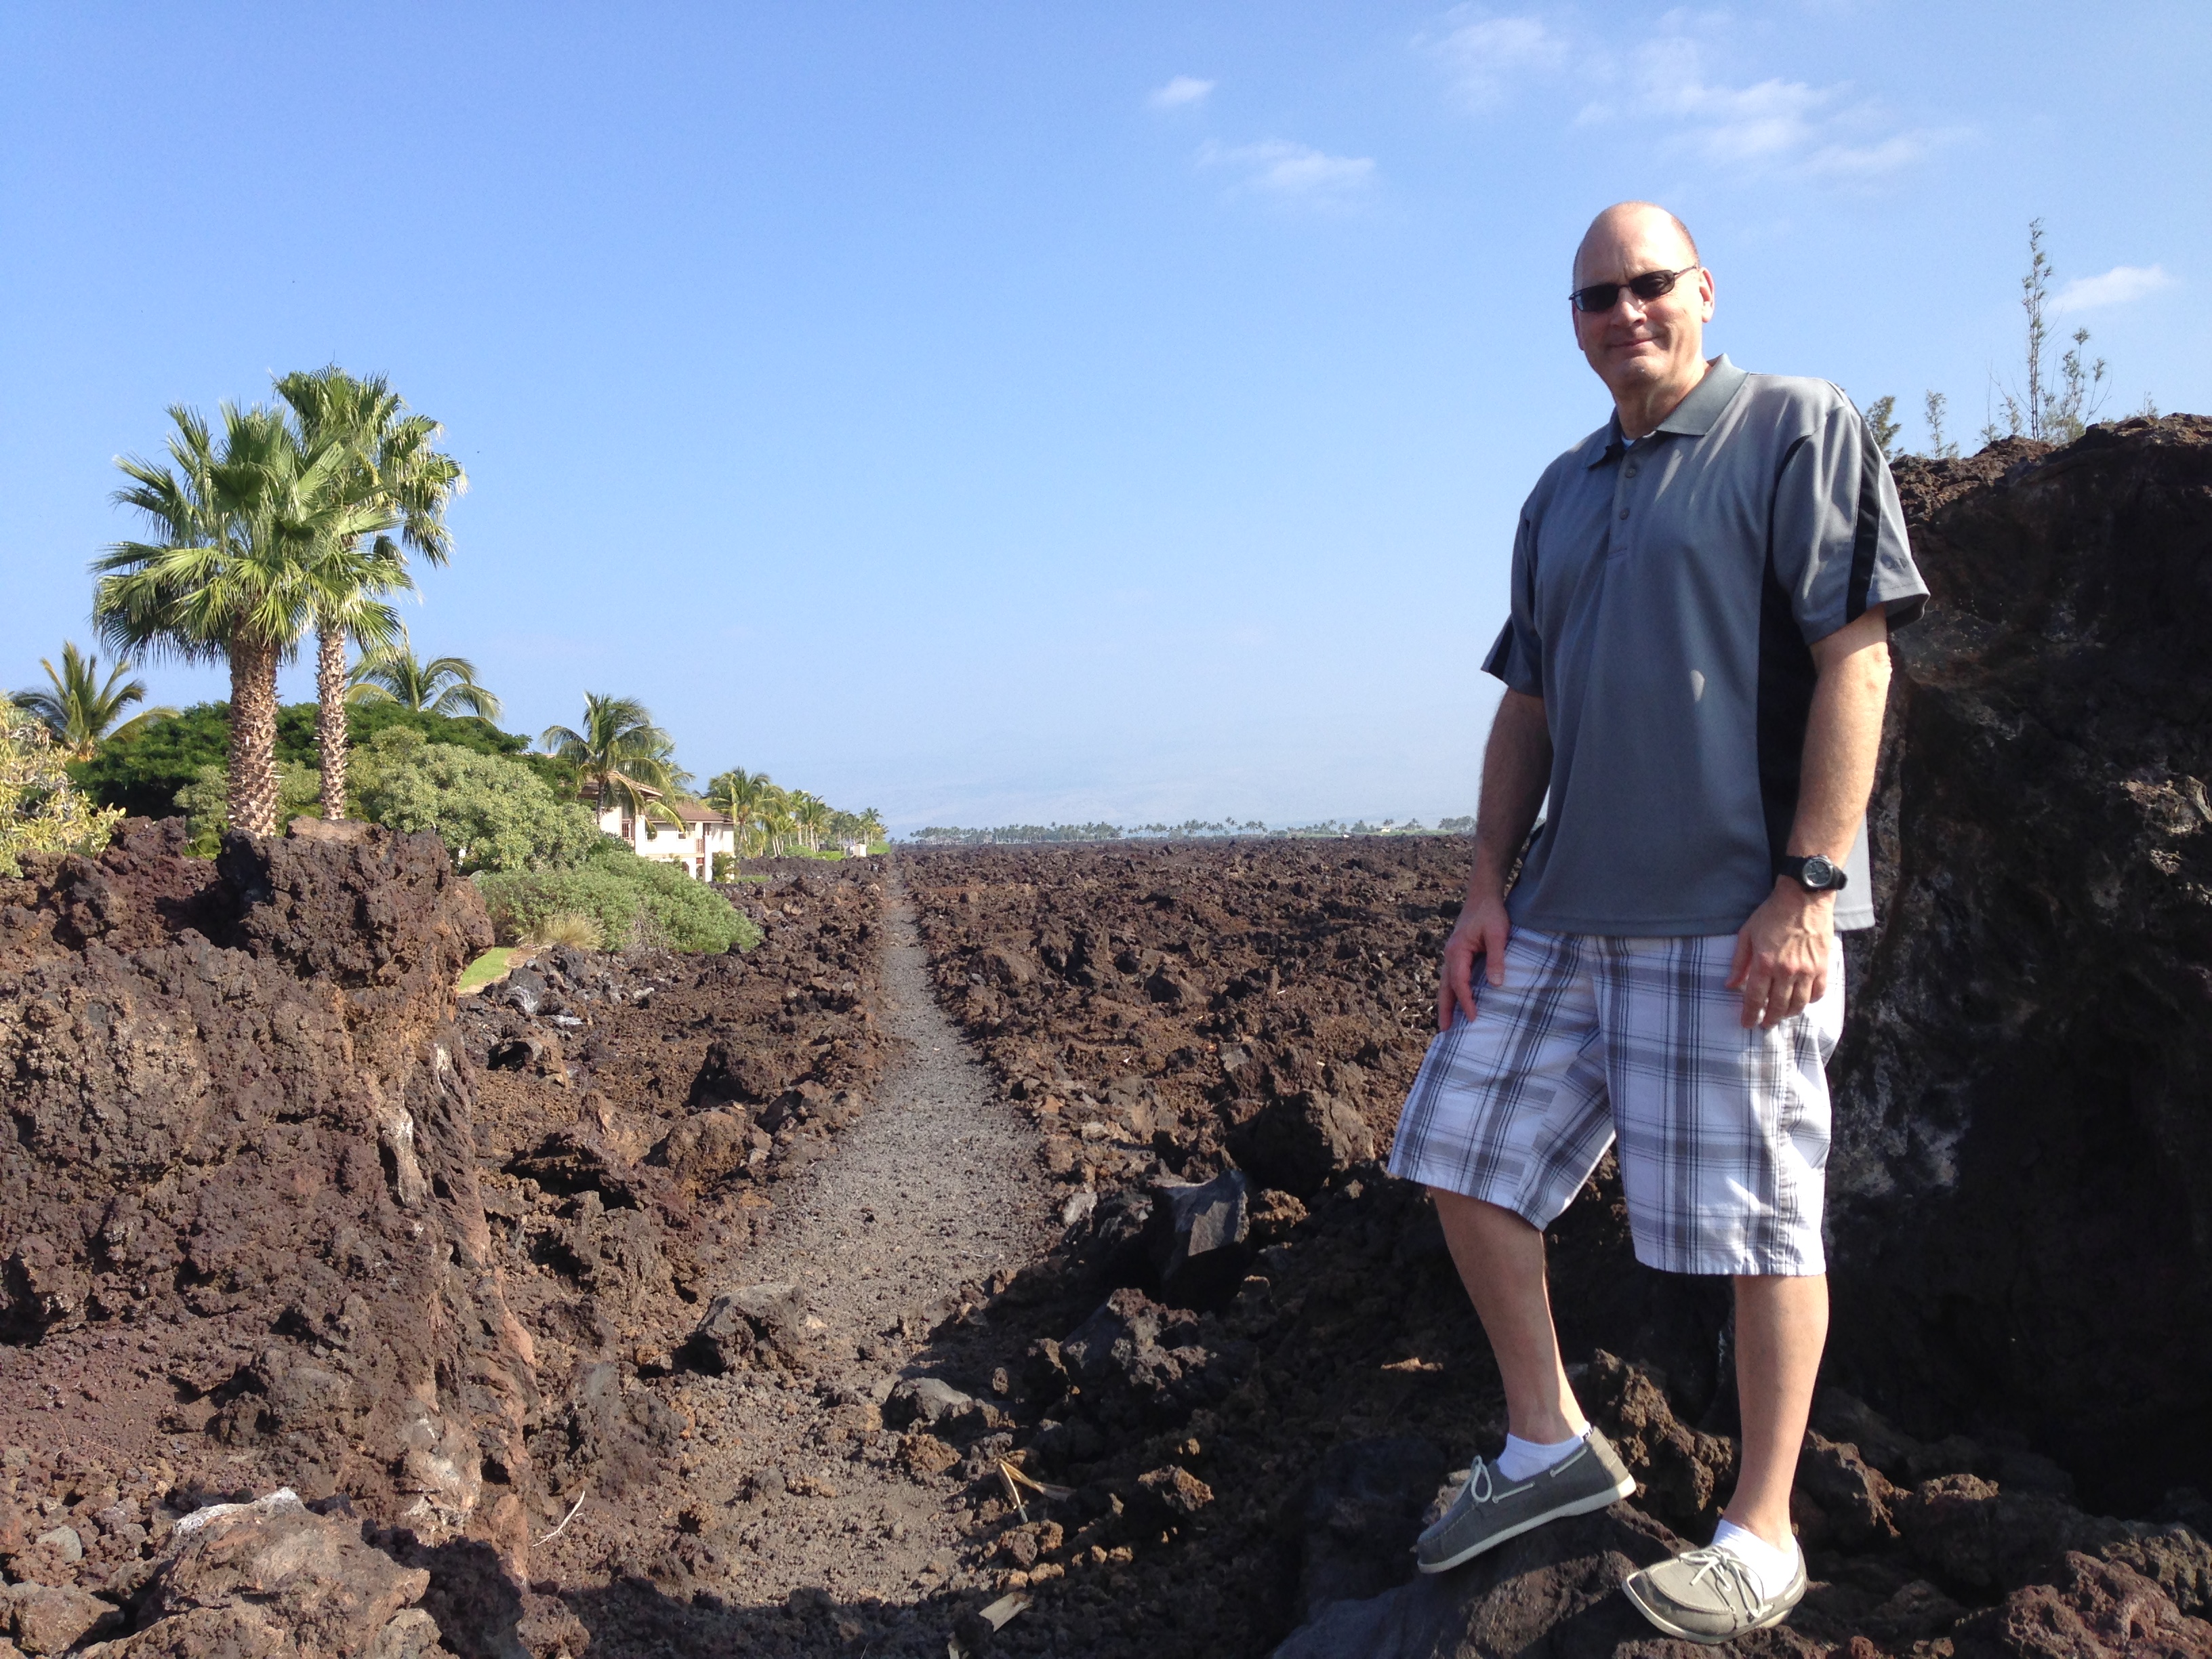
The Waikoloa Kings Trail winds its way through the pretty barren volcanic landscape.

King's Trail, Hawaii

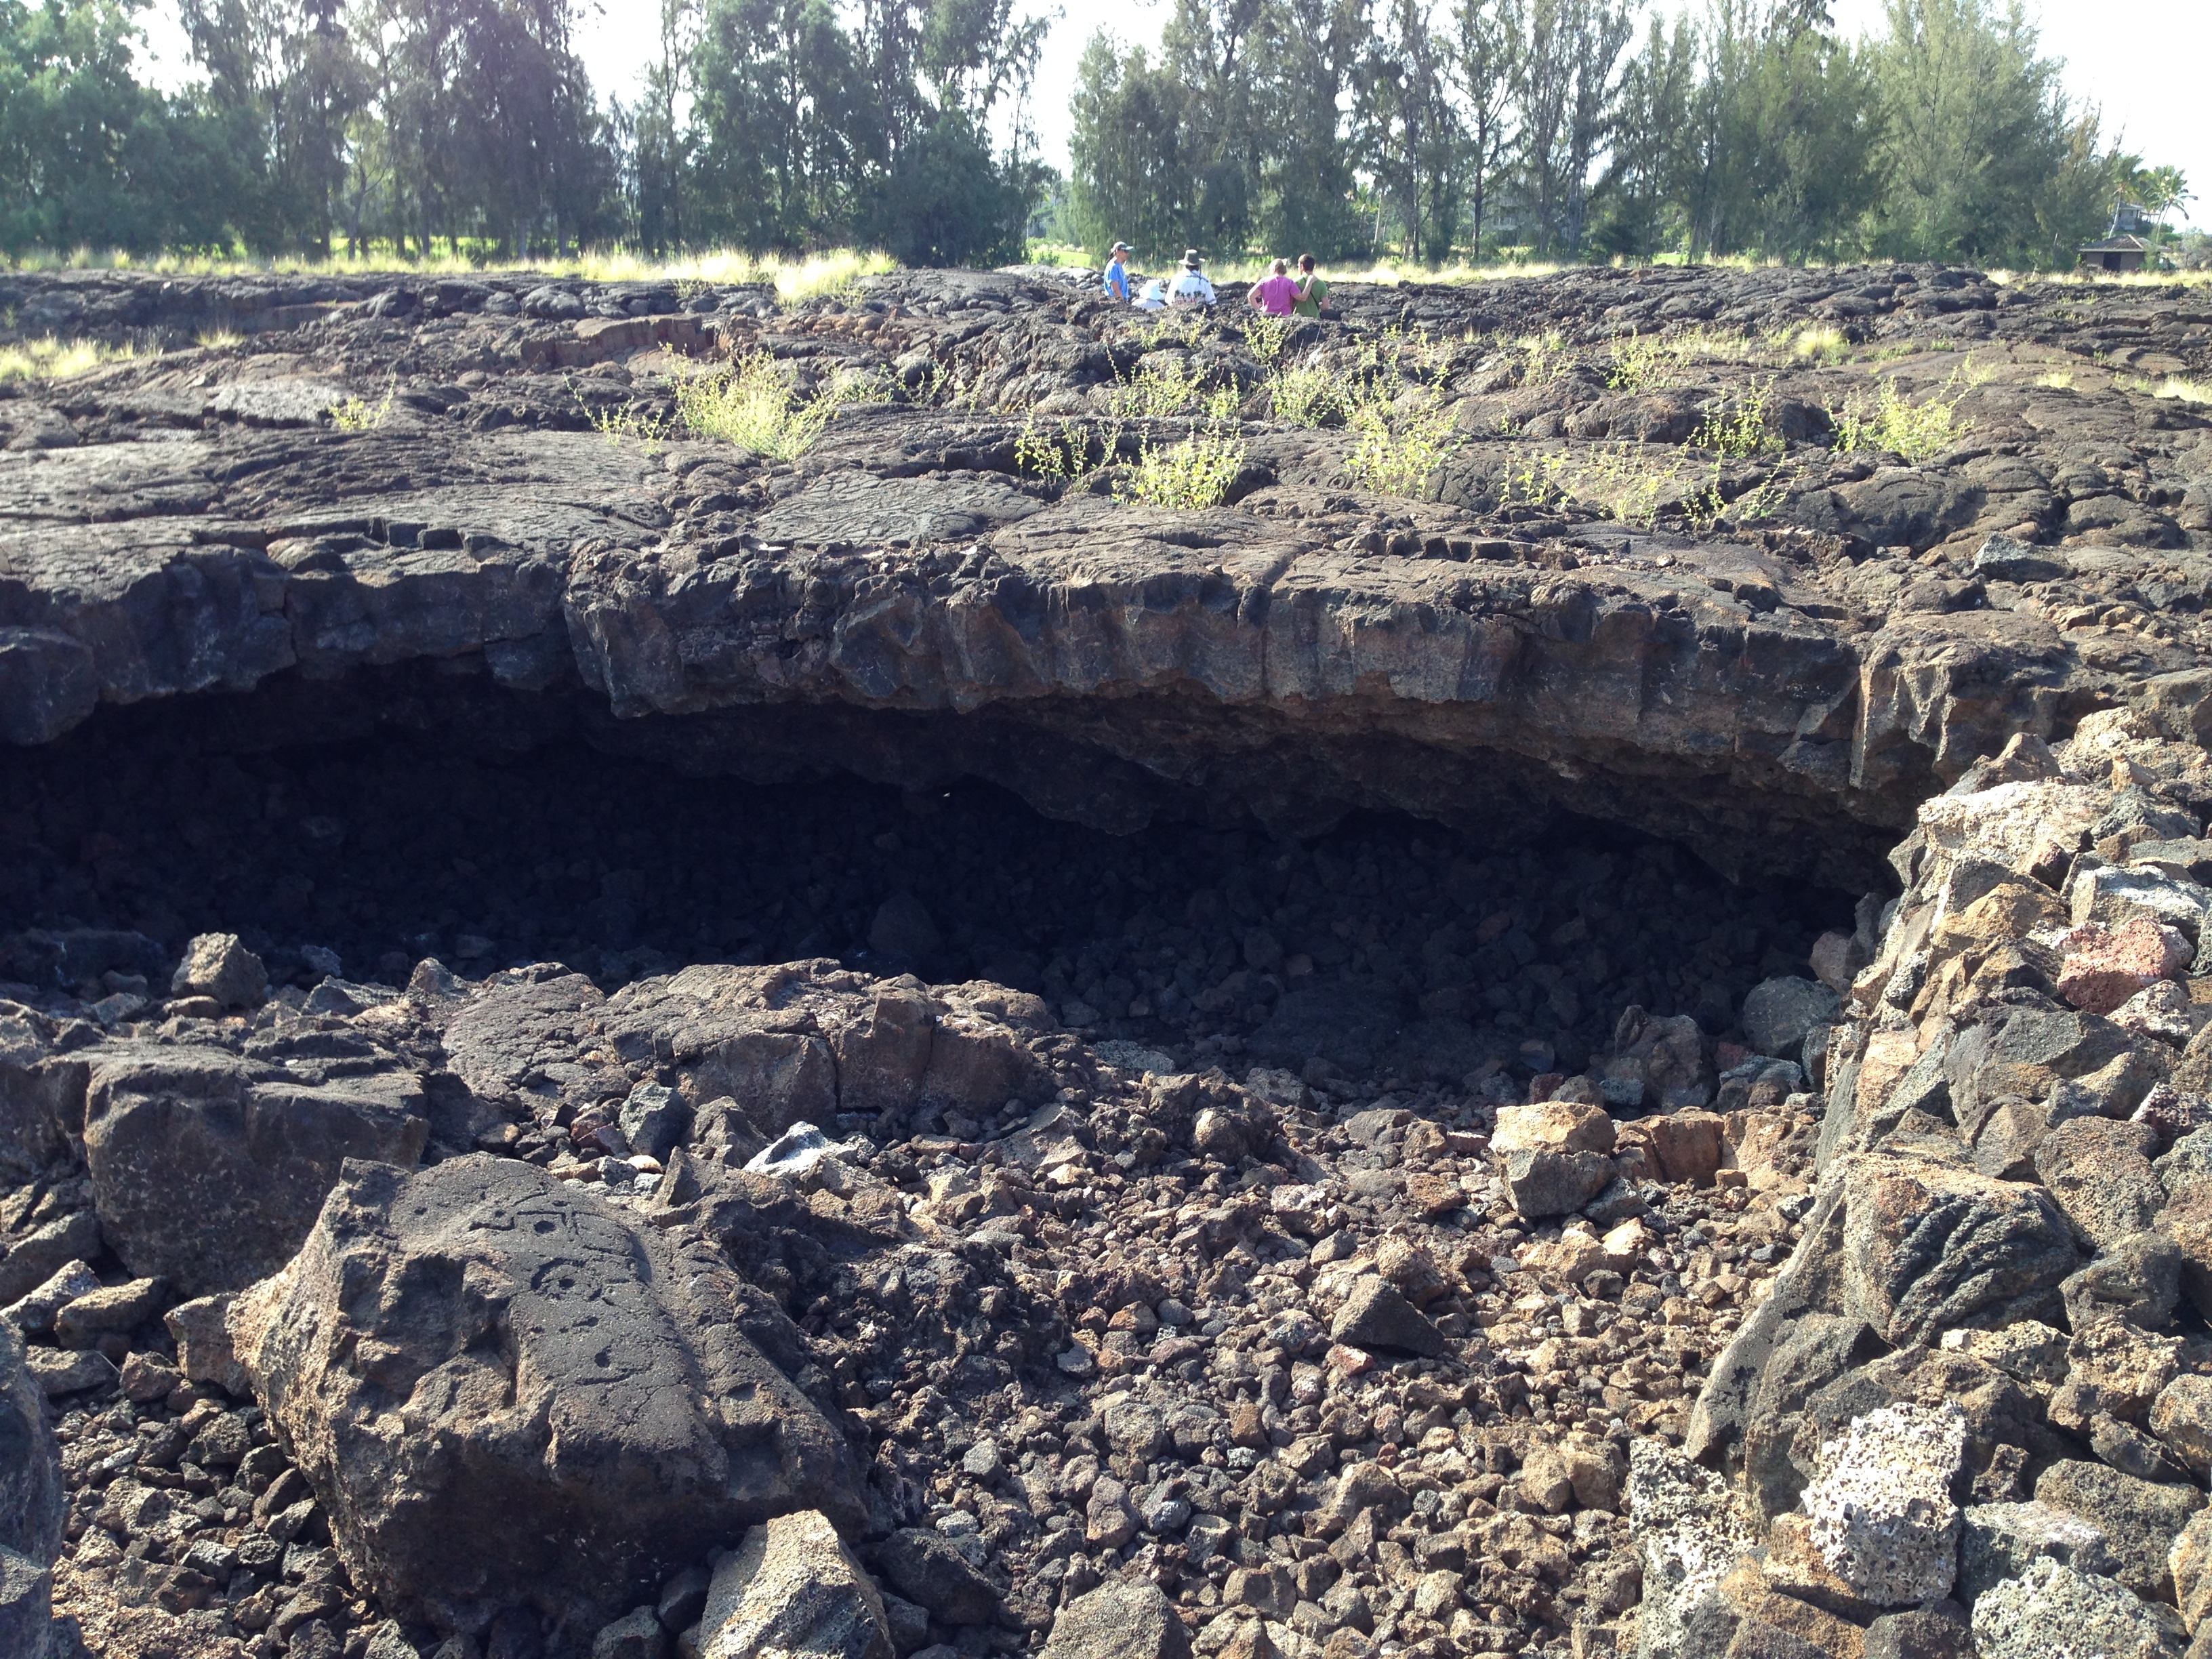
Along the King’s Trail. Overhanging cliffs like those shown here provided protected overnight camping spots for the ancient Hawaiians. In the near lower left foreground petroglyphs can be seen on the rock.

King's Trail, Hawaii

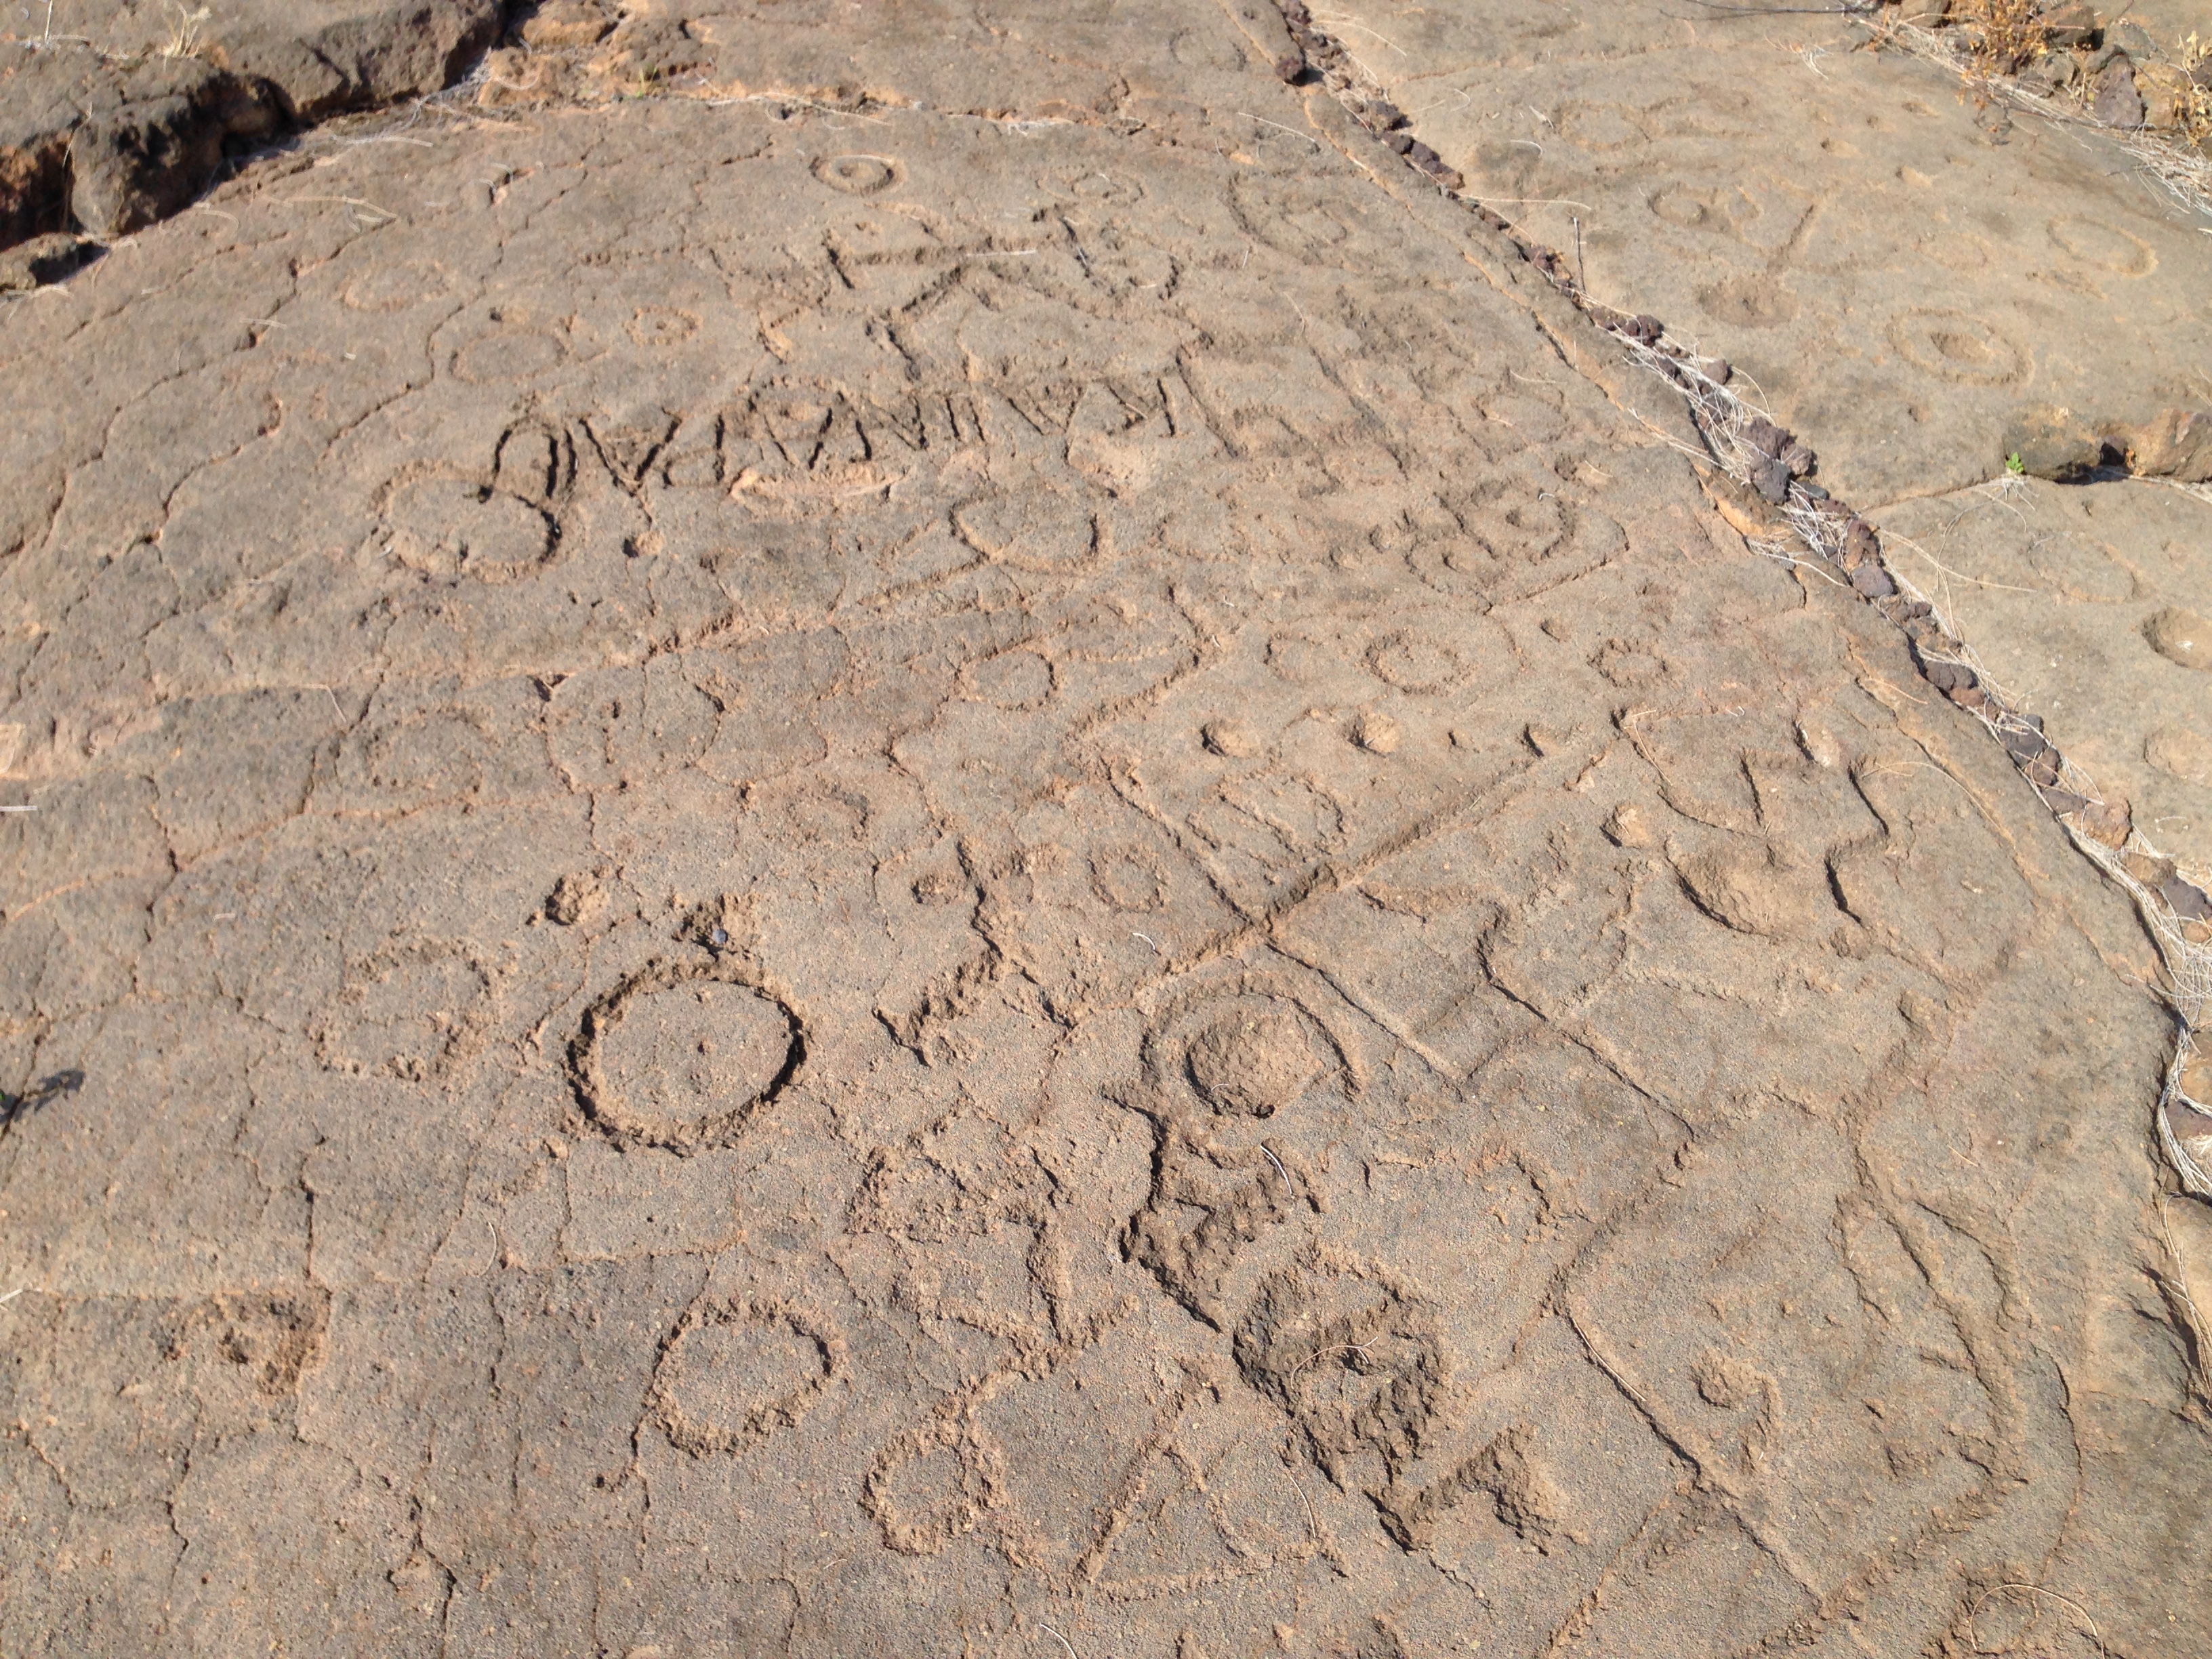
Examples of other petroglyphs along the King’s Trail.

From Waikoloa Village, we explored north and then south along the west coast.

North/West Coast of Hawai’i (North Kohala)

Like much of the Big Island, this part of Hawai’i is quiet and felt pretty remote, with just a few tiny towns and lots of open hilly countryside. It was apparent that the northern tip of the island receives more moisture than most of the western side.

Hapuna Beach State Park, Hawaii

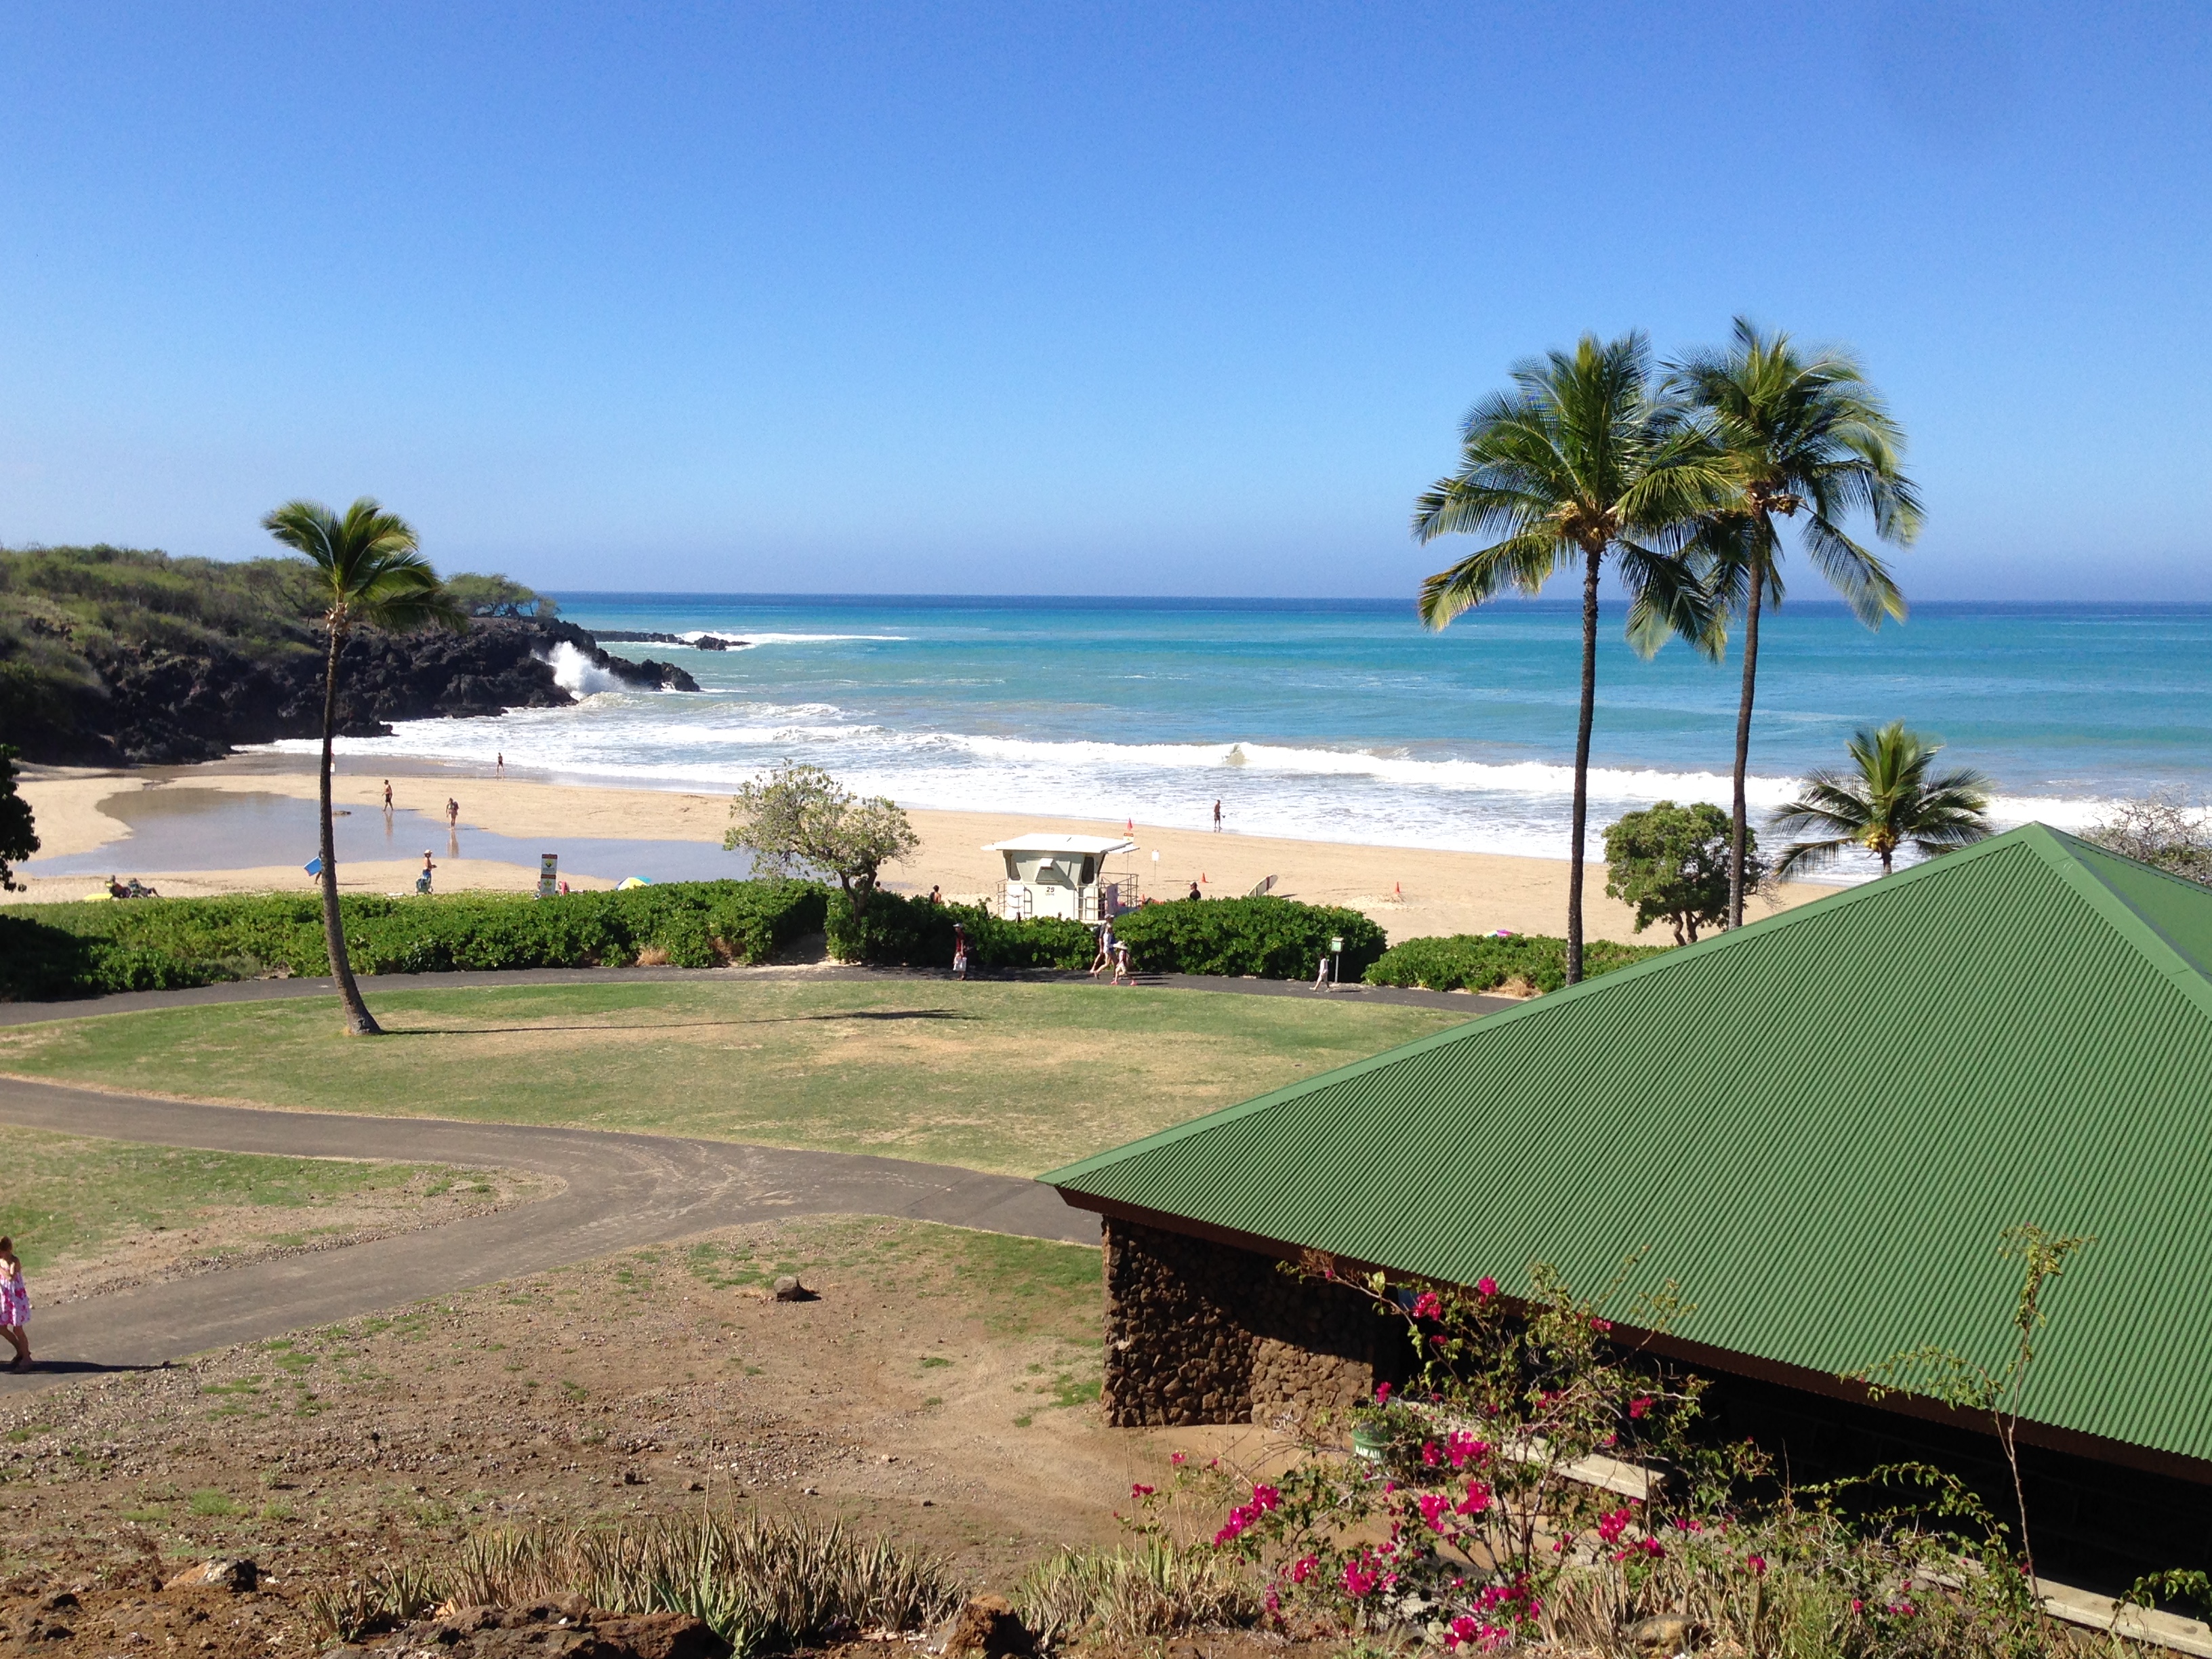
Hapuna Beach State Park, a short way north of Waikoloa Village. Hey, an actual sandy beach!

King Kamehameha, Hawaii

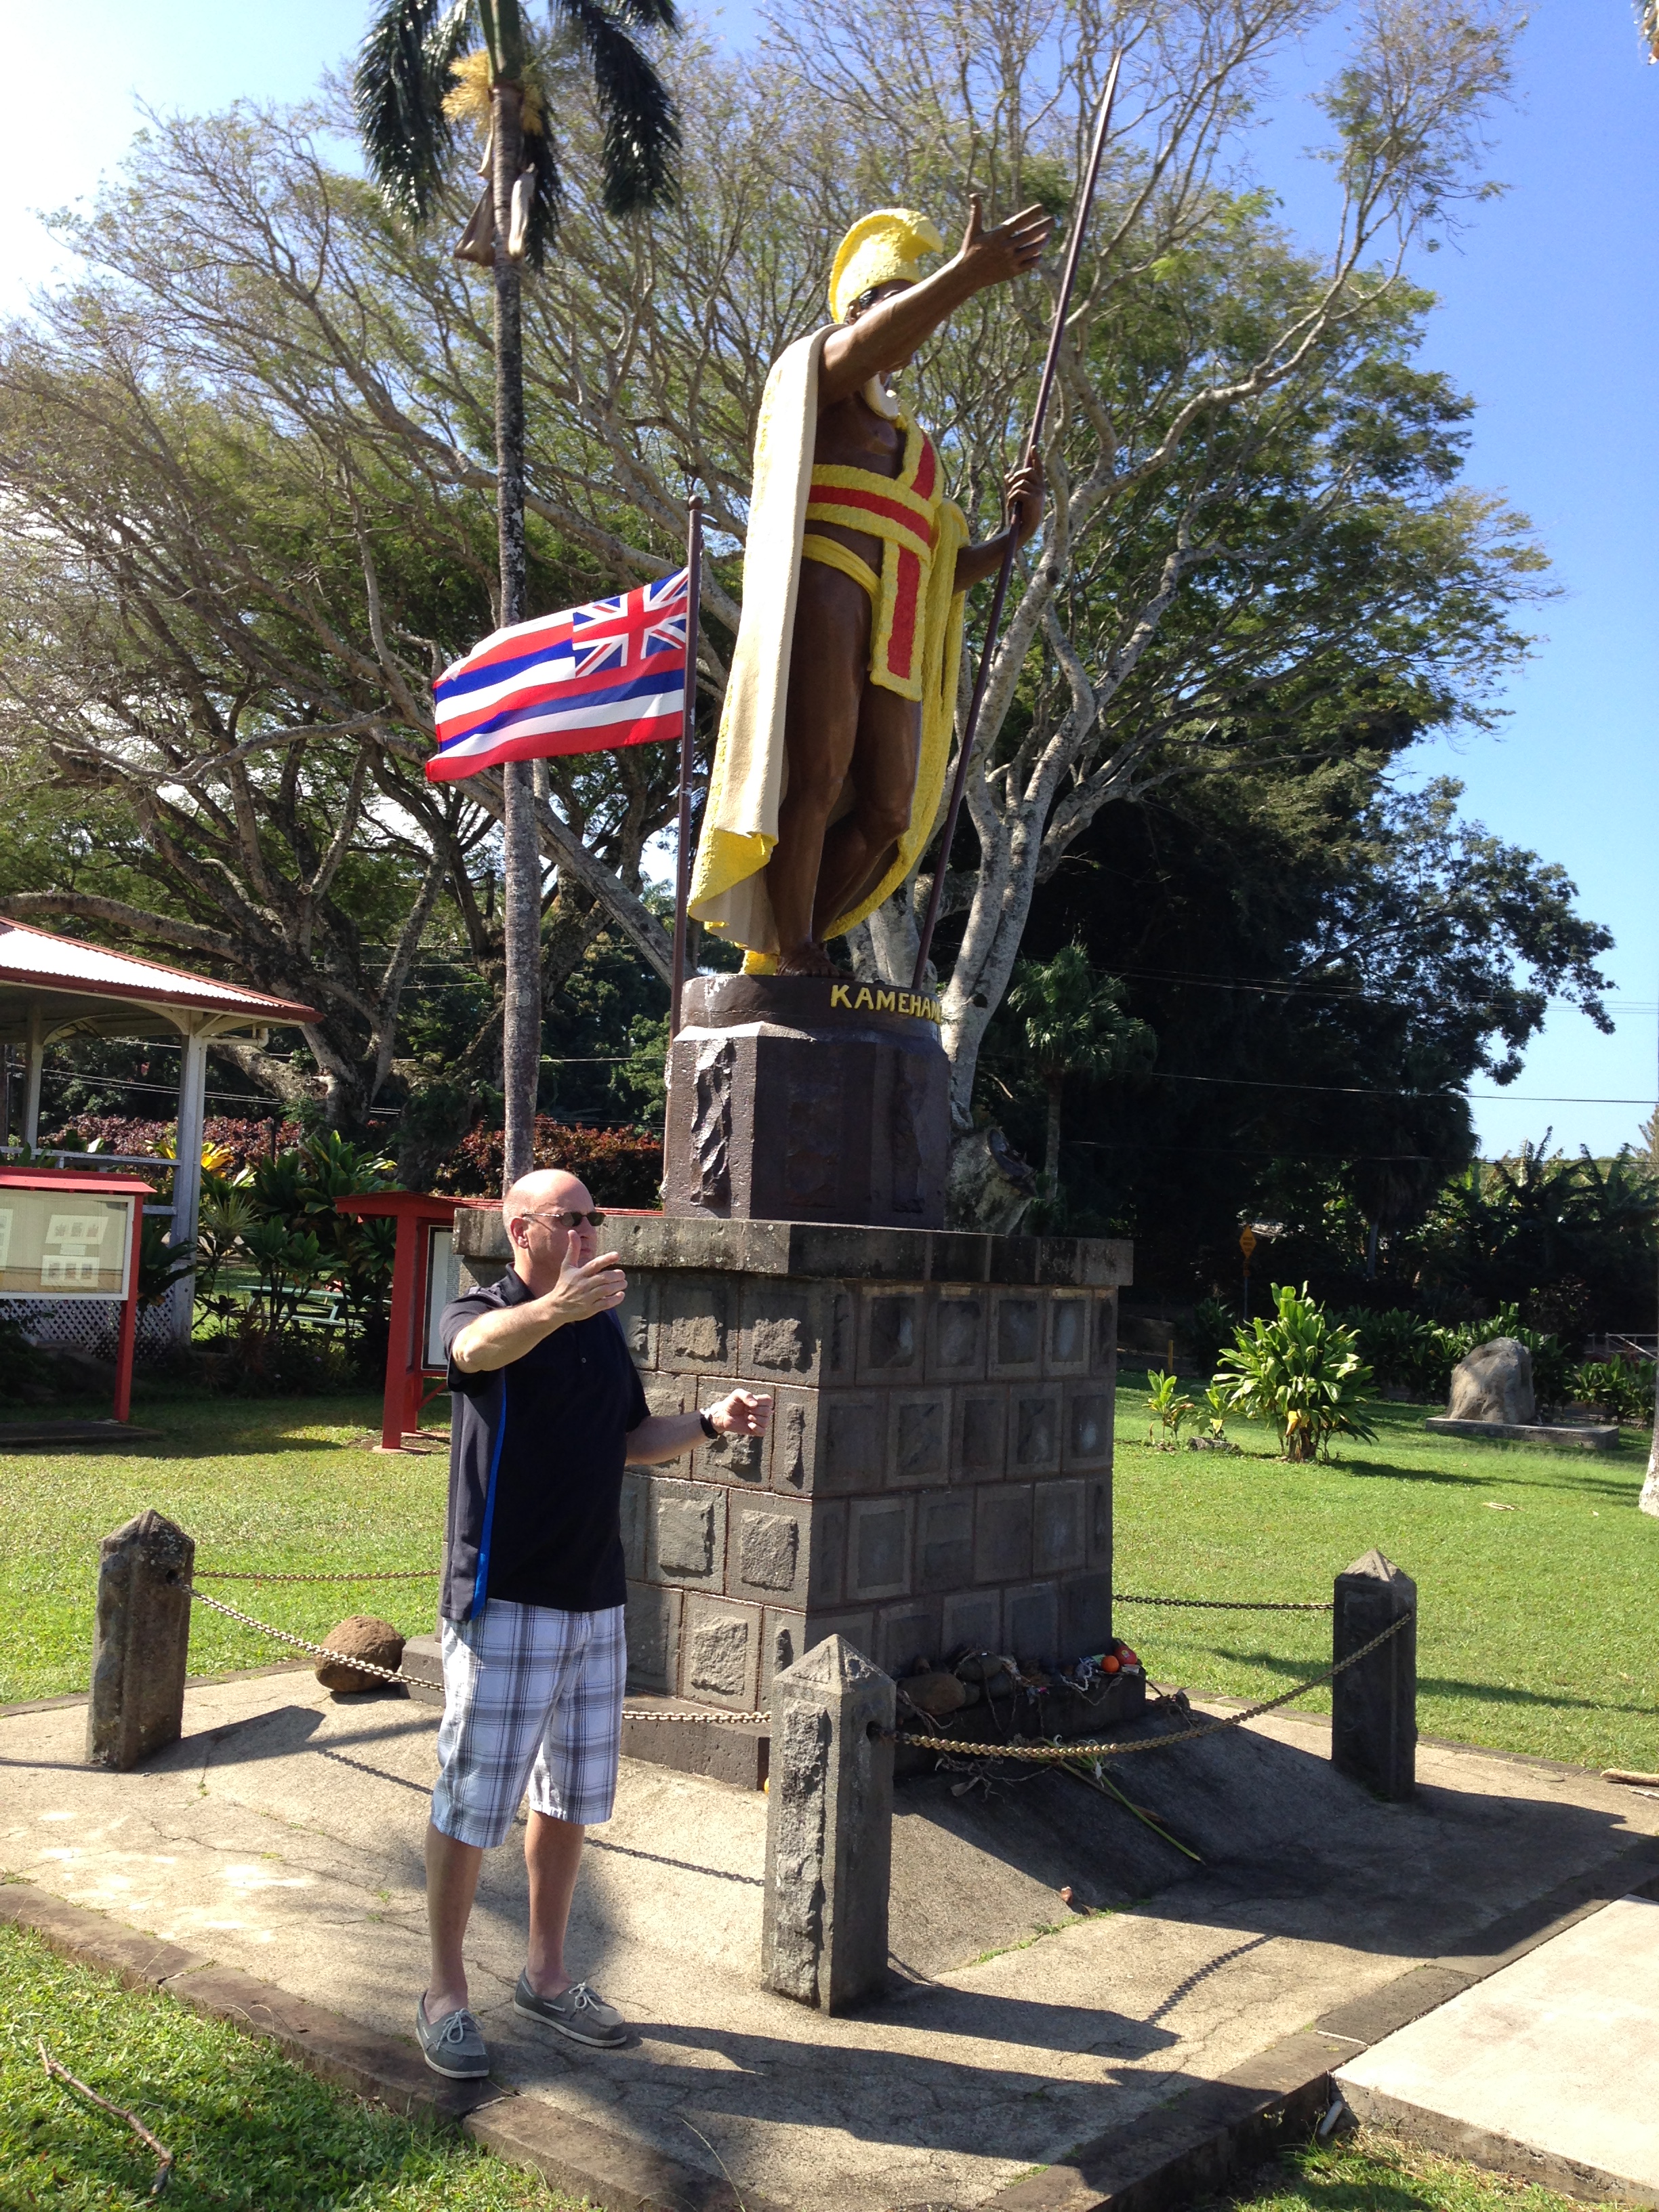
This is the original statue of King Kamehameha, commissioned and cast in 1878. The King’s birthplace is near here. He united the Hawaiian Islands in the 18th century. This statue is found in the little village of Kapa’au, at the northern end of the Big Island.

Kapa'au, Hawaii

The little village of Kapa’au in North Kohala, a town that doesn’t feel like it’s changed much over the years.

Continuing a little further along the northern coast of the Big Island from Kapa’au, is Pololu Valley Lookout. Given the rugged terrain, you have to back track through Kapa’au to continue going south and east around the island.

Pololu Valley Lookout, Hawaii

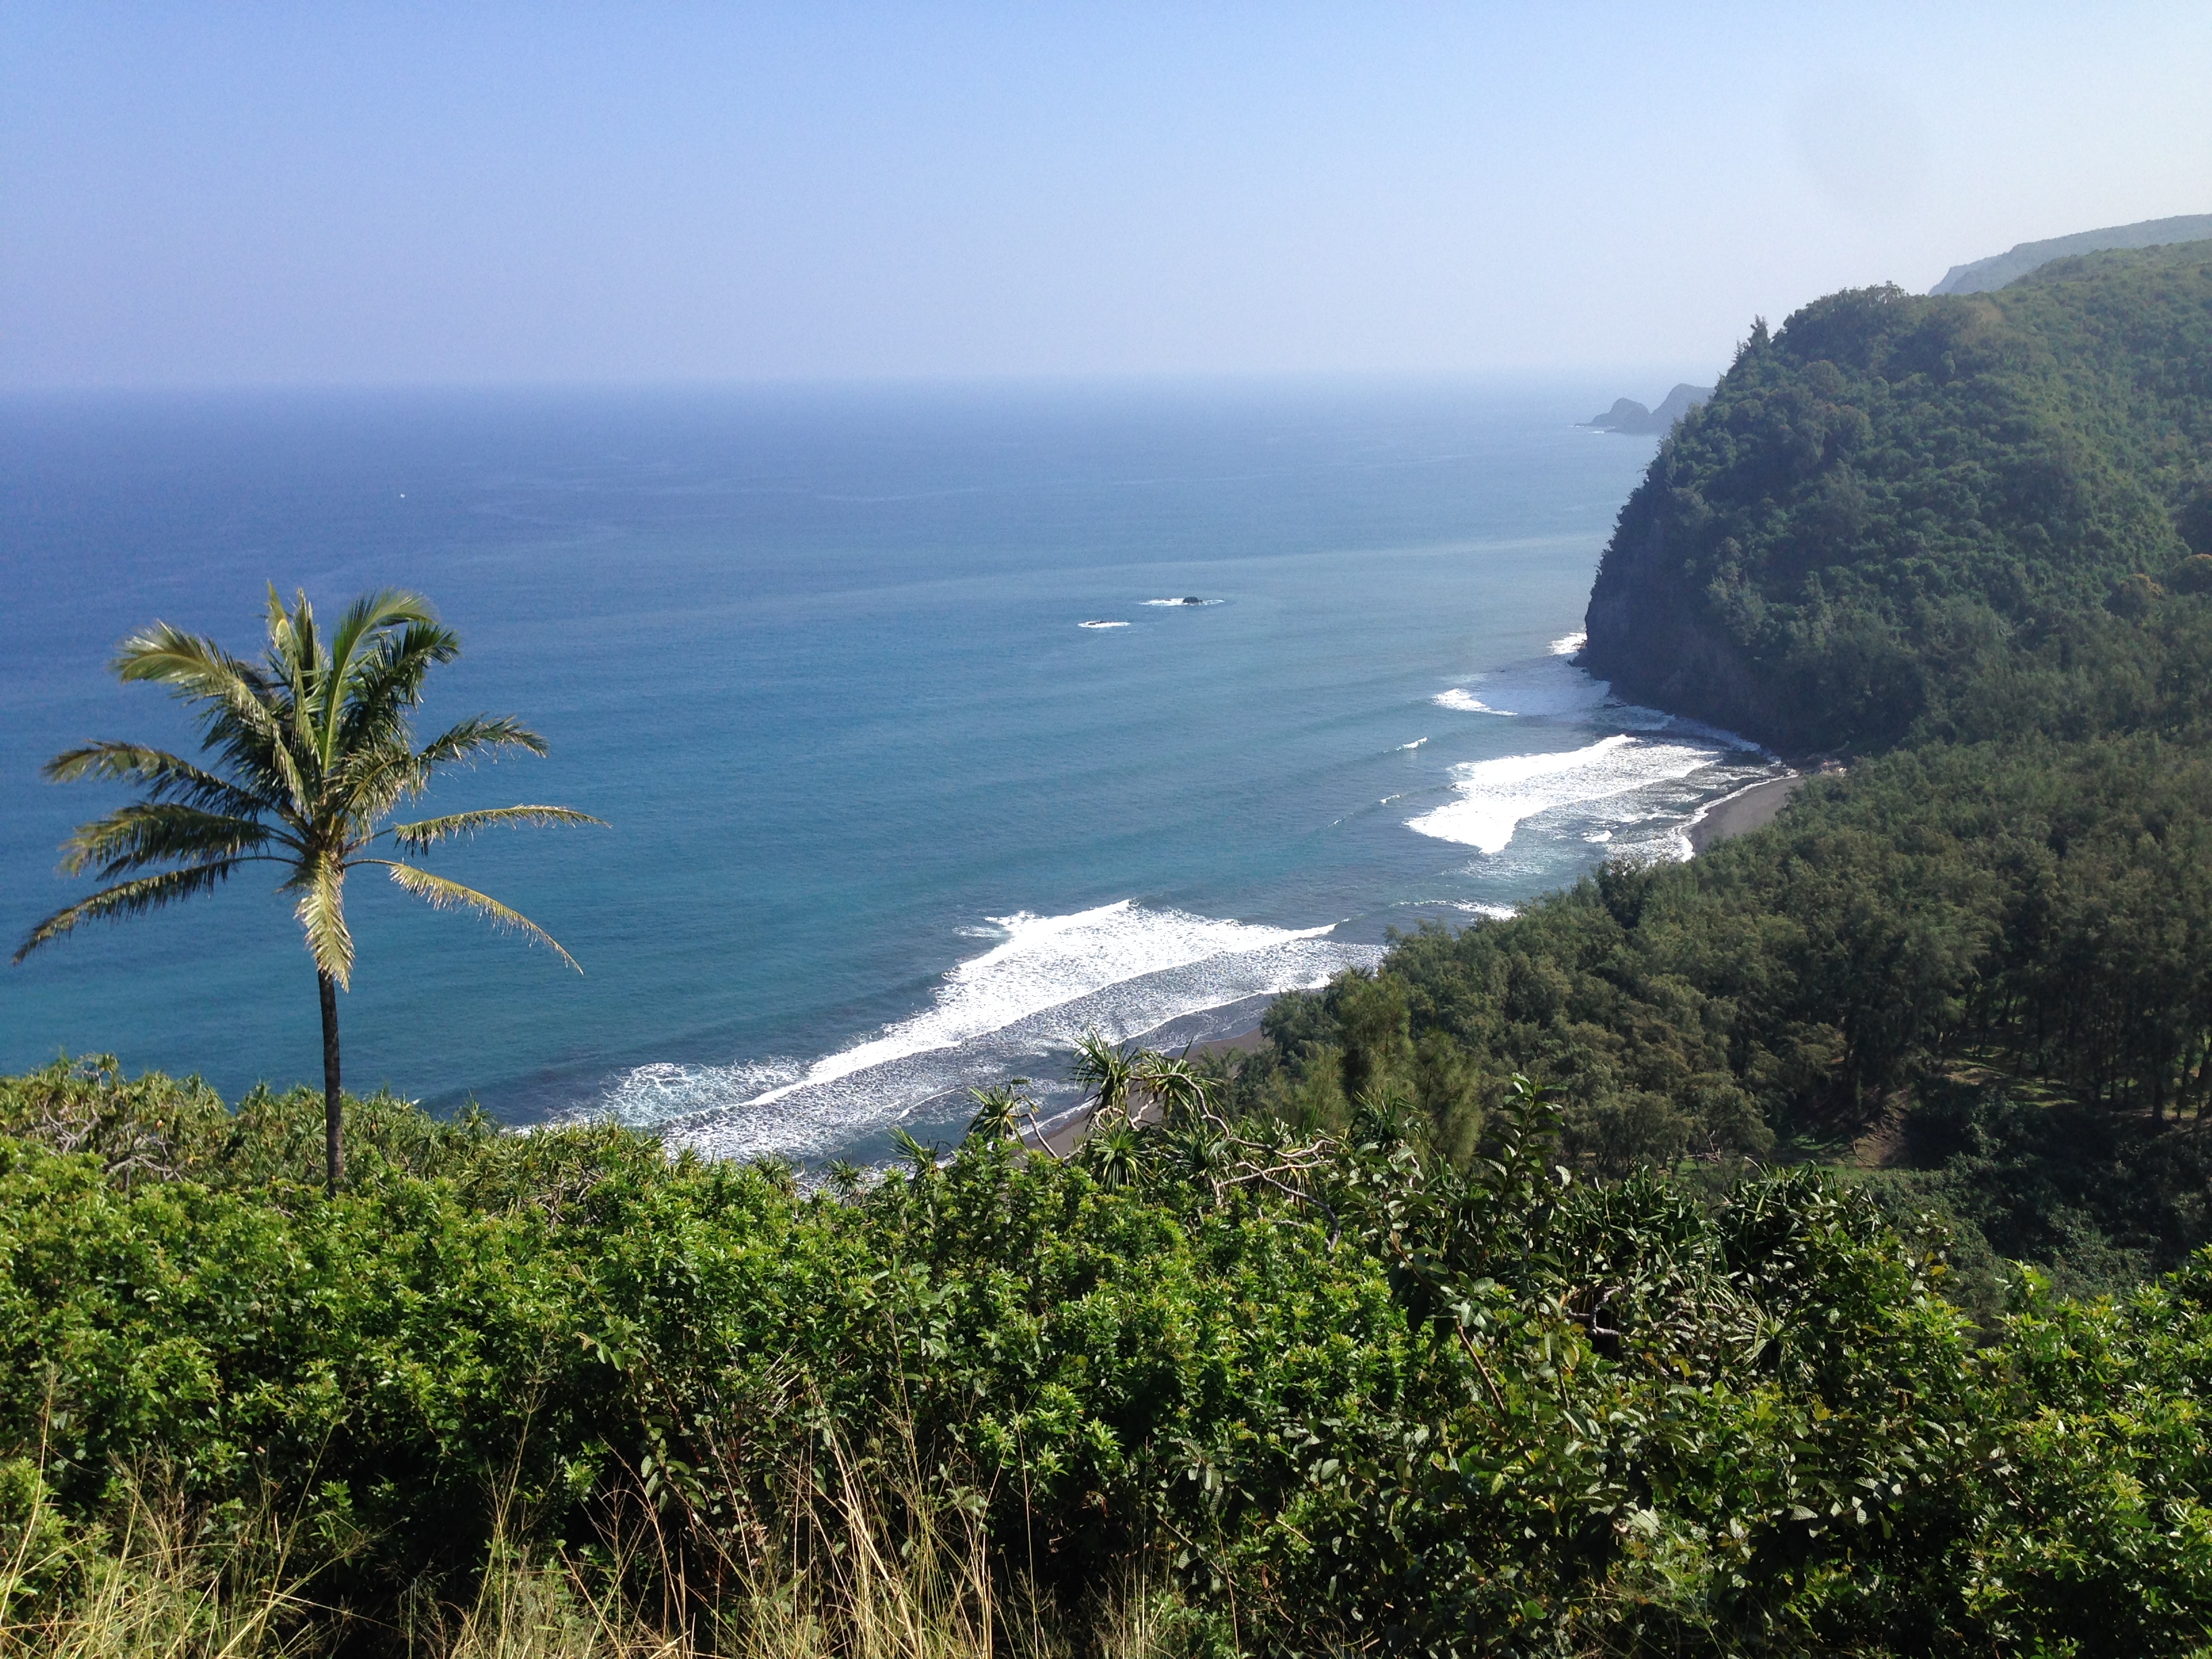
This is a view of Pololu Valley Lookout, just east of the town of Kapa’au. There is a steep hike down to the black sand beach, it took us about 30 minutes to reach the shore.

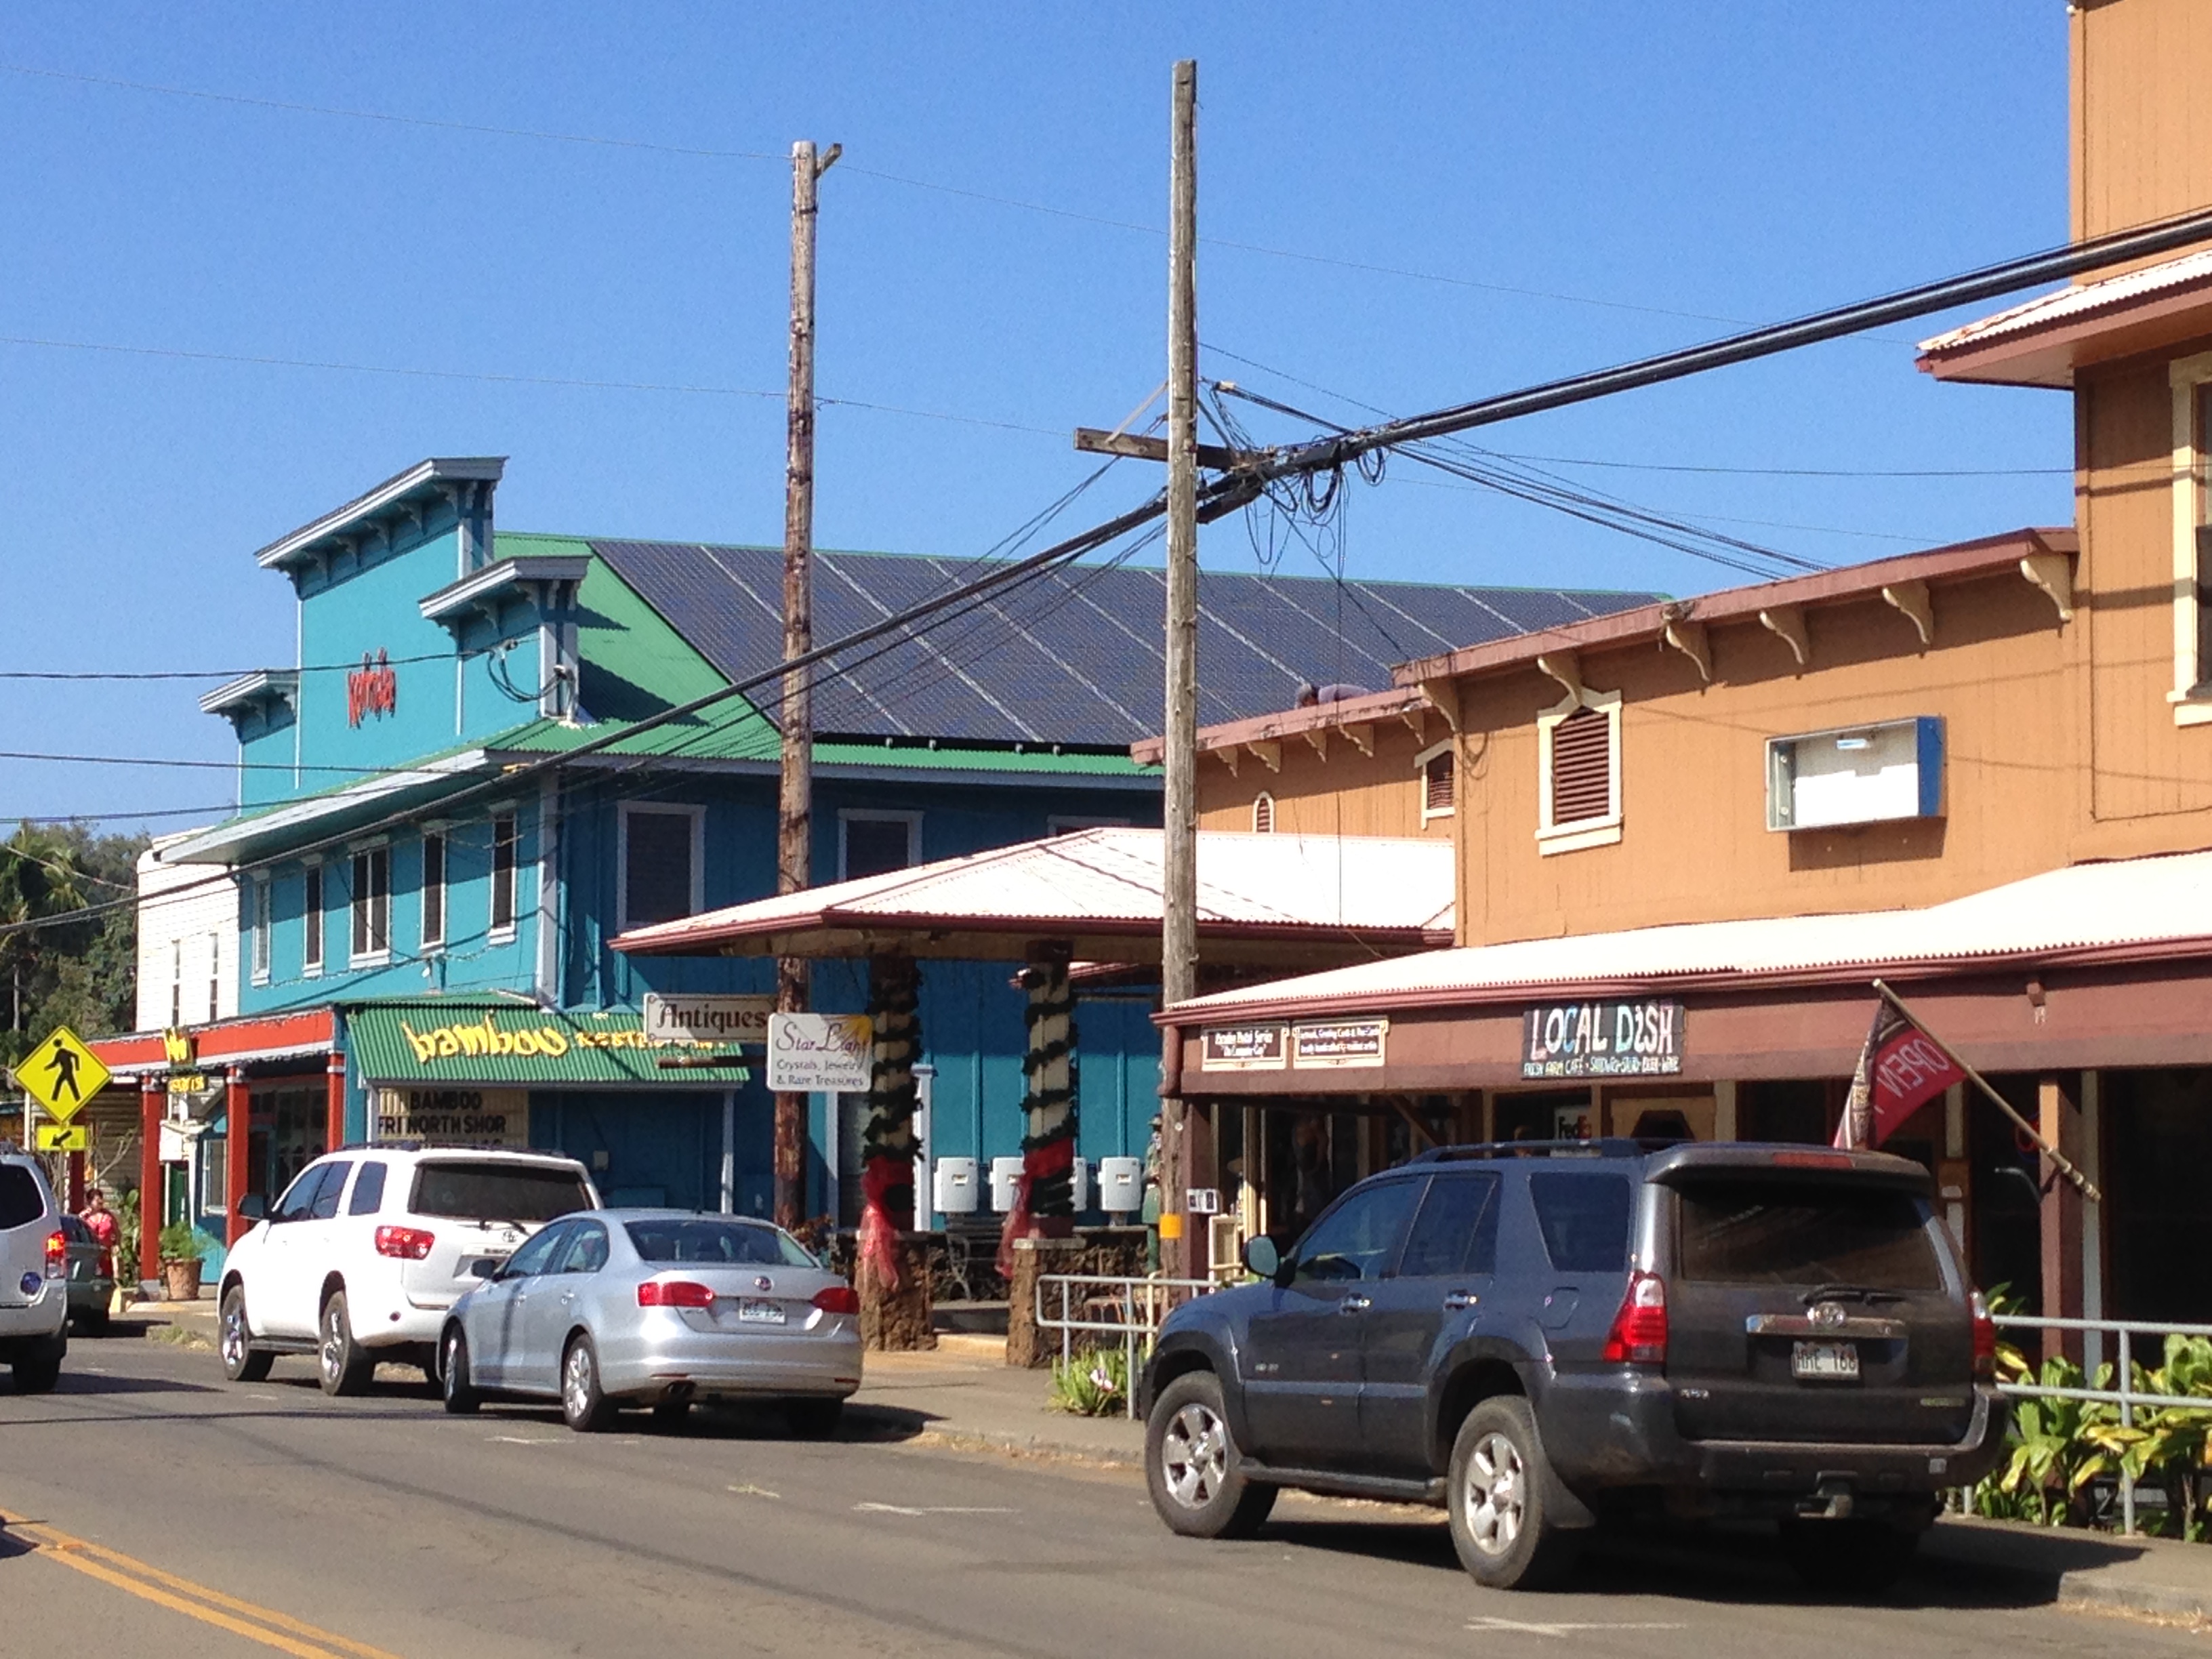
Going a little further east along the northern end of the Big Island from Kapa’au, is the village of Honoka’a and Waipi’o Lookout.

Honoka'a, Hawaii

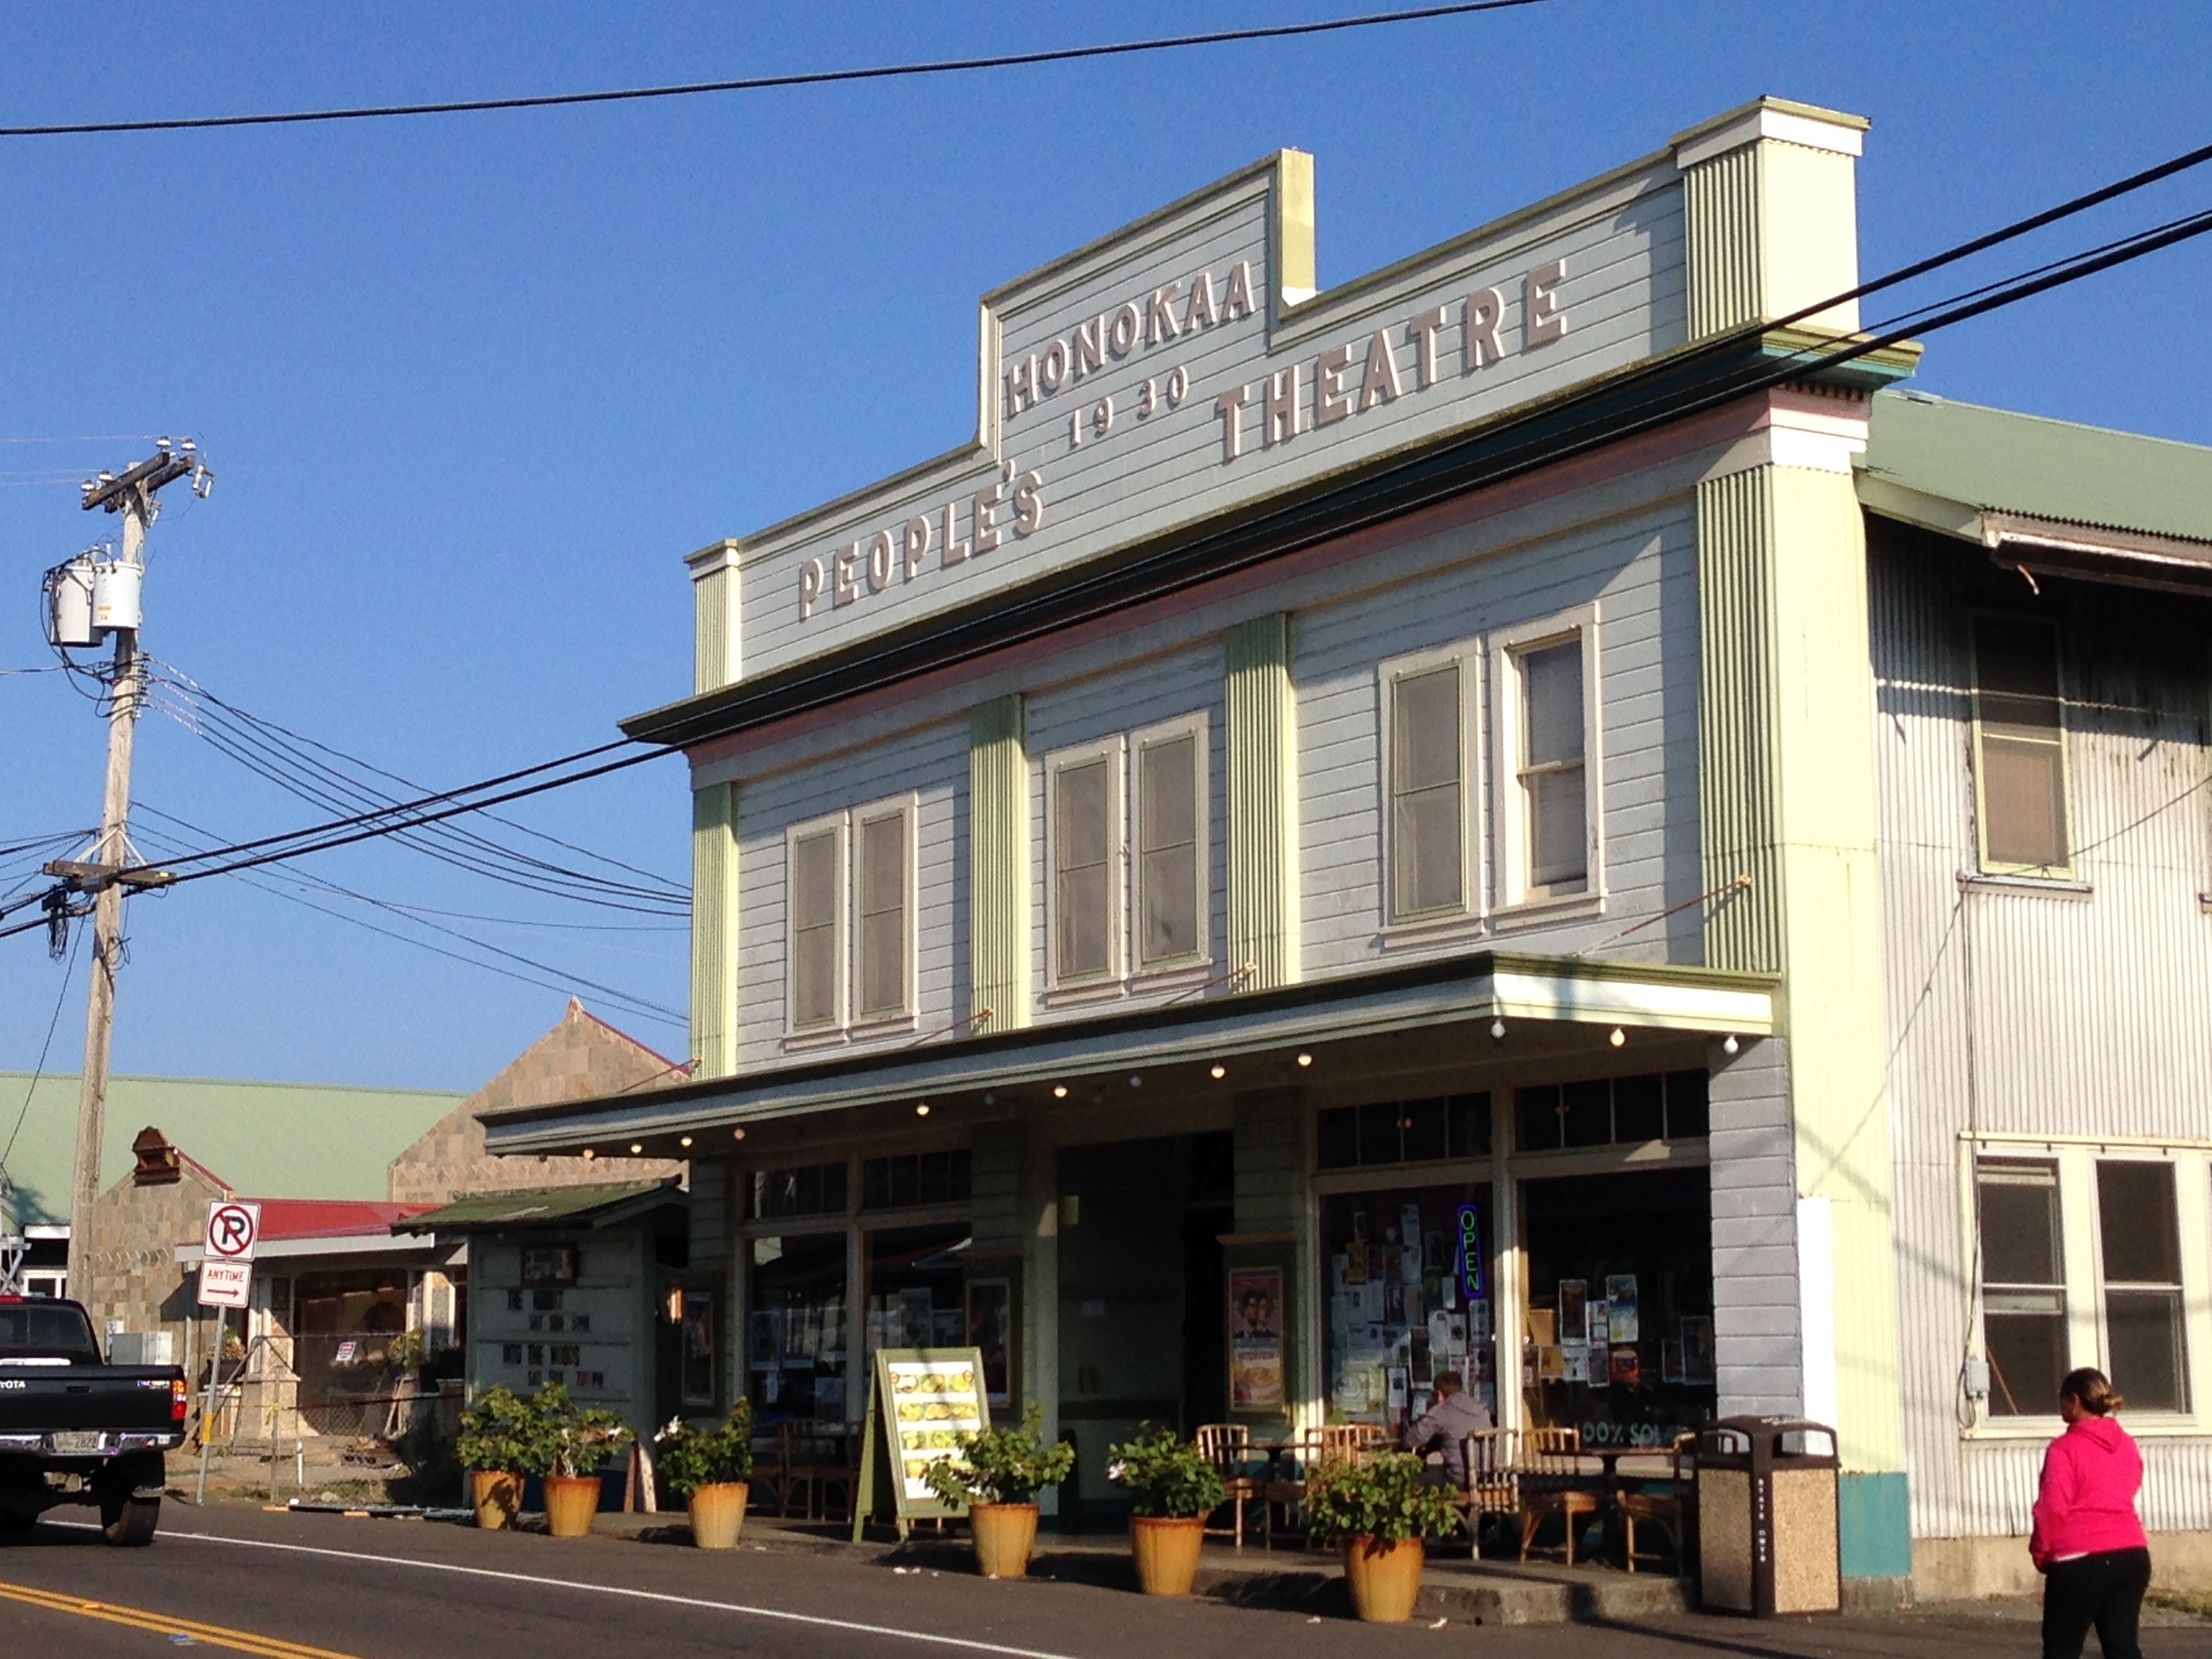
Downtown Honoka’a, the People’s Theater from 1930, a place that feels like old town Americana. With 525 seats, this theater presents films, concerts, dance recitals and classes.

Waipi'o Valley Lookout, Hawaii

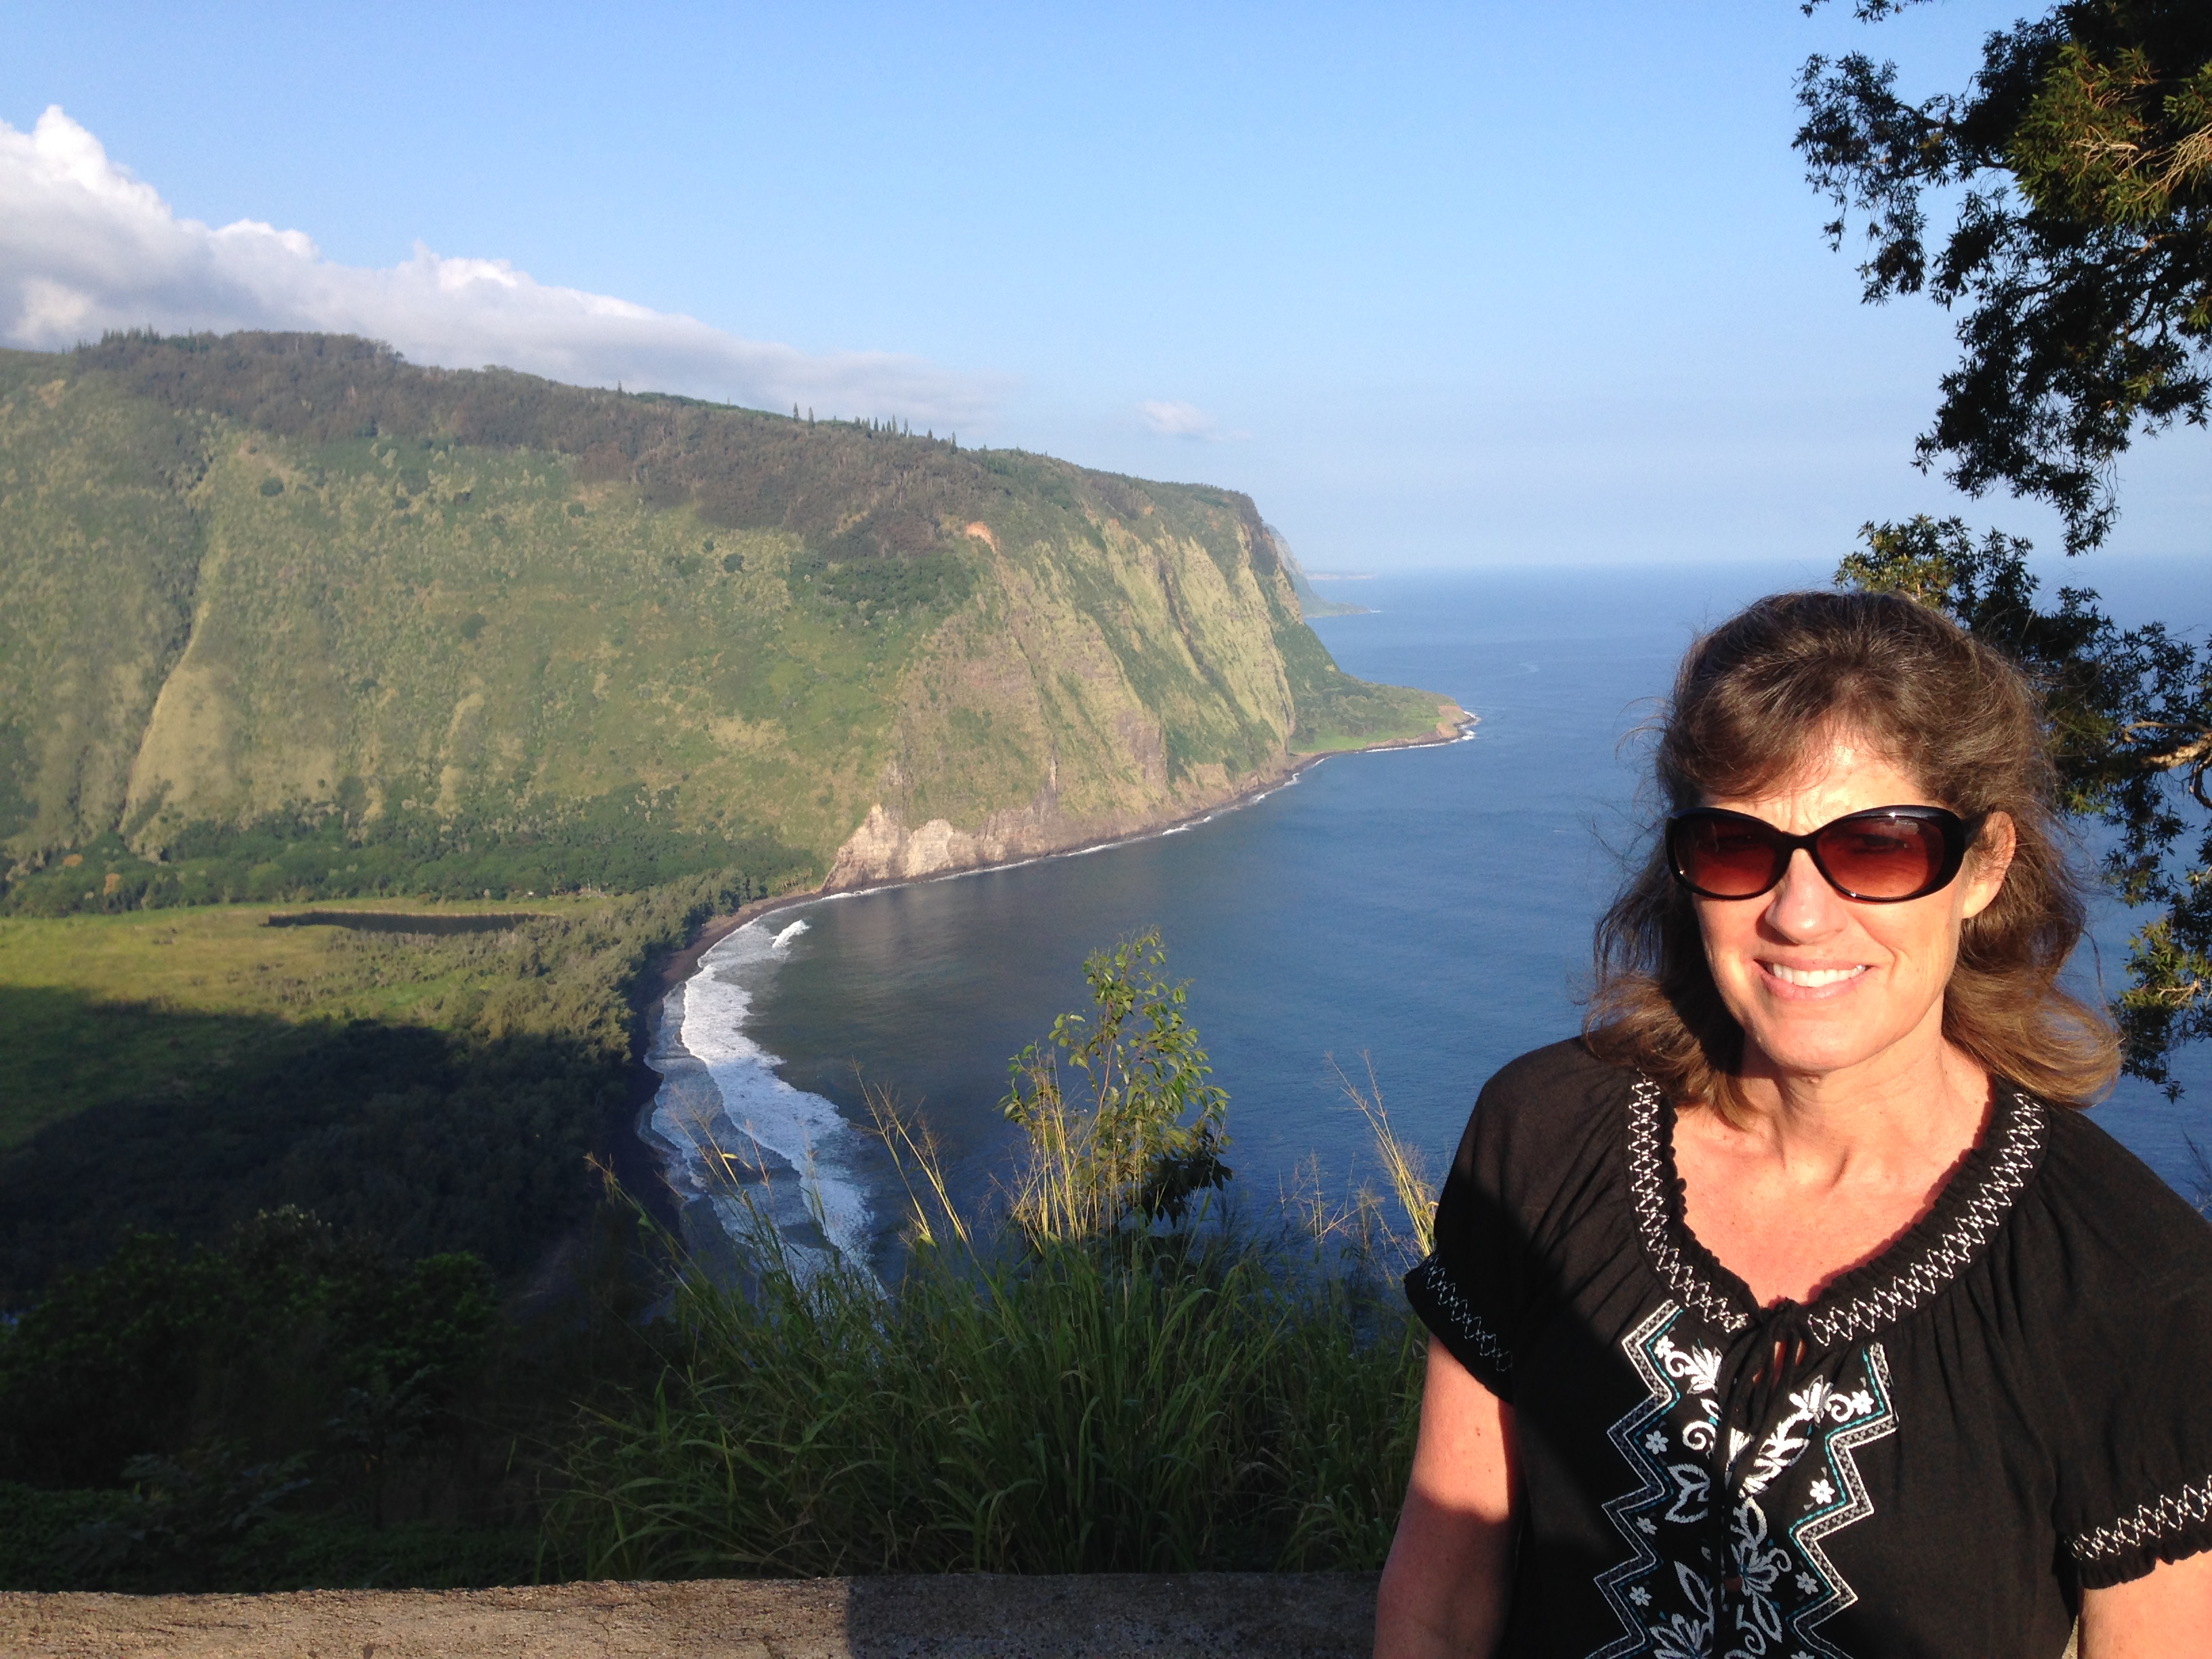
This is the Waipi’o Valley Lookout, near Honoka’a. The island has lots of deserted beaches, due to their limited accessibility.

South/West Coast

This section of the island is drier and is the “urban” center of the island, with most of the shopping and restaurants along this part of the coast, south of Kona airport.

Kailua-Kona, Hawaii

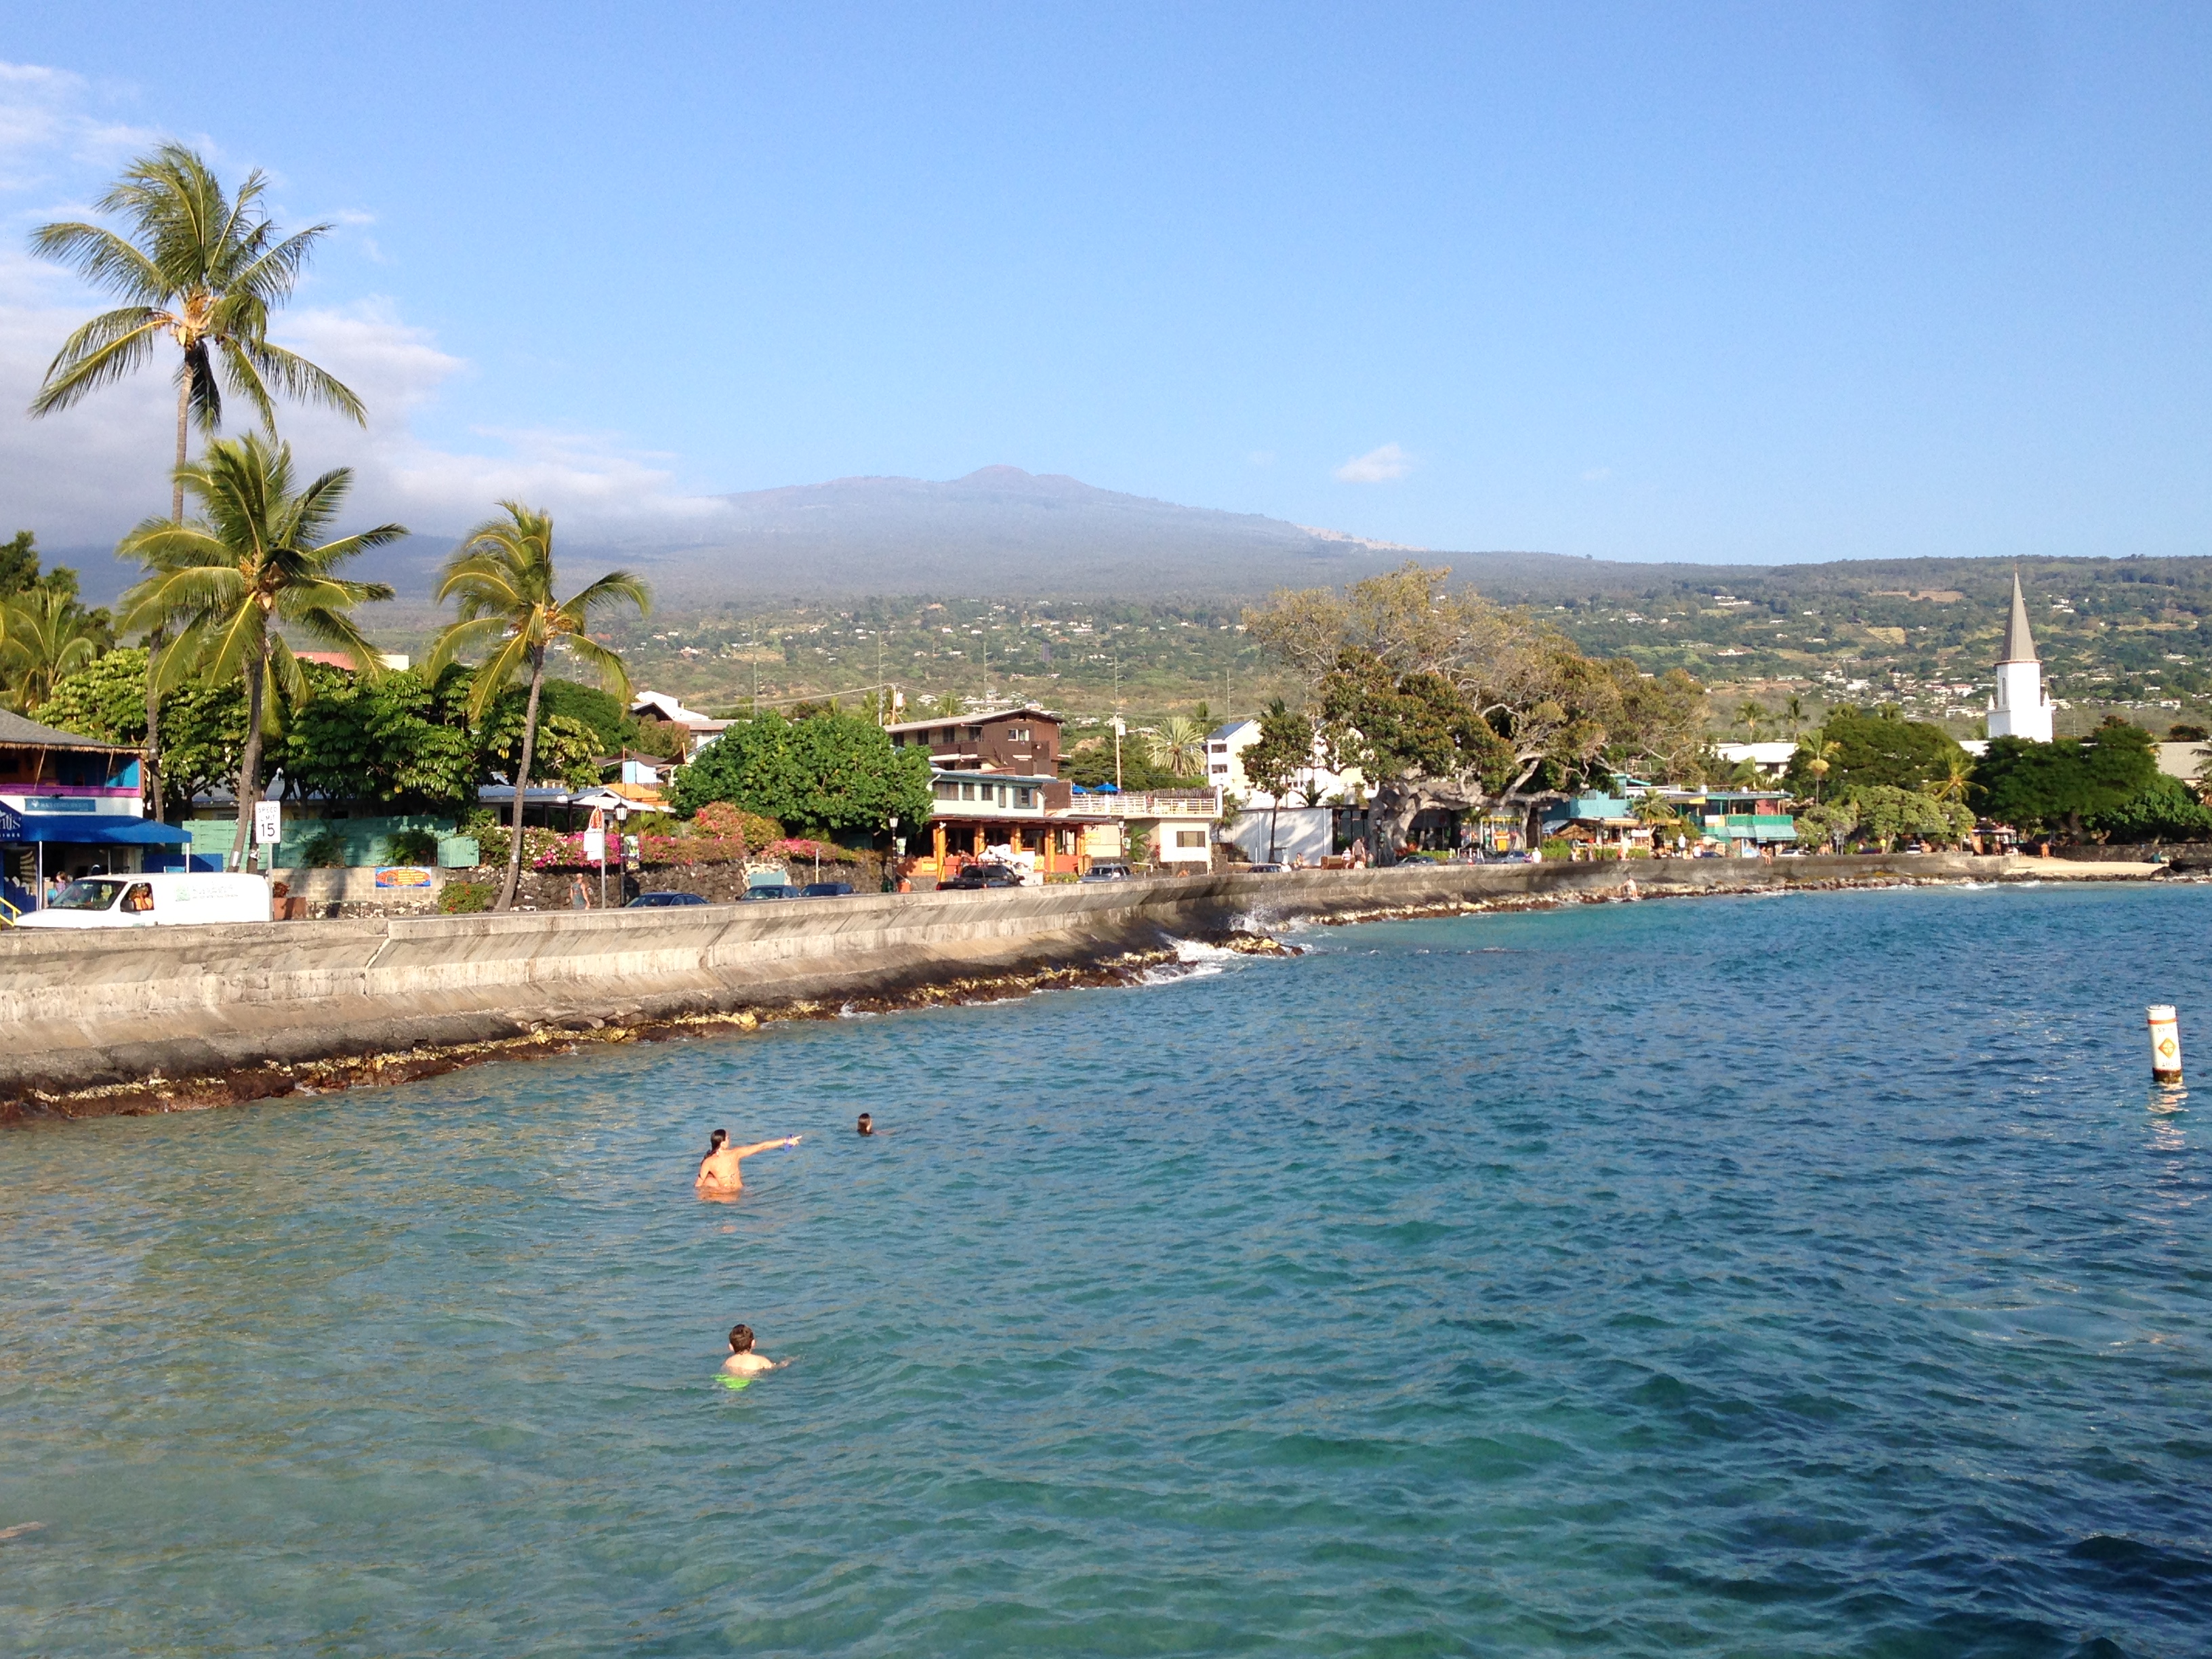
A view of Kailua-Kona area, the main center for services and shopping on the Big Island’s west coast. There isn’t much of a “downtown”, just a series of small shopping centers and neighborhoods stretching for miles along the coast.

Honaunau – Saint Benedict’s Painted Church

As you continue south for Kailua-Kona area, you come across some other interesting sights.

Saint Benedict's Painted Church, Honaunau, Hawaii.

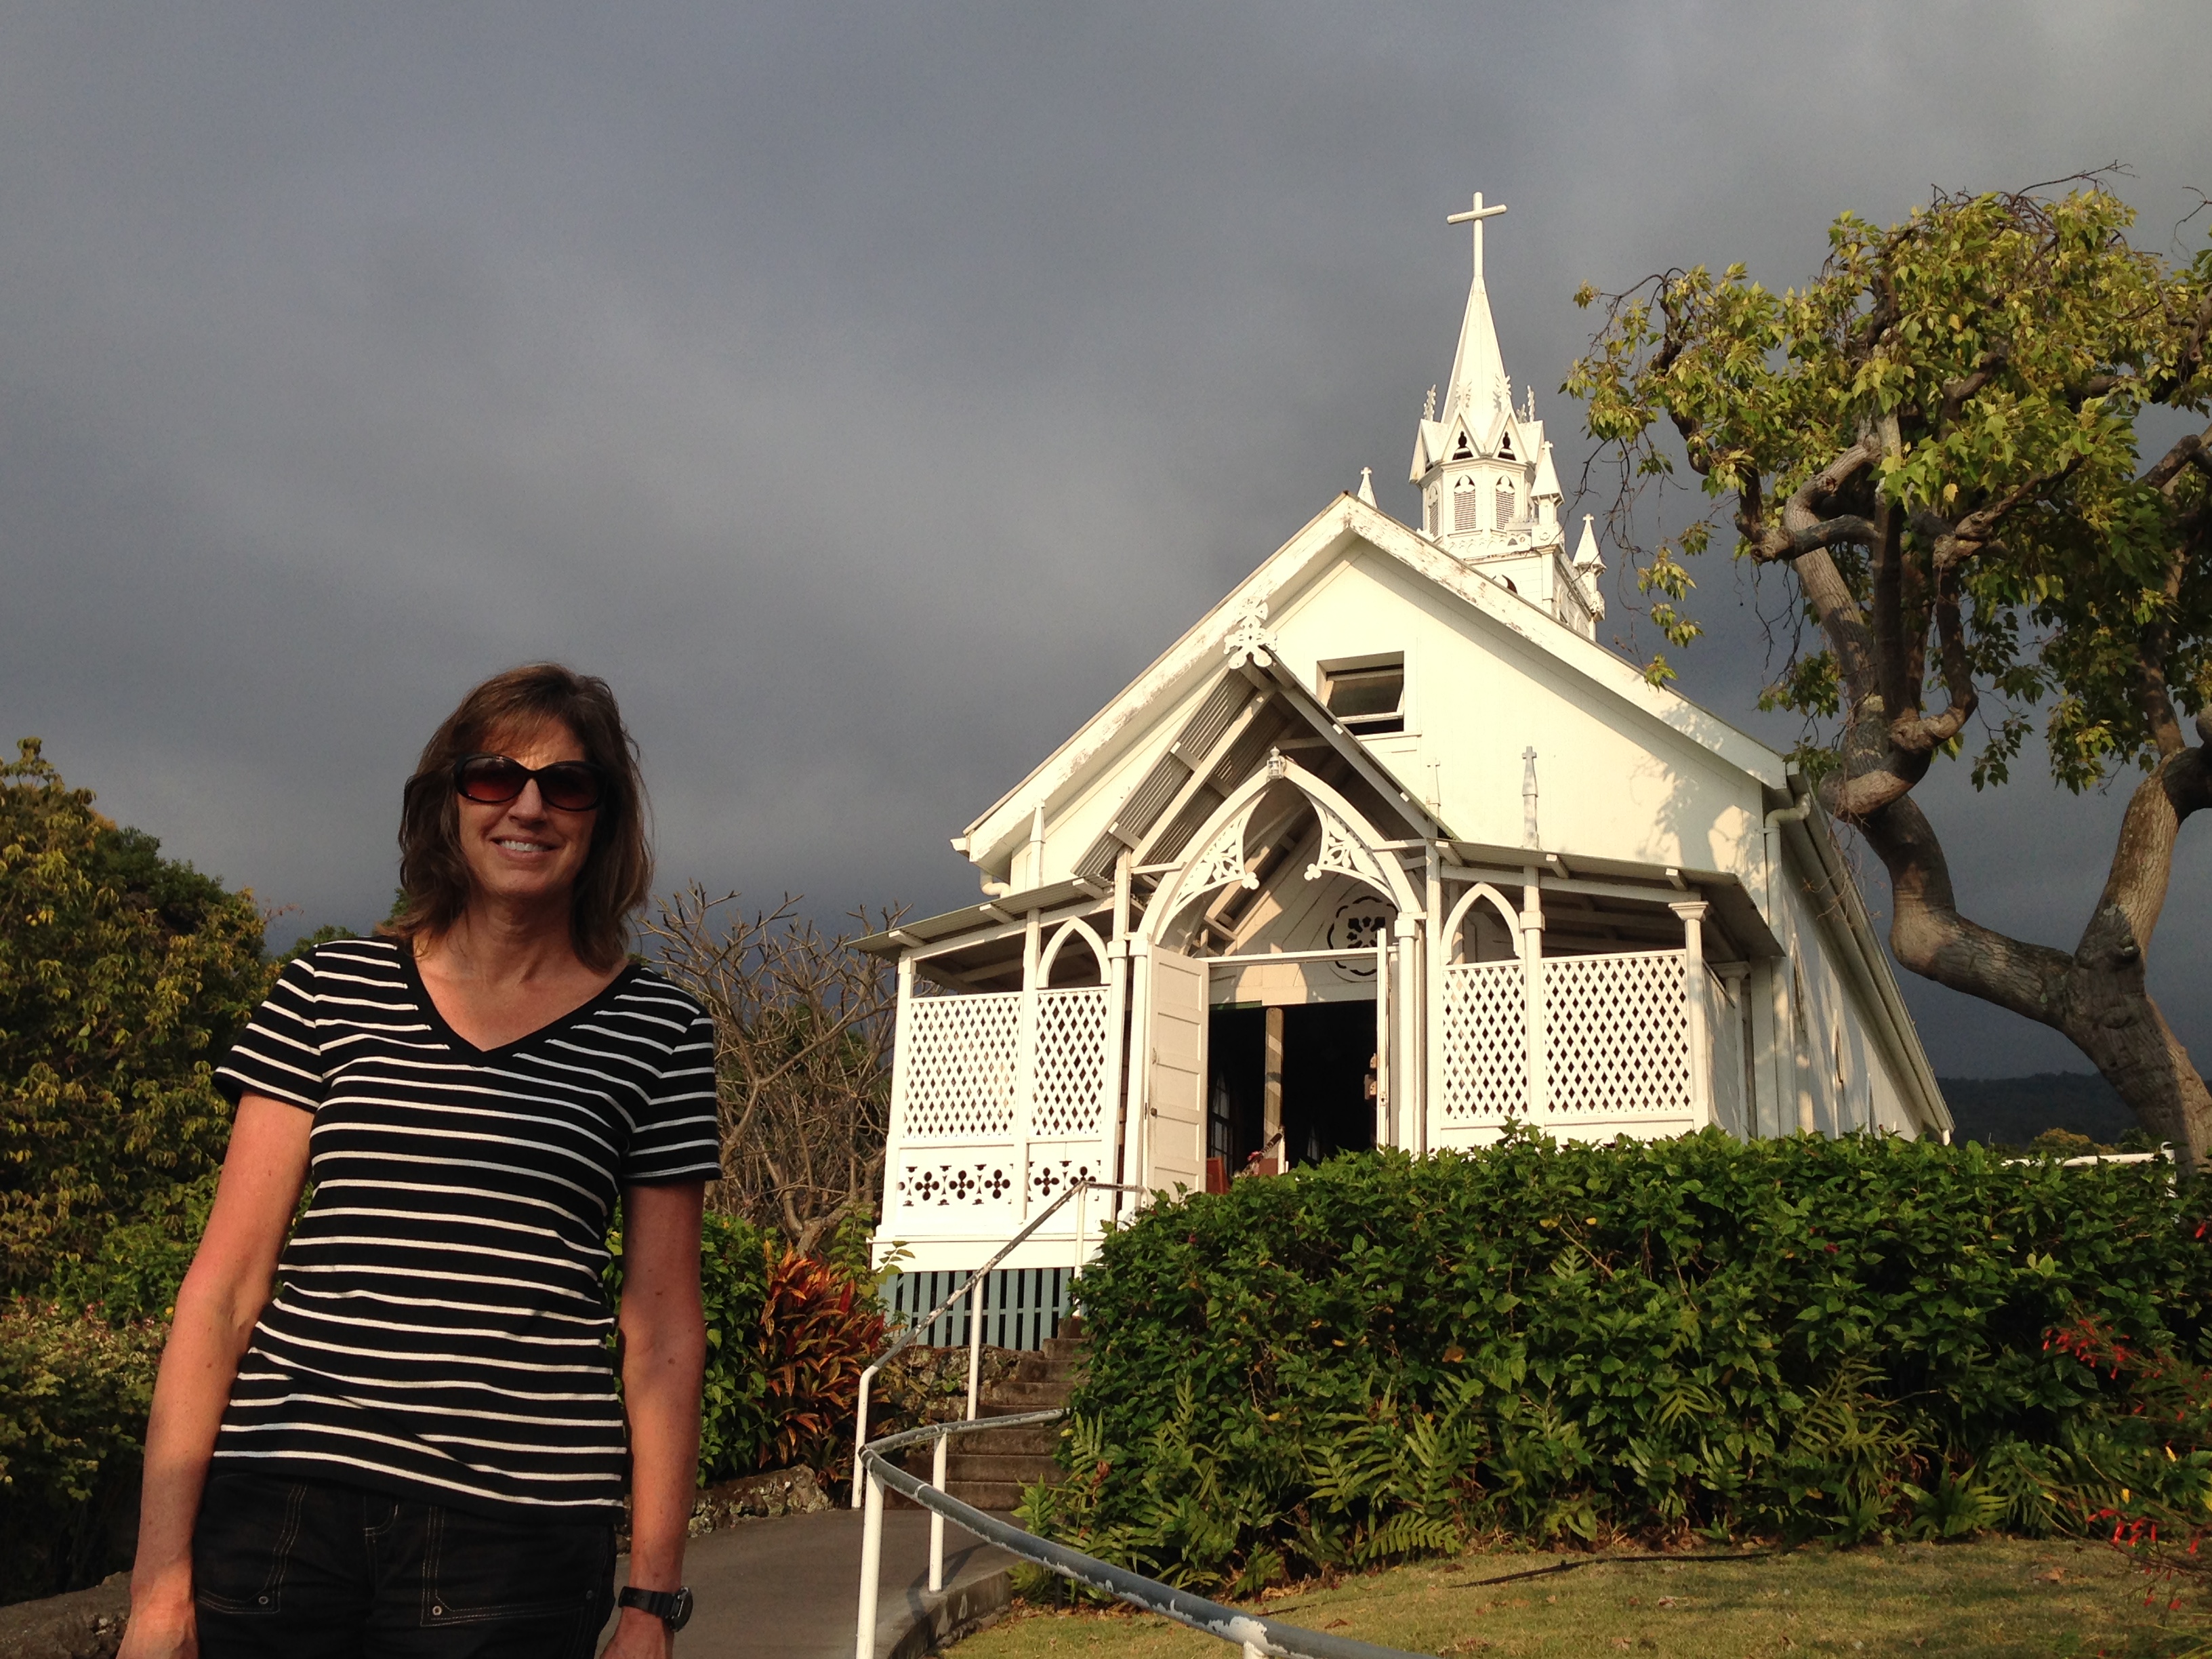
We visited this little church in the town of Honaunau, south of Kailua-Kona, known as Saint Benedict’s Painted Church.

Saint Benedict's Painted Church, Honaunau, Hawaii

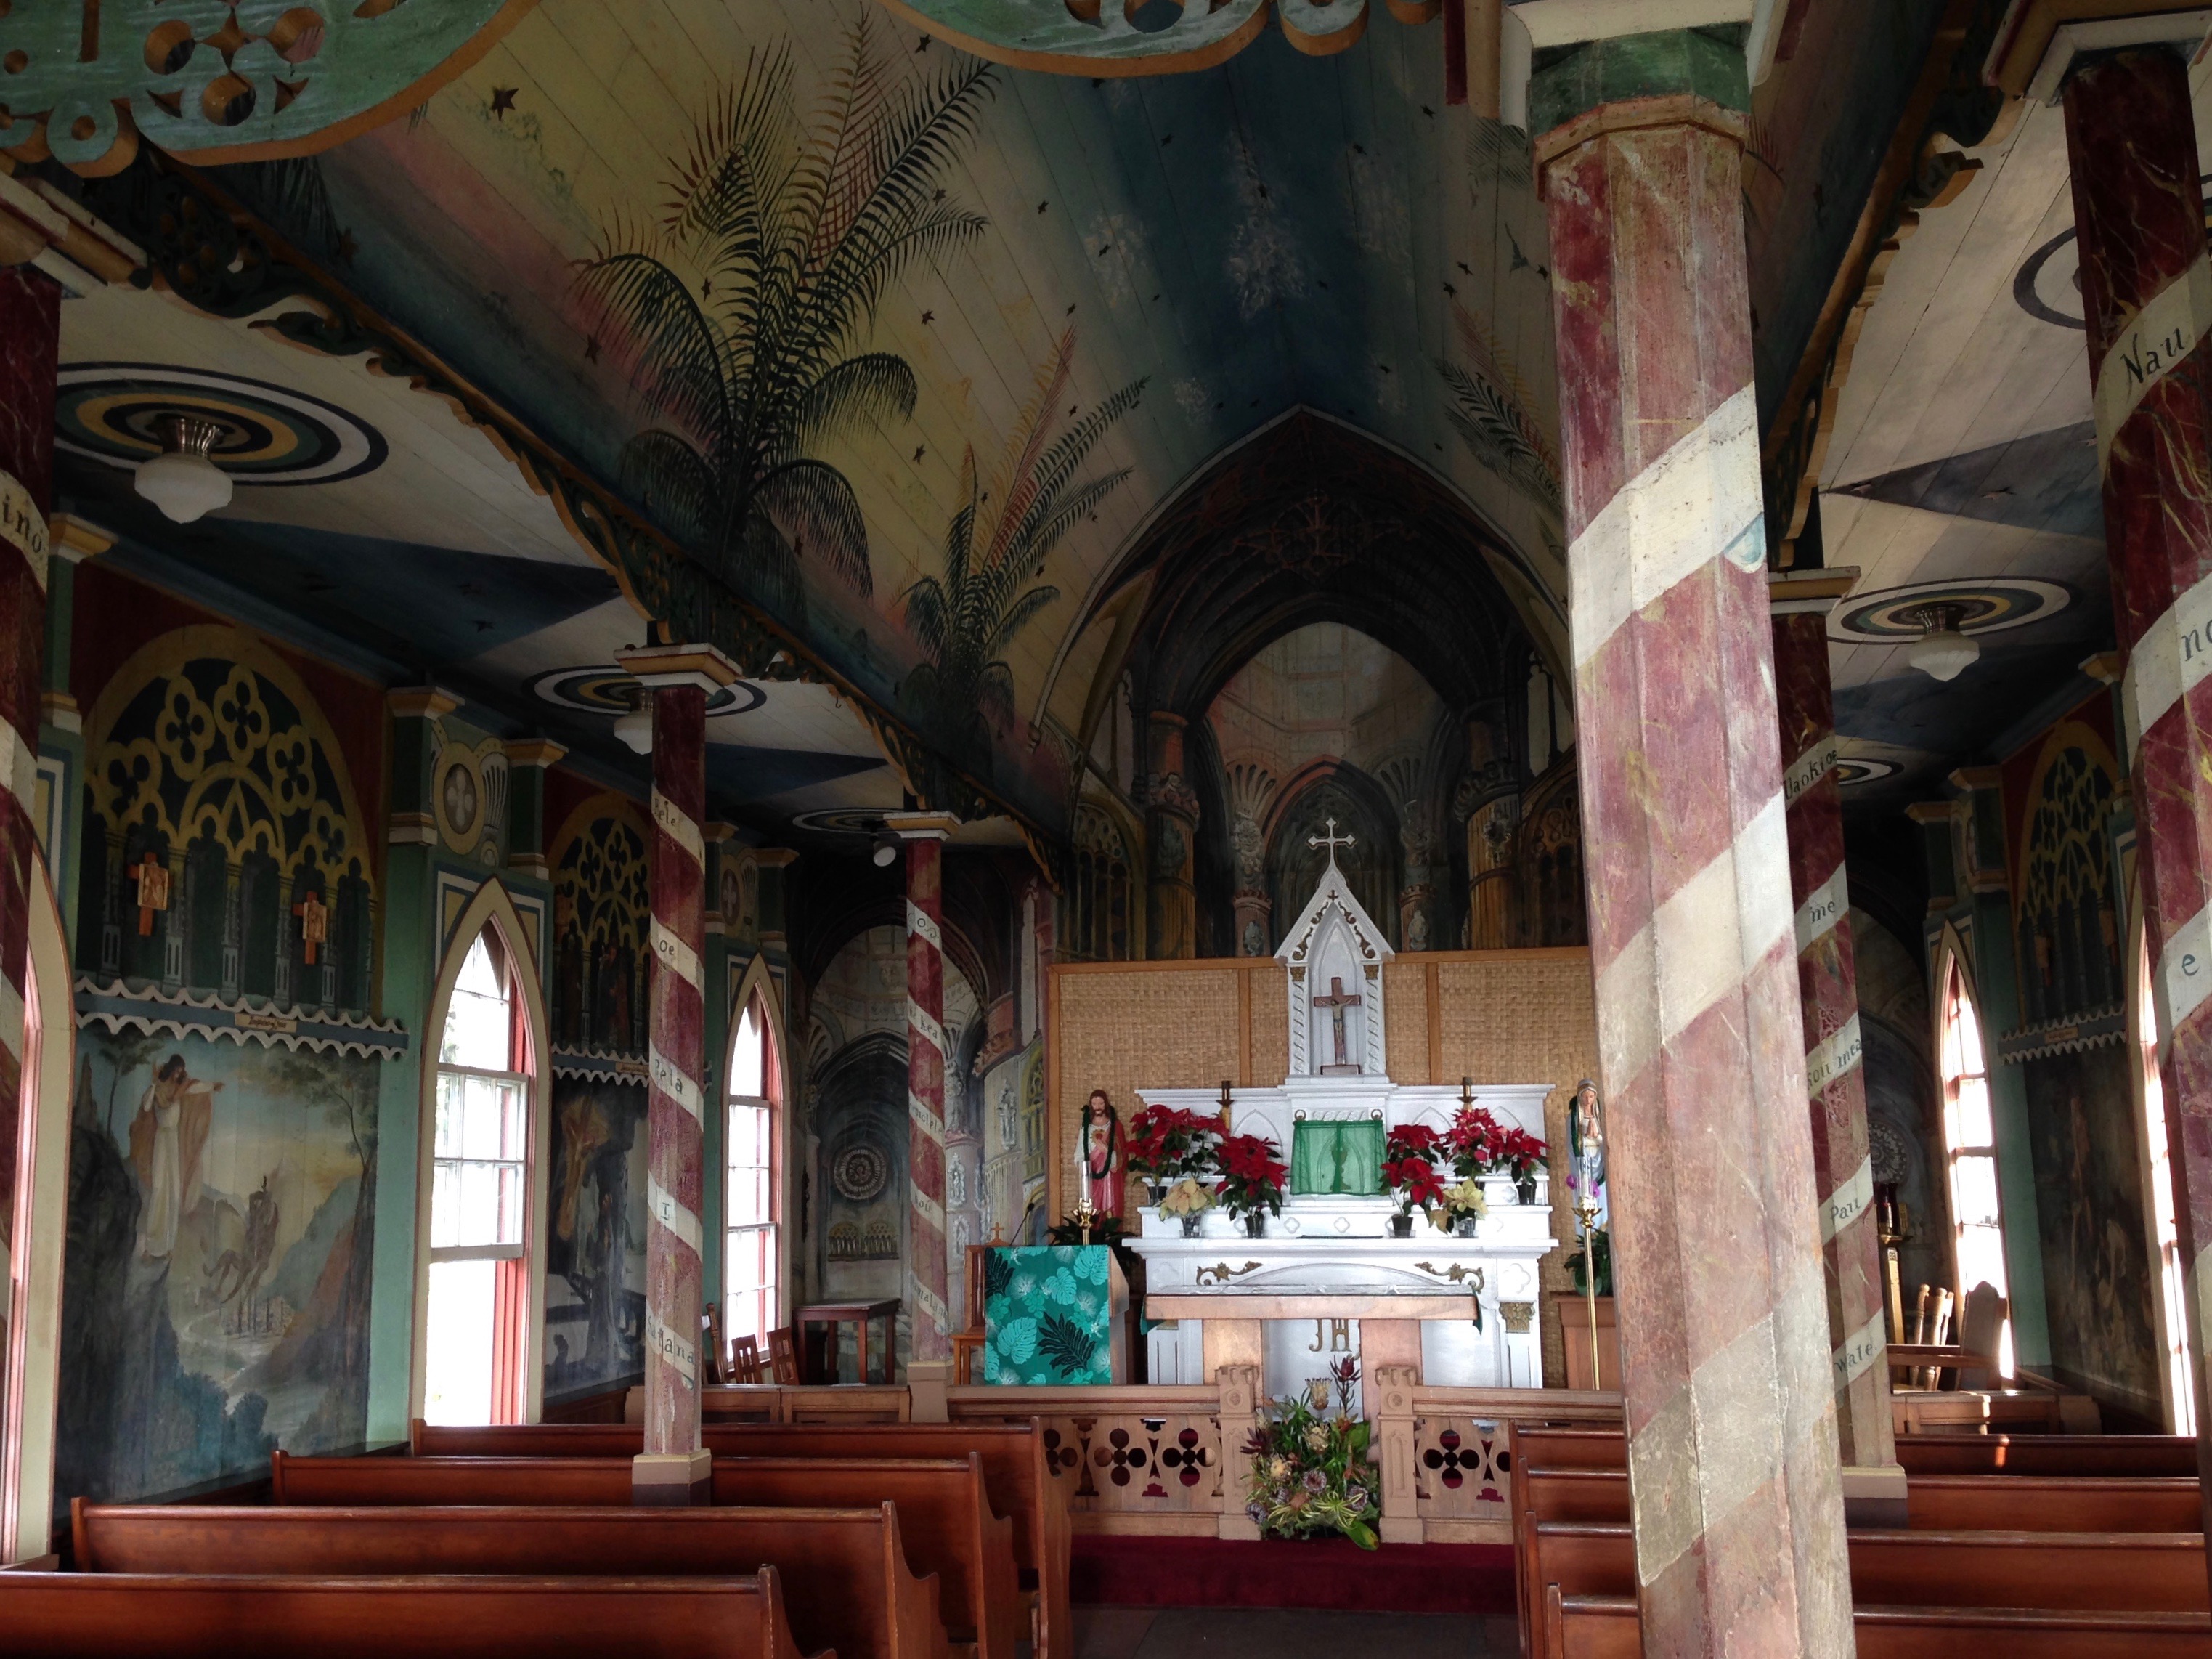
The interior of Saint Benedict’s was painted right around the end of the 19th century. A Belgian priest used the biblical scenes to teach the natives who could not read. The interior reminded me a bit of the Scandinavian painted churches we have seen during our other travels.

Pu’uhonua O Honaunau National Historical Park

Don’t ask me to pronounce the name of this Park, but this is an interesting sight right on the coast and a very sacred spot to Hawaiian natives. It was where Hawaiian royalty lived and it now serves as a historical educational park. This park is just due west from the Painted Church above.

Pu'uhonua O Honaunau National Historic Site, Hawaii

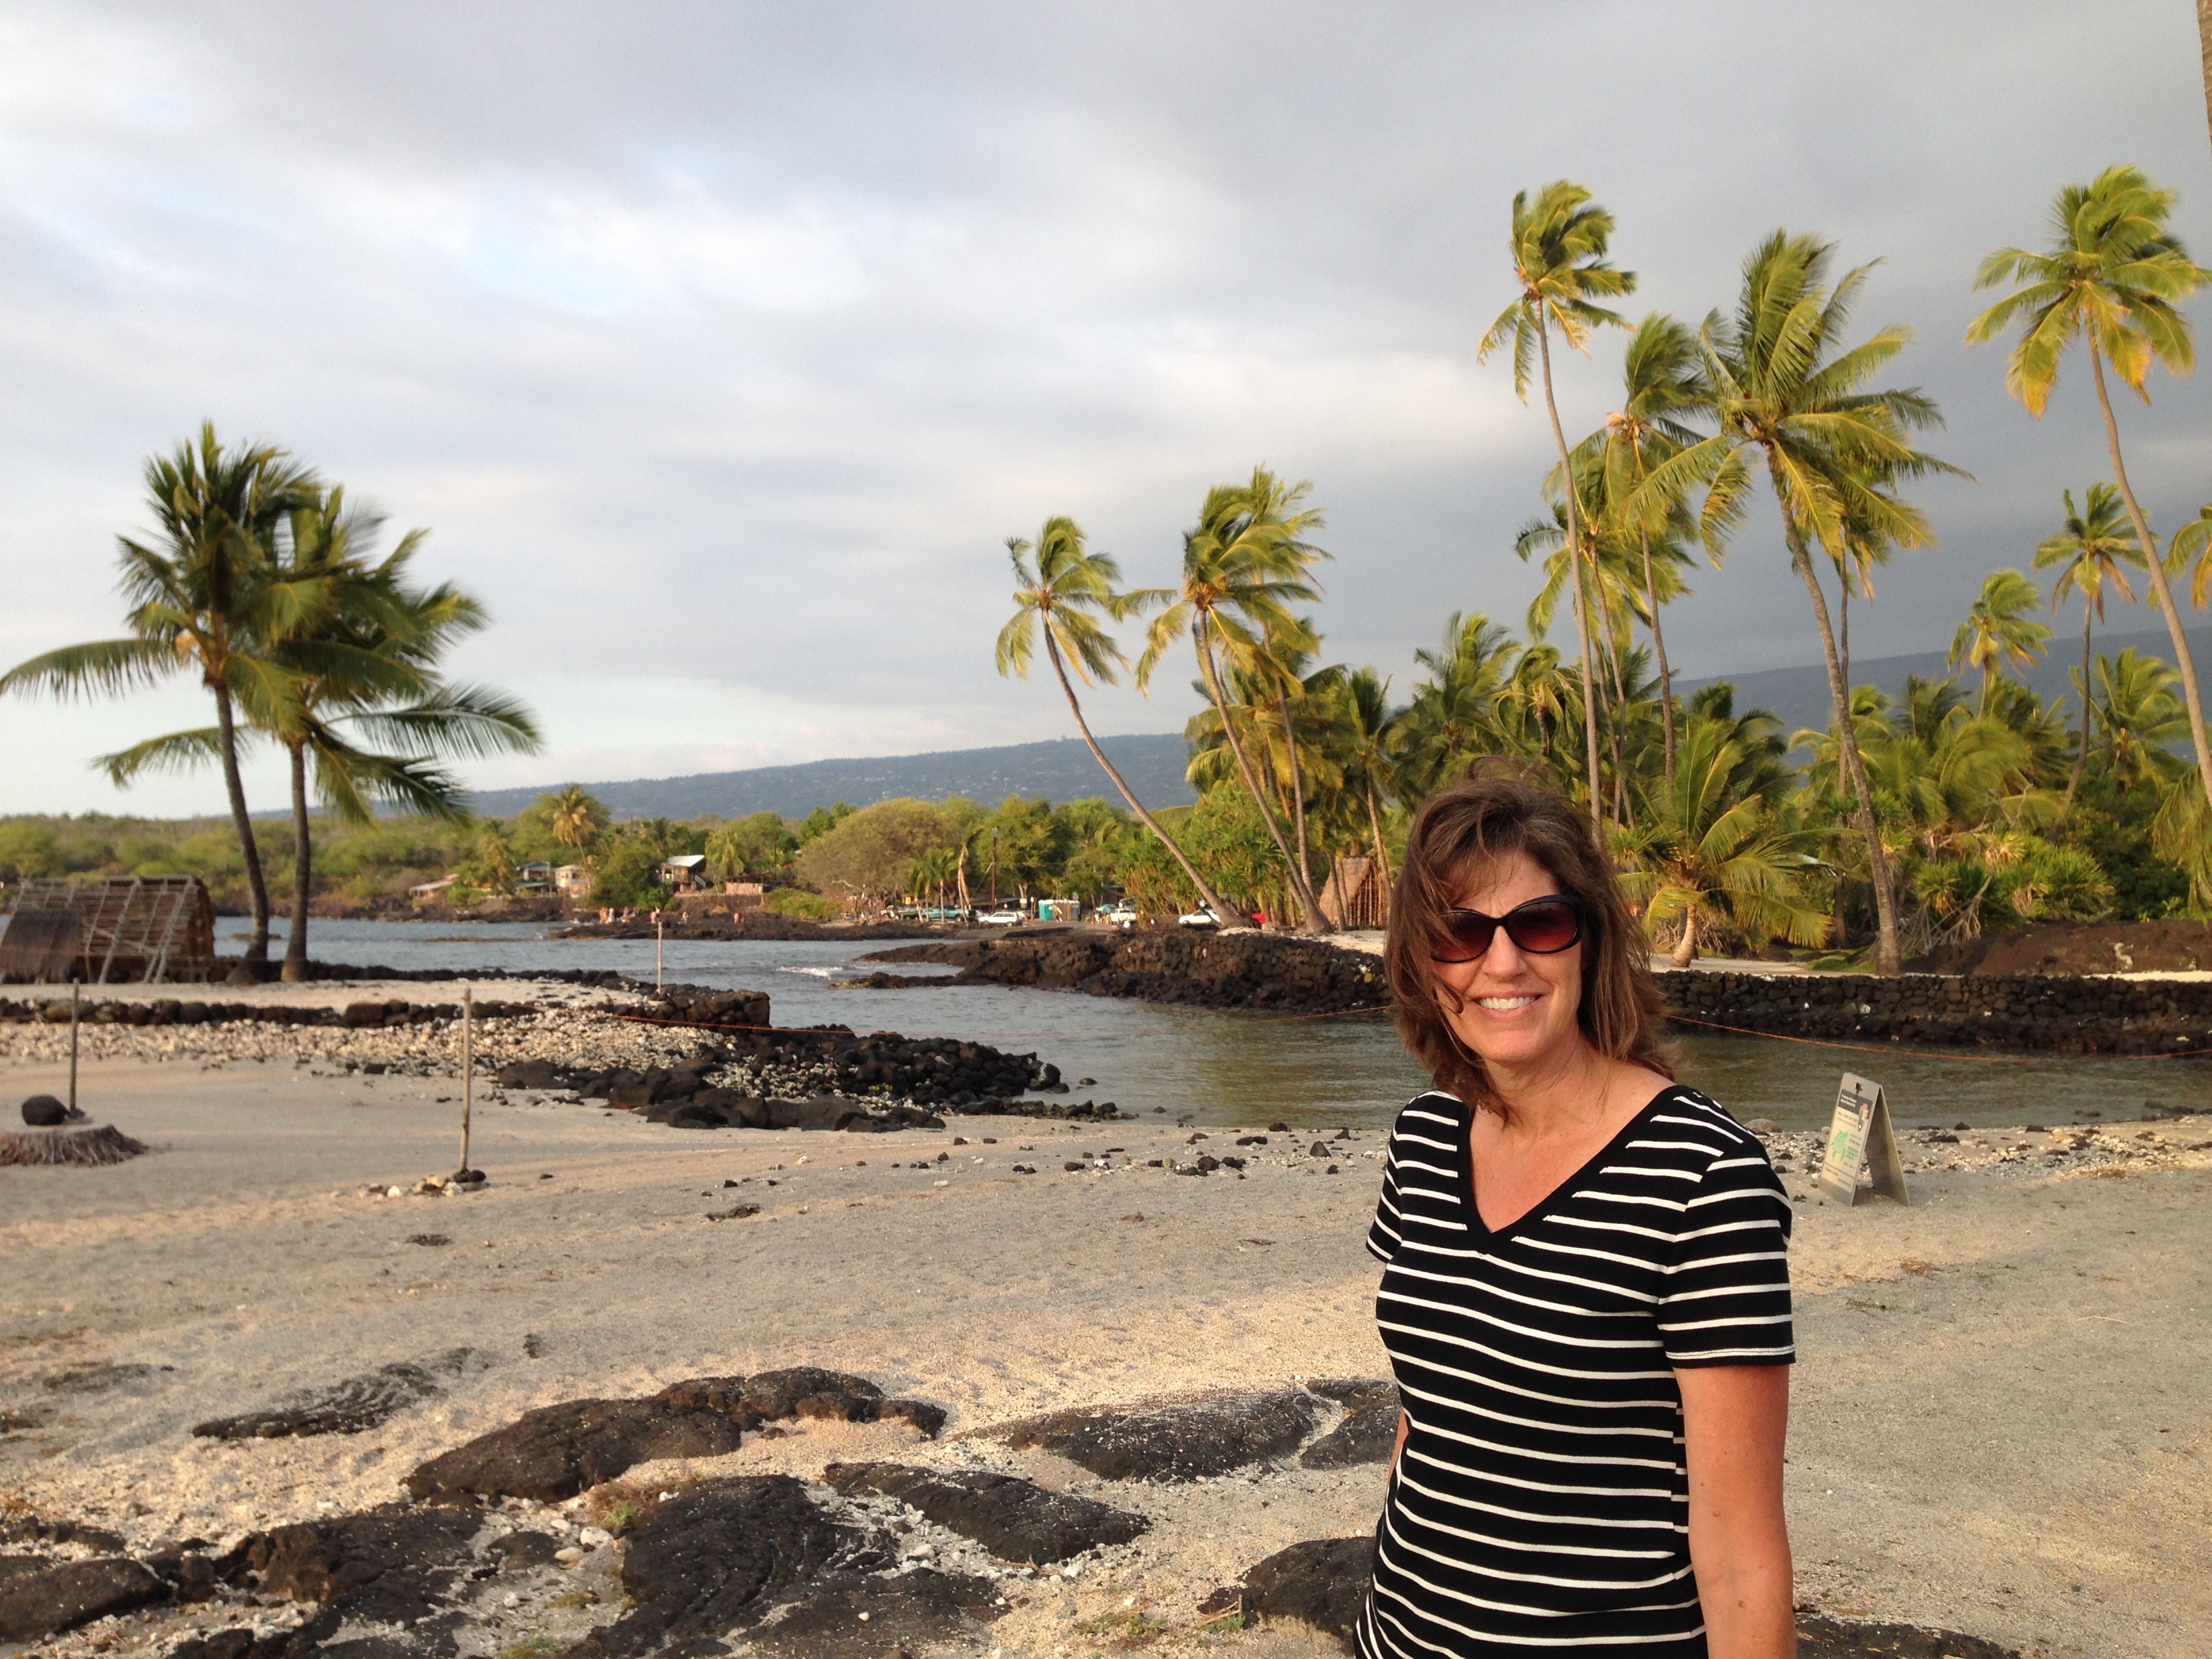
The setting of Pu’uhonua O Honaunau National Historic Site is quite beautiful–the royals knew how to pick a good location!

You get a map with your entrance fee, and walk from point to point to learn more about ancient Hawaiian customs, skilled craftsmanship and way of life.

Pu'uhonua o Honaunau National Historic Site, Hawaii

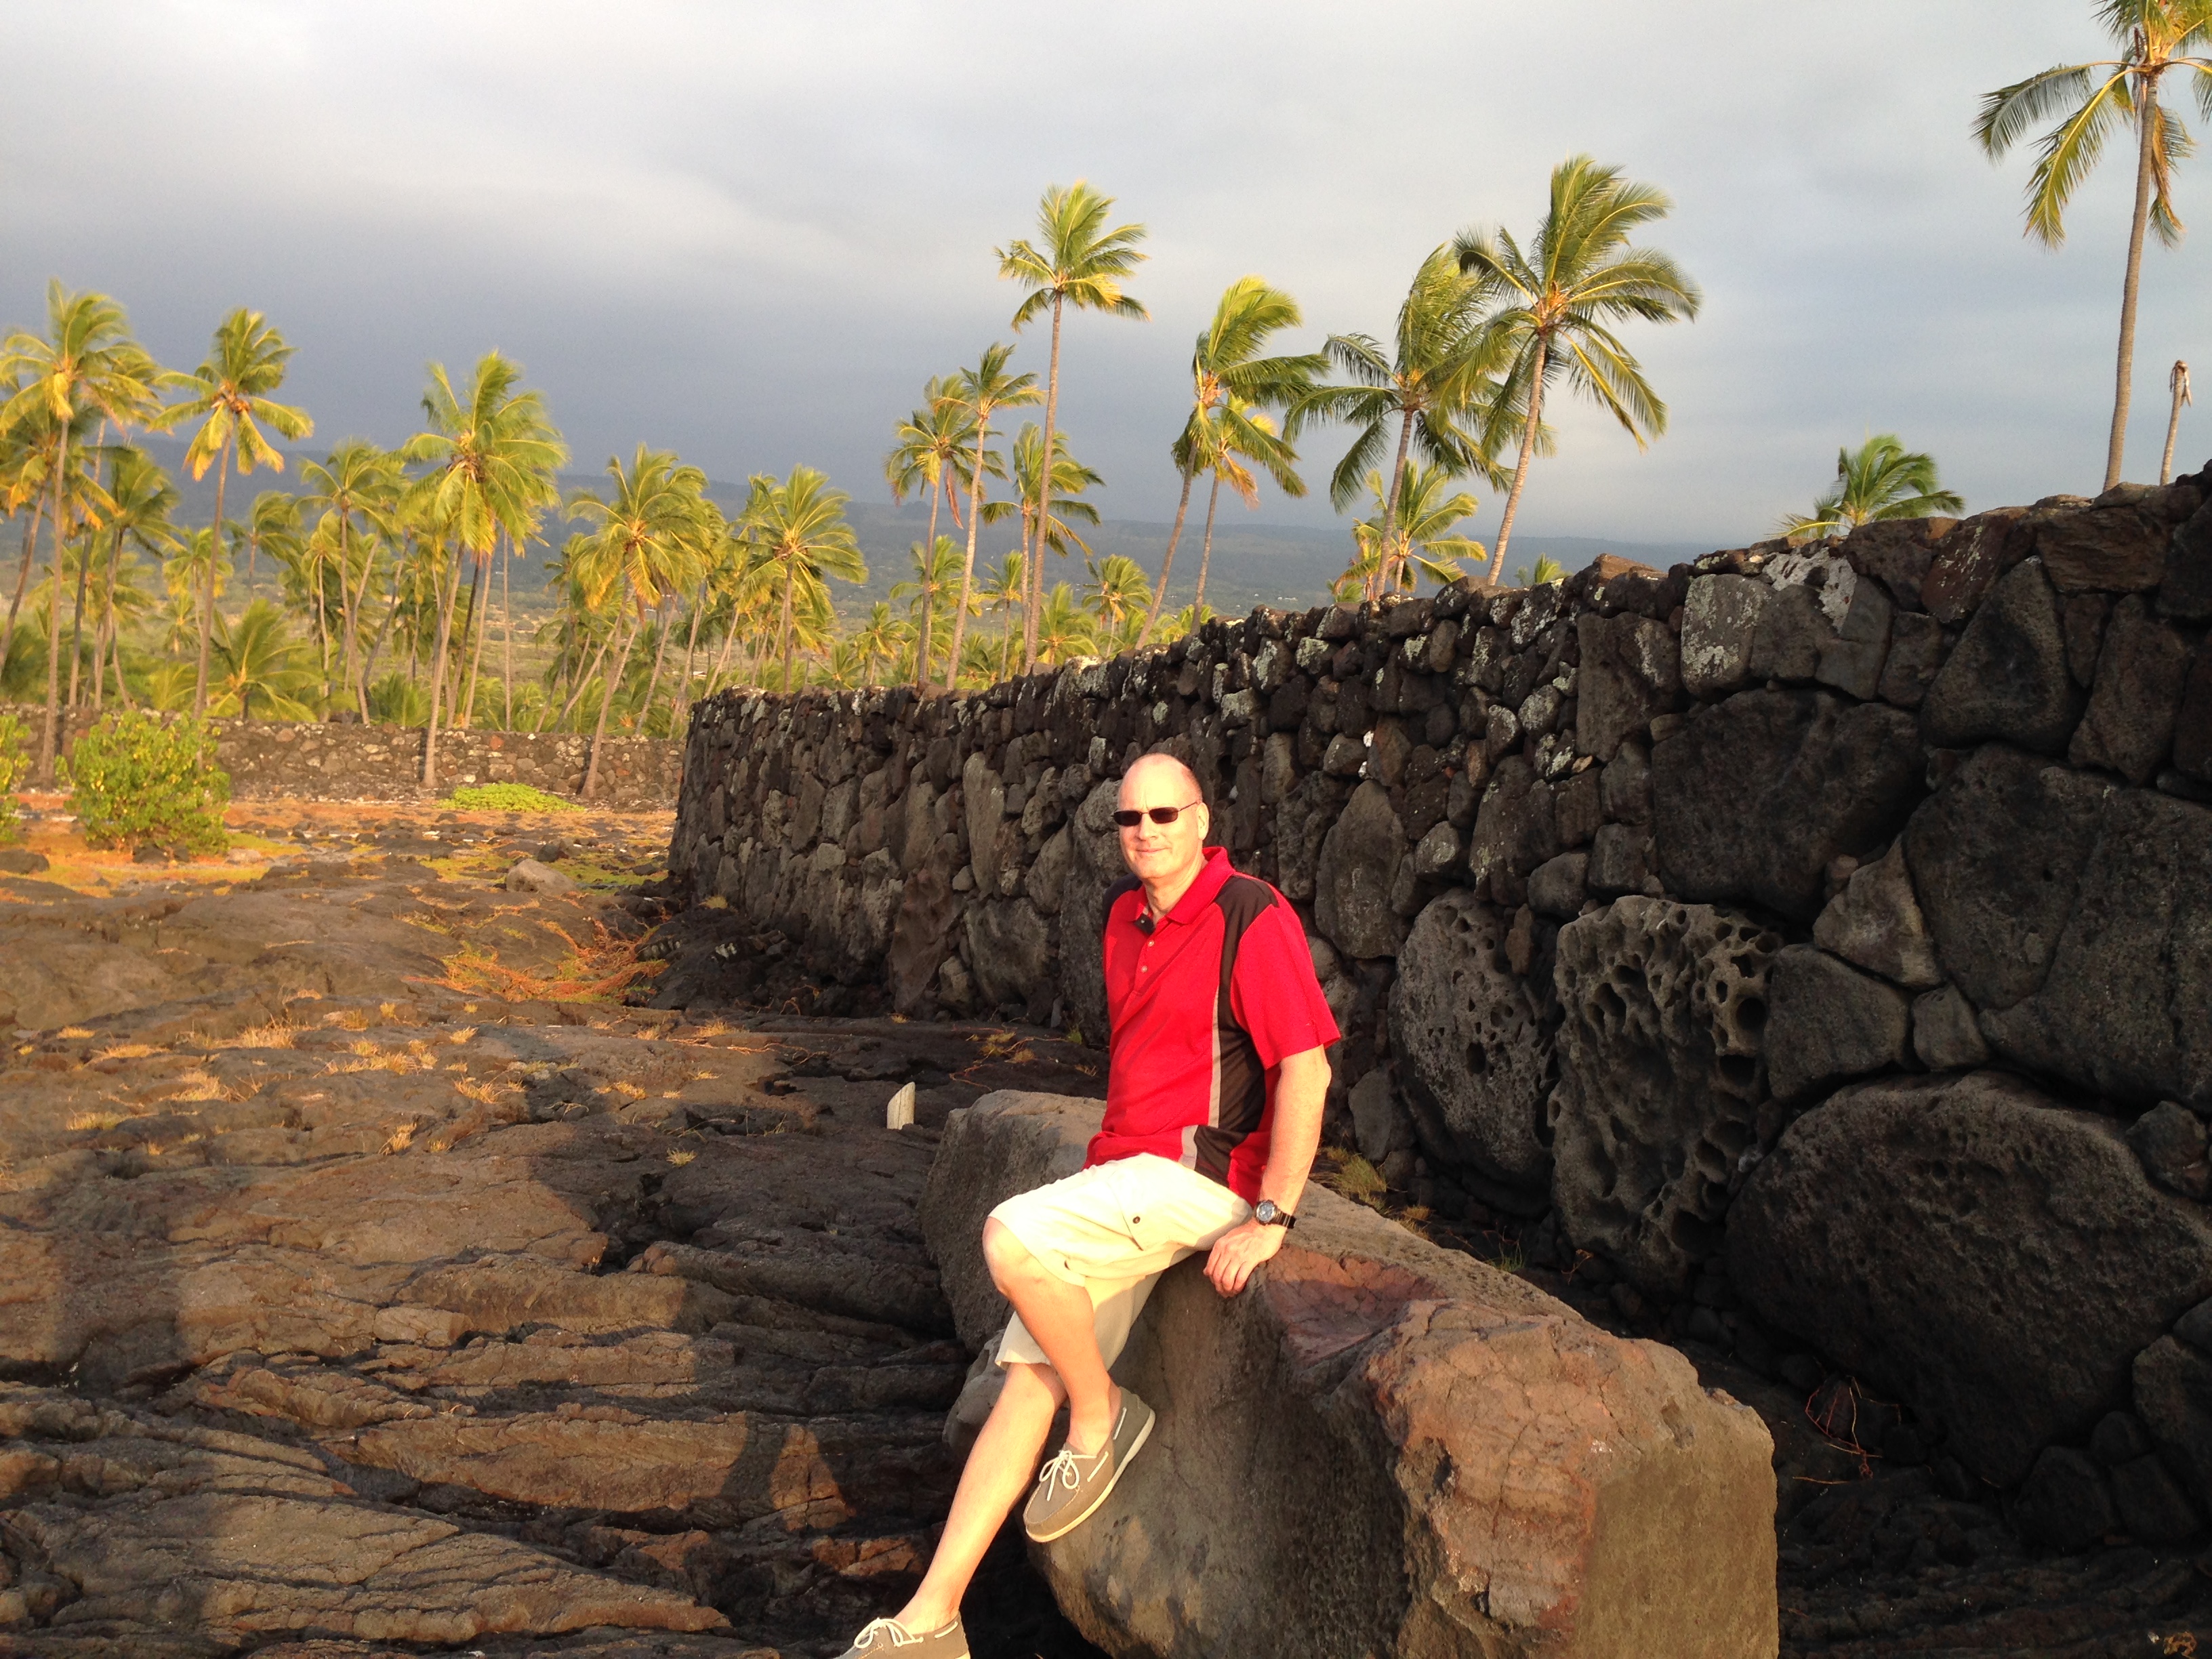
In the shadows at dusk are examples of native carvings near the entrance to Pu’uhonua o Honaunau National Historic Site.

Pu'uhonua o Honaunau National Historic Site, Hawaii

An ancient ceremonial structure in Pu’uhonua O Honaunau National Historic Site.

Pu'uhonua O Honaunau National Historic Site. Hawaii

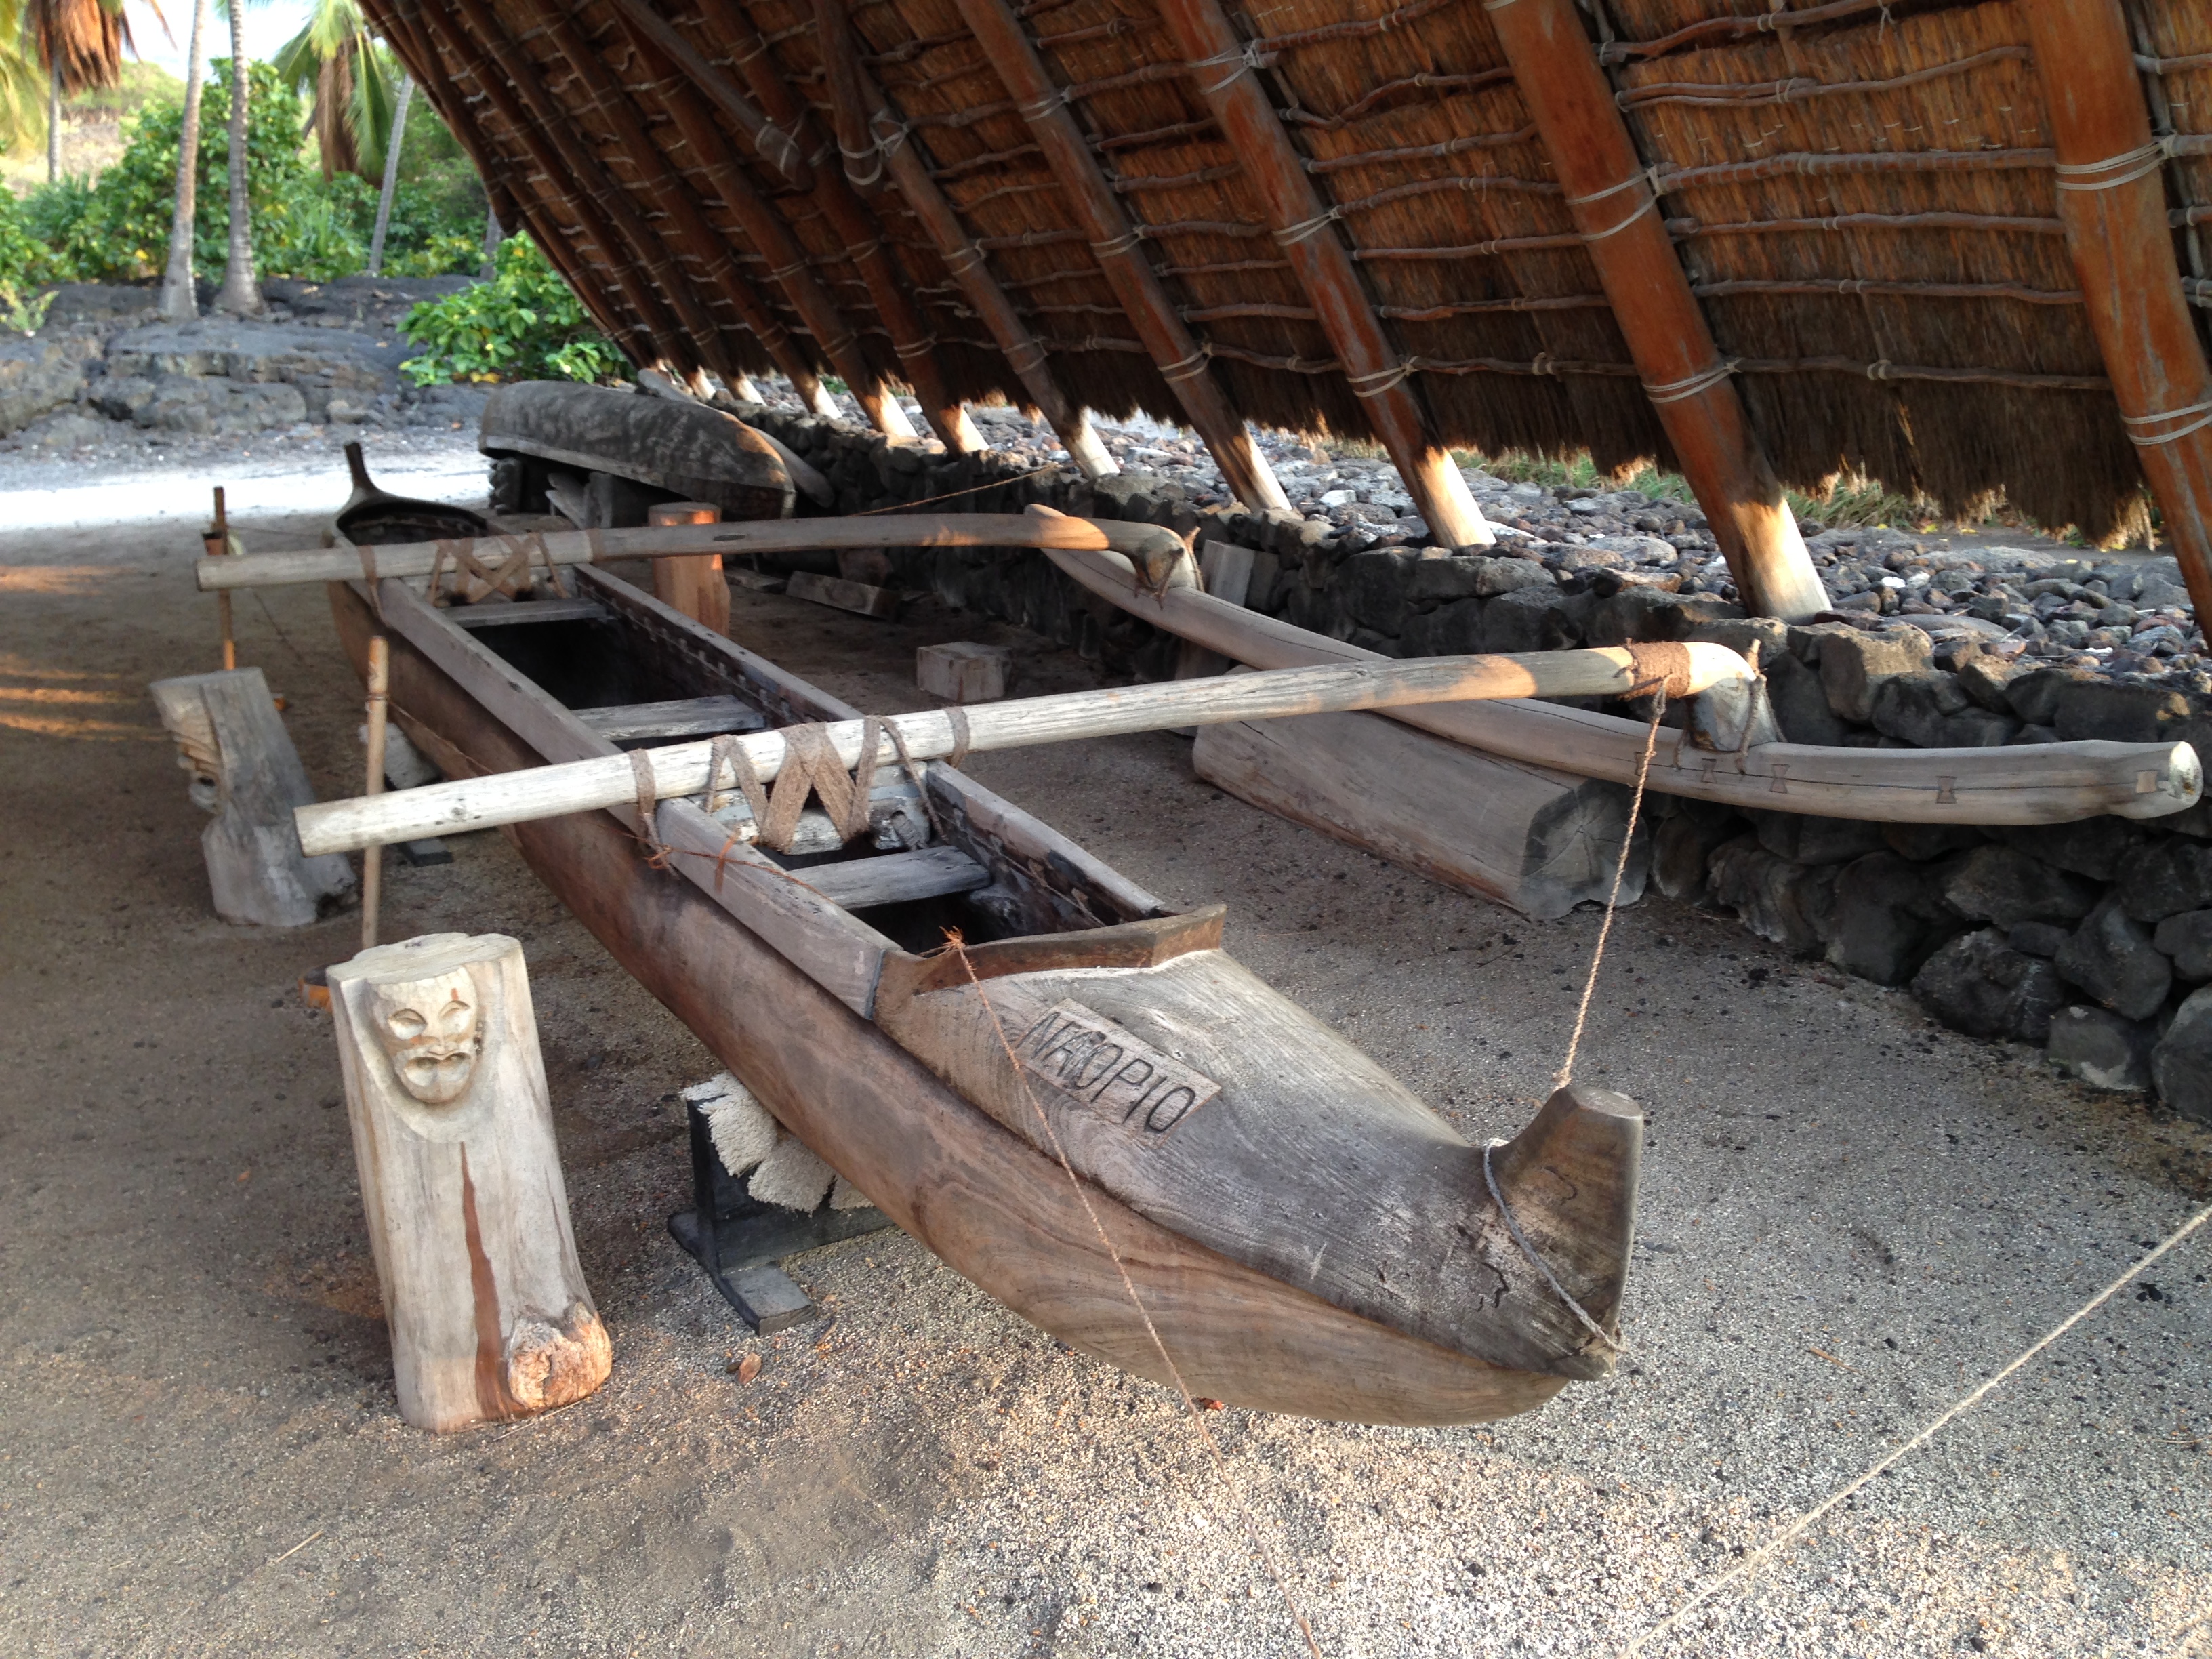
Example of an outrigger canoe, showing construction from traditional materials.

North/East Coast (Hamakua Coast) of the Big Island

After exploring north and south along the west coast, we crossed over to the east coast of the Big Island through Waimea, a ranching area that reminded me a bit of Colorado.

Waimea

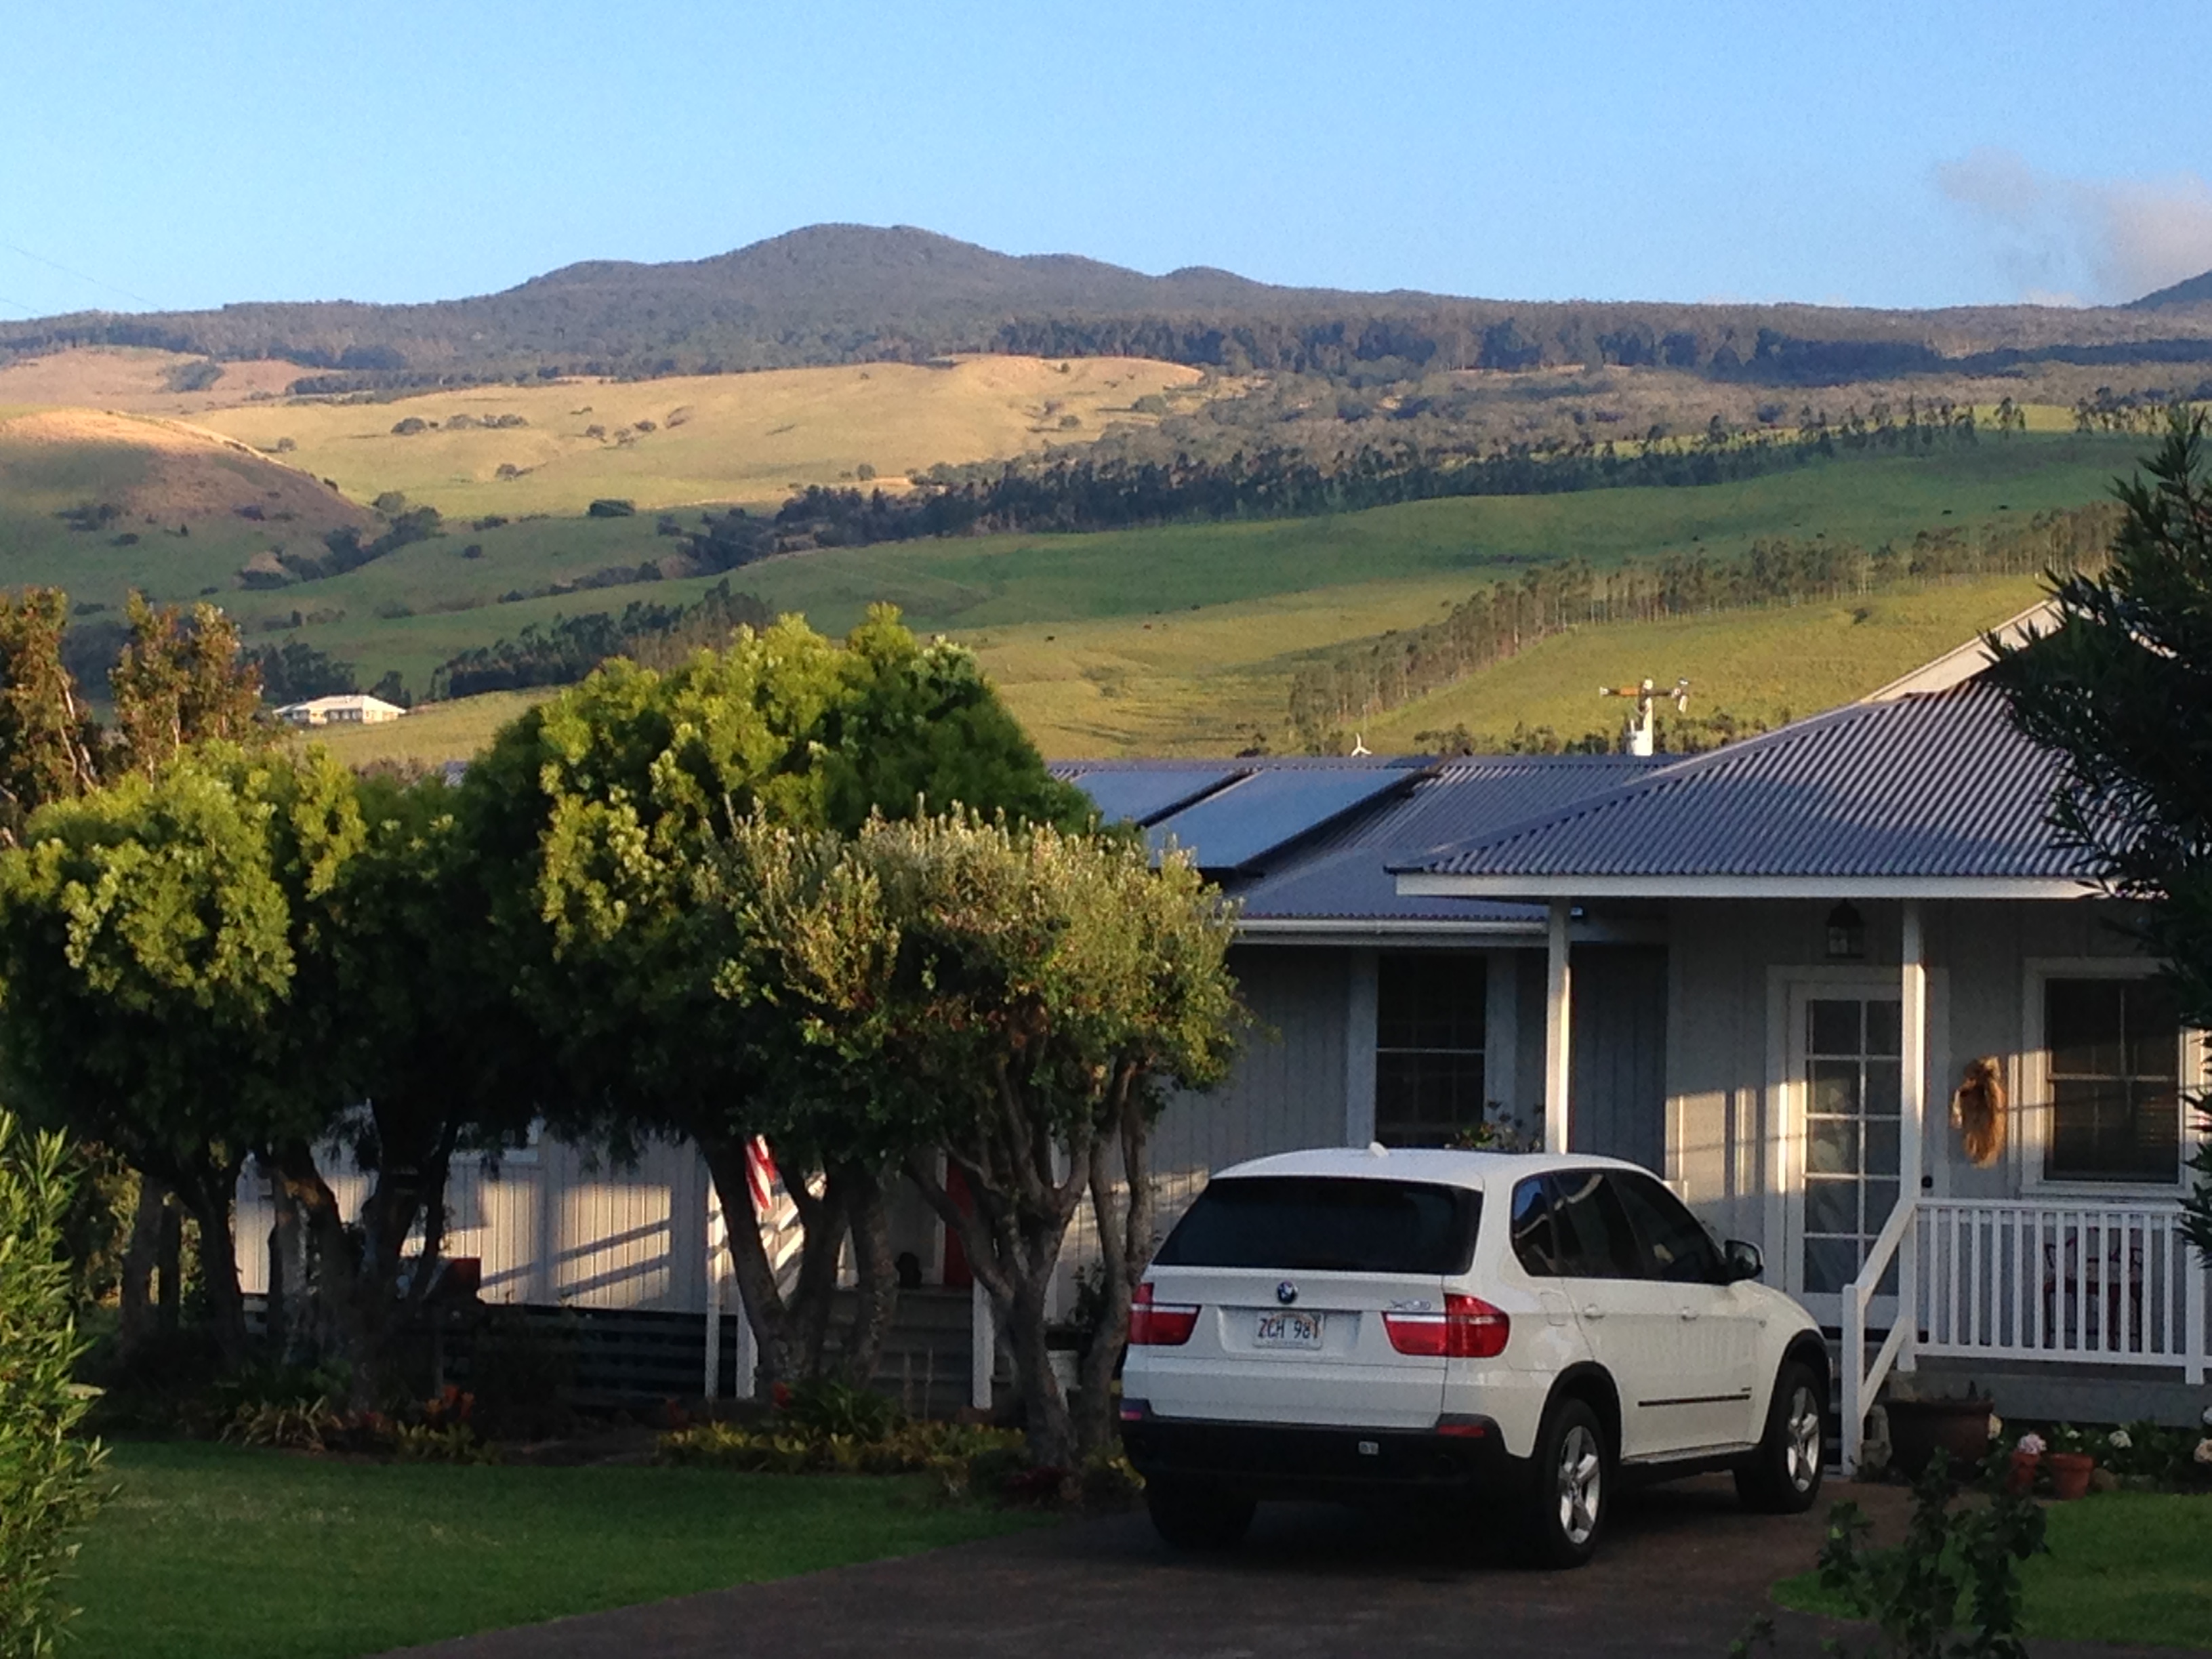
The countryside of Waimea, this scene looks like it could be in Colorado or Wyoming or New Mexico!

There are not many driving routes across the island, and this route is the main one. As you reach the east coast, the climate zone shifts to a more tropical feel, clearly this side of this island receives more moisture than the west coast. The northeast coast of the Big Island, known as Hamakua, is rugged and the surf is rougher than on the western side. It has a wild beauty, with the dark volcanic rock contrasting with the dark green vegetation. While there are numerous state parks on this side of the island, you won’t find a lot of soft sandy beaches.

Here are a few State Parks heading south along the east coast towards Hilo:

Laupahoehoe Point Beach Park, Hawaii

Laupahoehoe Point Beach Park

Kolekole Beach Park, Hawaii

Kolekole Beach Park

Onomea Bay, Hawaii

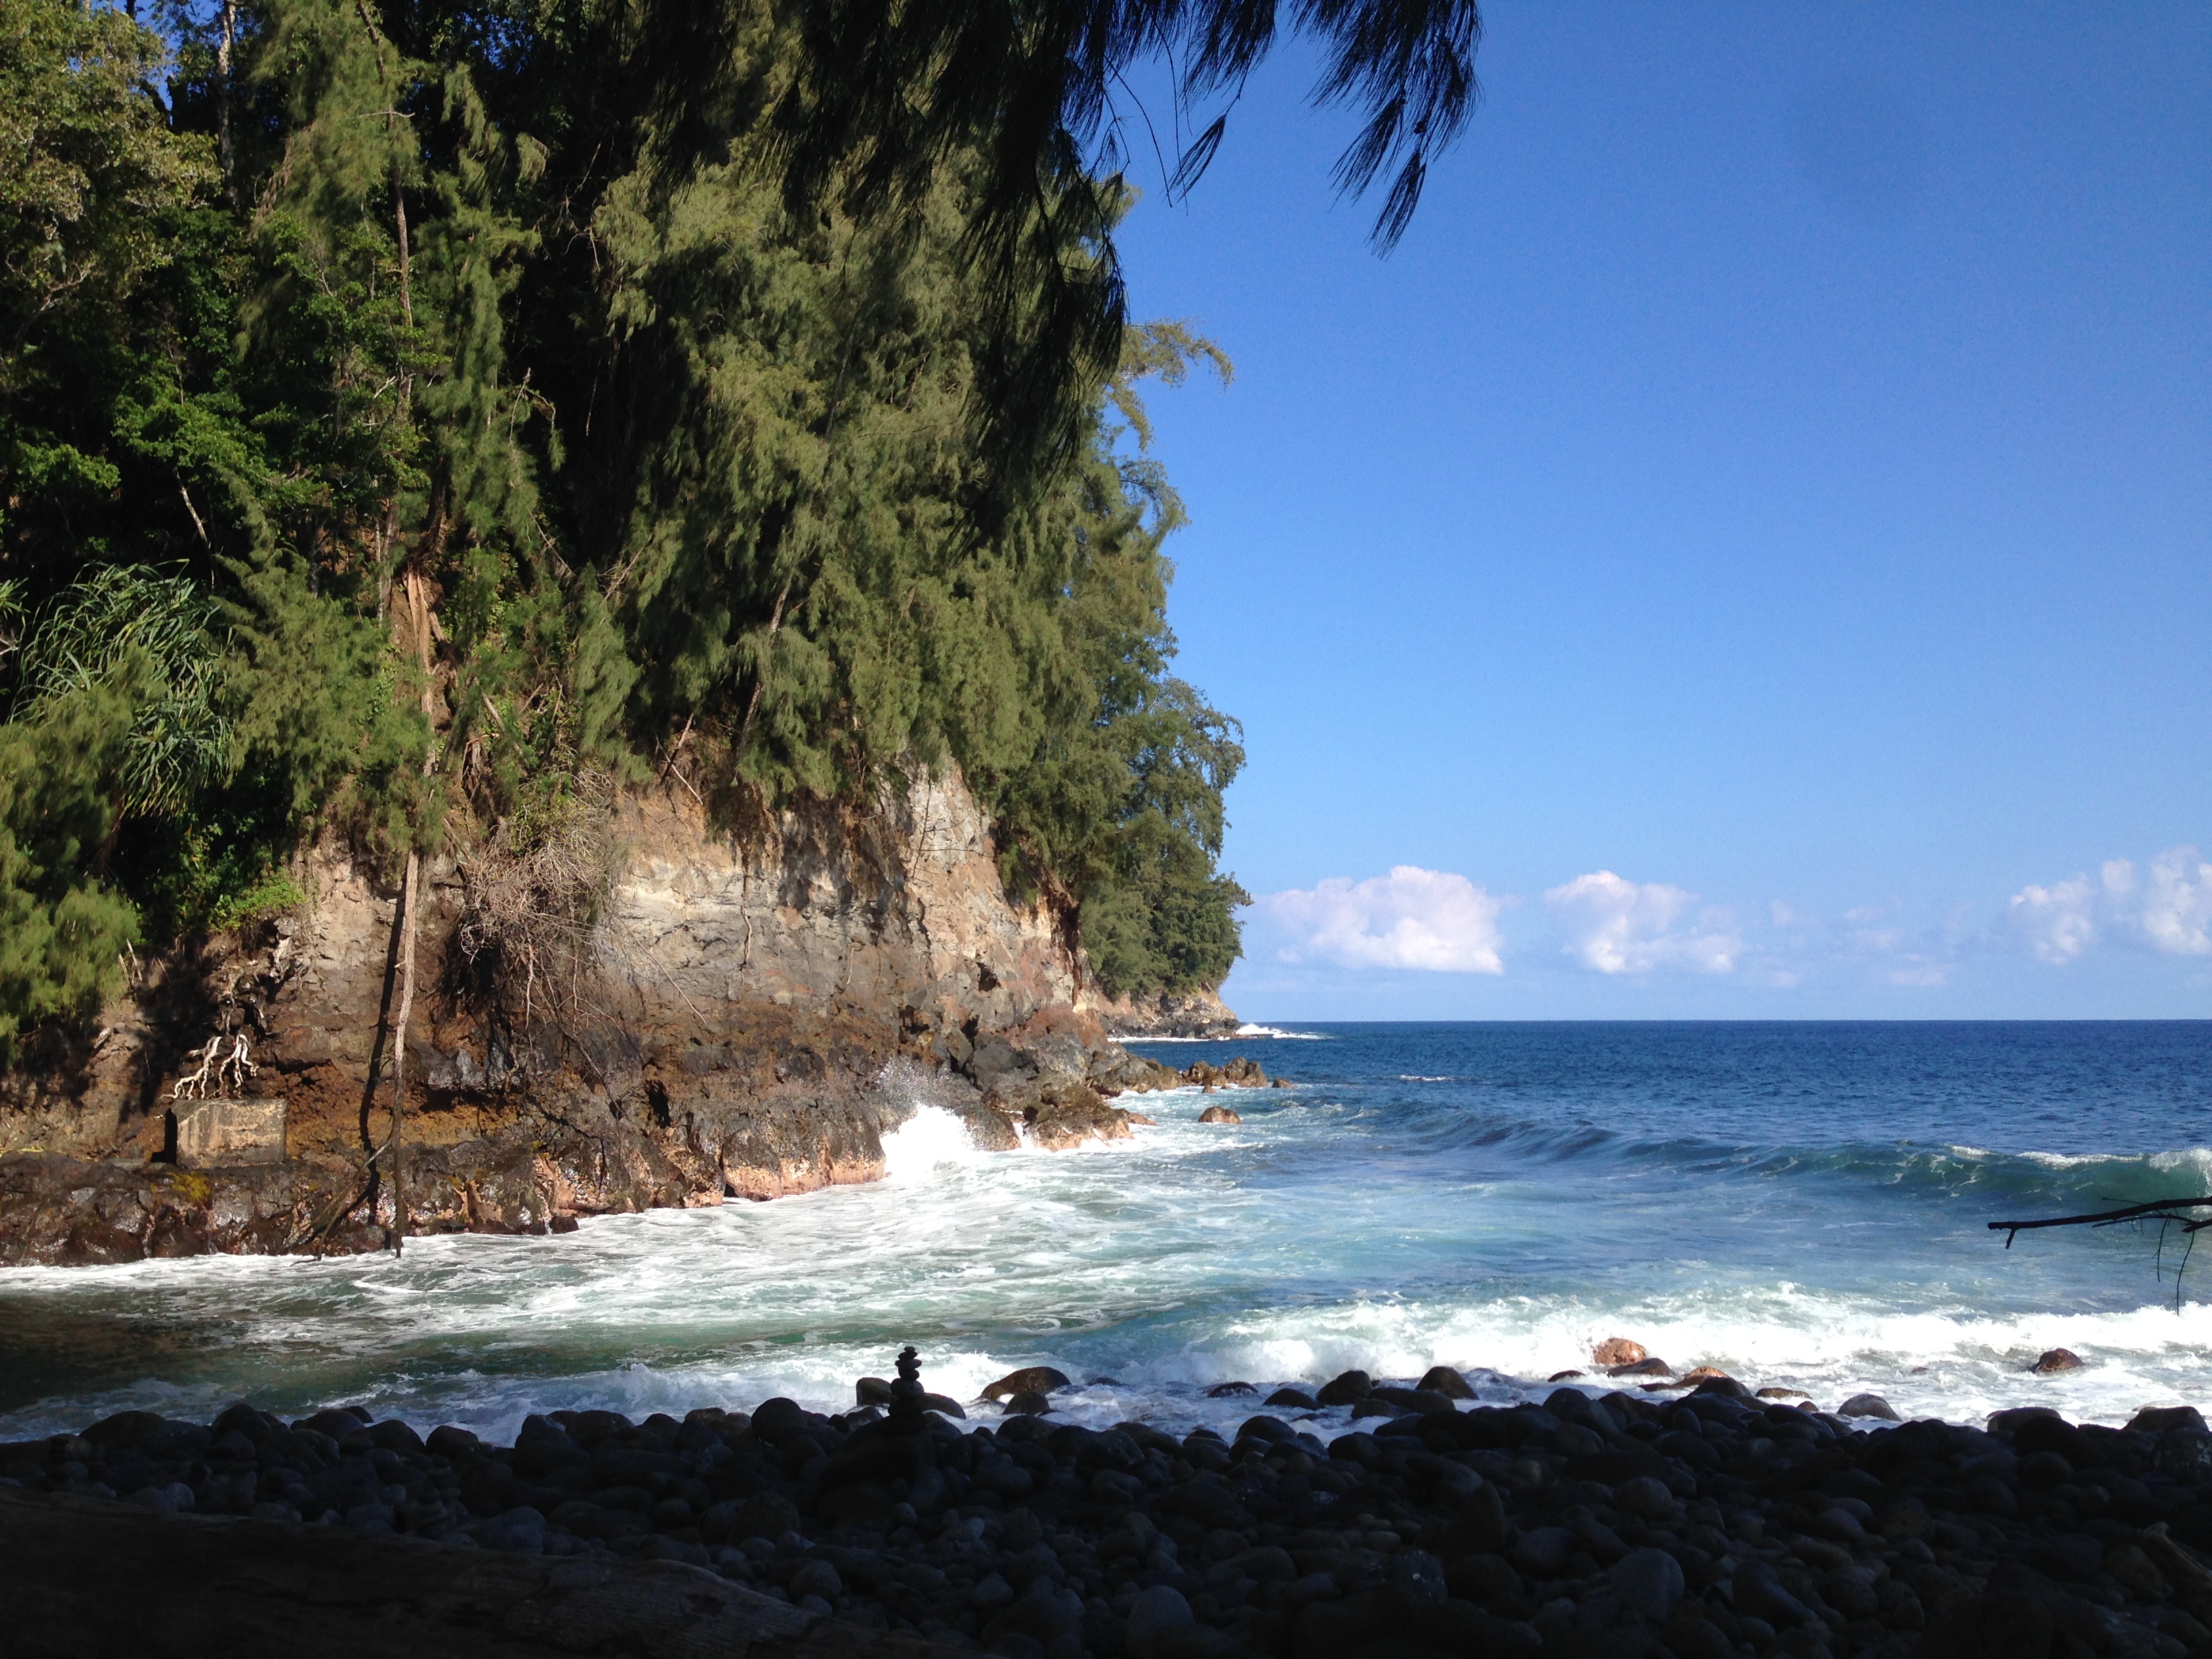
Onomea Bay, a protected cove on a rugged shoreline.

Just a few miles inland from Onomea Bay is another state park, Akaka Falls.

Akaka Falls State Park, Hawaii

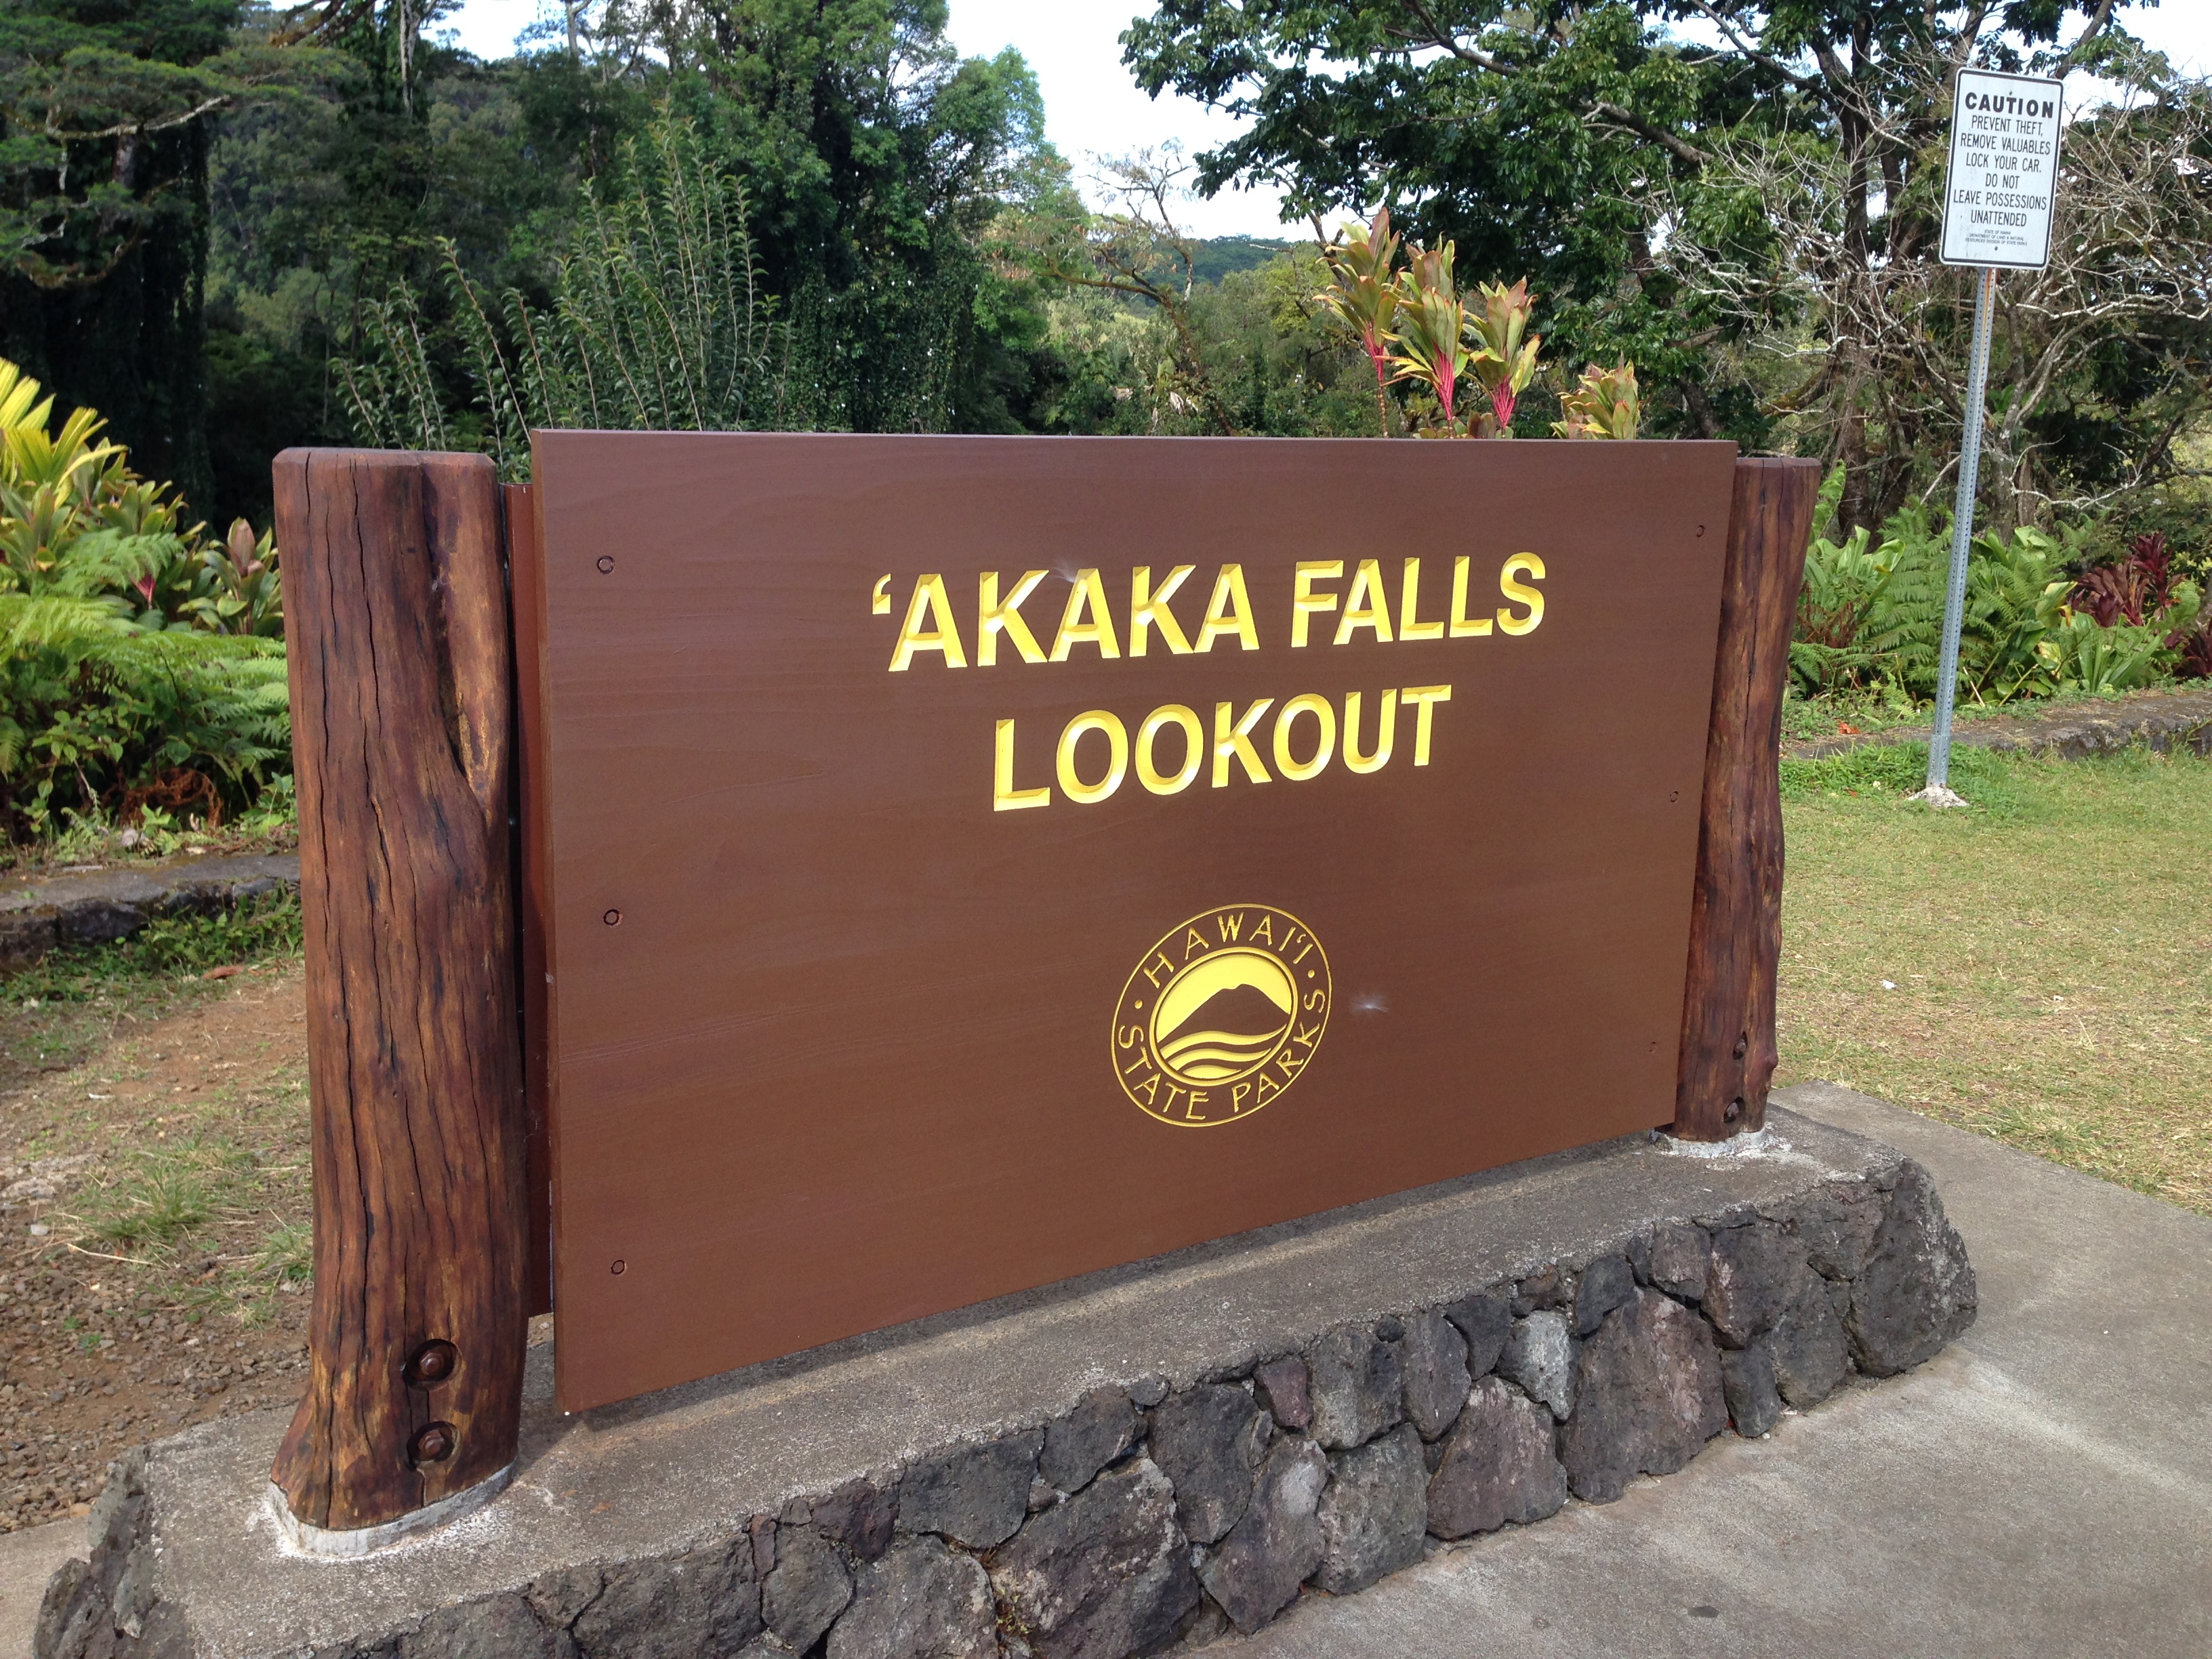
Akaka Falls is just inland from Onomea Bay, and a short hike takes you to a view of the falls.

Akaka Falls, Hawaii

A view of Akaka Falls.

Hilo

Just few miles south of the locations above brings you to Hilo. I had expected Hilo to have  a bigger city feel and tourist vibe, but it felt very “local” and is relatively small town. It became apparent to me that most tourists hang out on the west coast, rather than Hilo. Hilo also has an airport, which makes sense given the size of the island and the fact that two 13,000 ft volcanoes (Mauna Kea and Mauna Loa) separate the east and west coasts, making travel across the island slow.

While I don’t have a photo, be sure to stop at Ken’s House of Pancakes in Hilo any time of day for delicious pancakes and about everything else! We enjoyed our meal there.

Hilo, Hawaii.

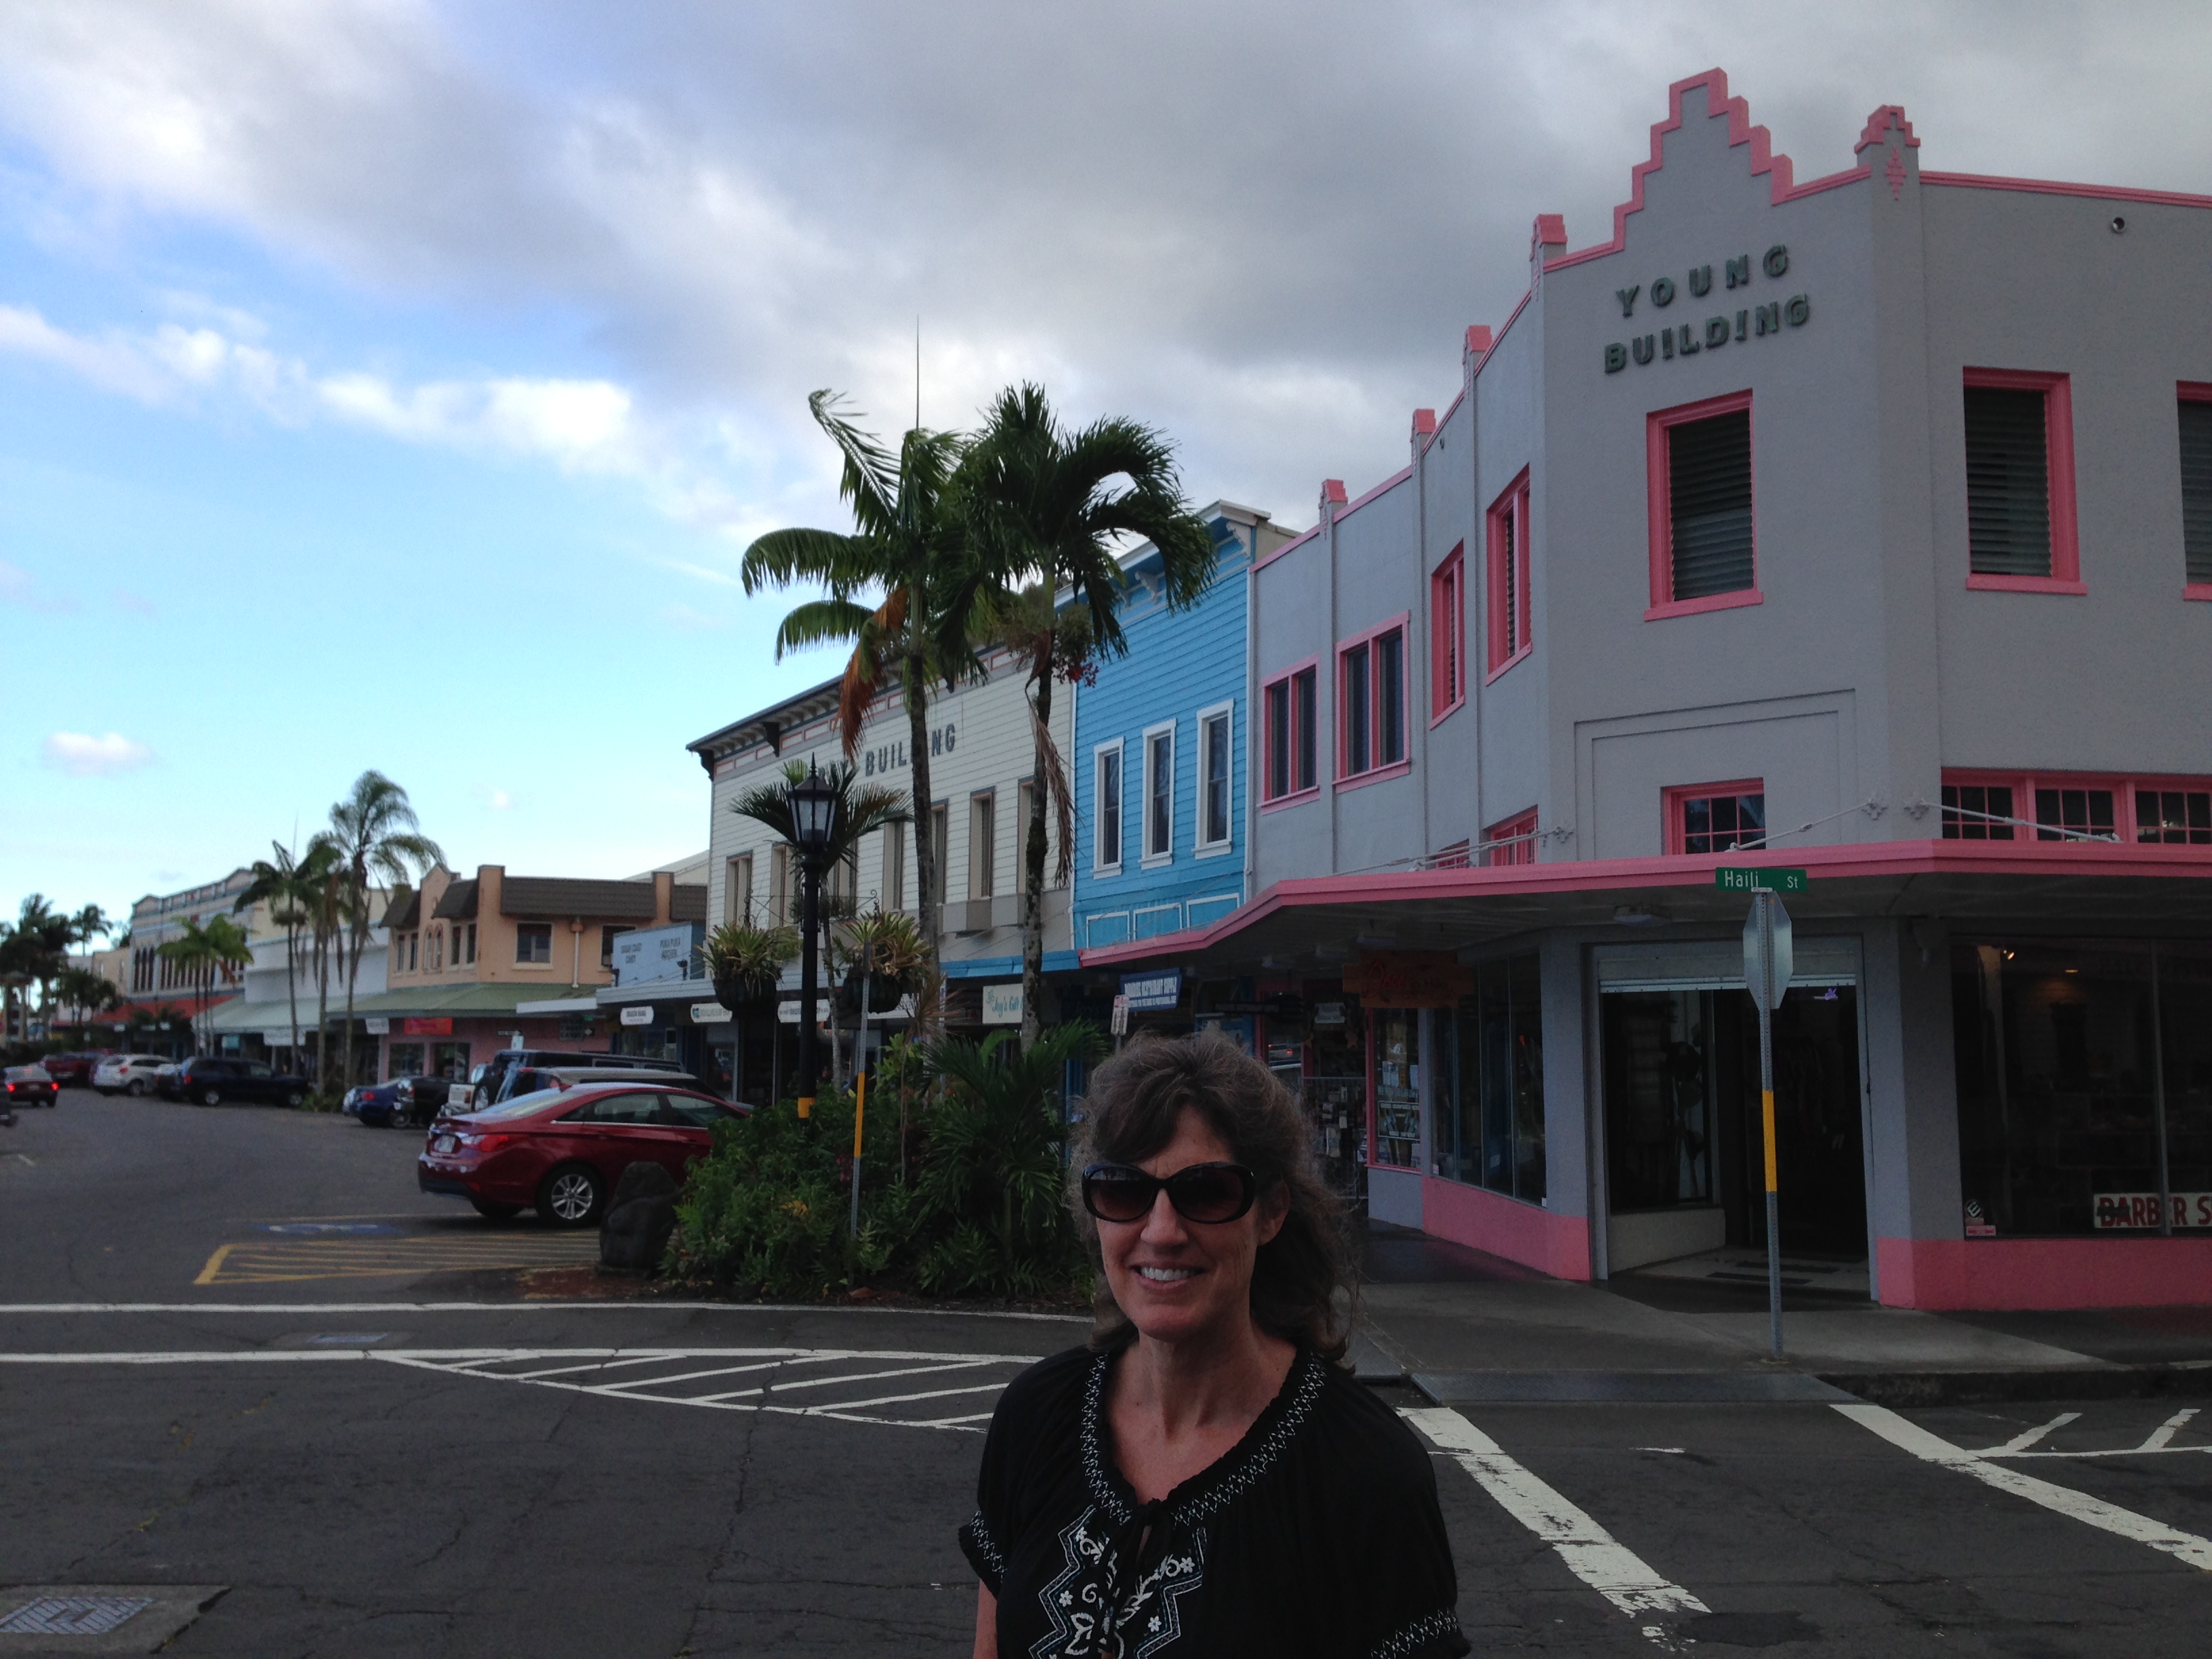
Downtown Hilo maintains its early 20th century look, I felt like I had stepped back in time to what this town must have looked like during World War II, during my Dad’s time in the islands.

Hawaii Volcanoes National Park

Our last stop on the Big Island was Hawaii Volcanoes National Park, south and west of Hilo in the southeastern part of the island. This is a big park, one could easily spend several days exploring the various features, hiking trails and sights. Volcanic activity on the Big Island is seemingly constant, so parts of the Park may be closed at any given time. Due to the dangerous gases, you are not allowed close to any active craters.

Kilauea Iki Crater, Hawaii Volcanoes National Park

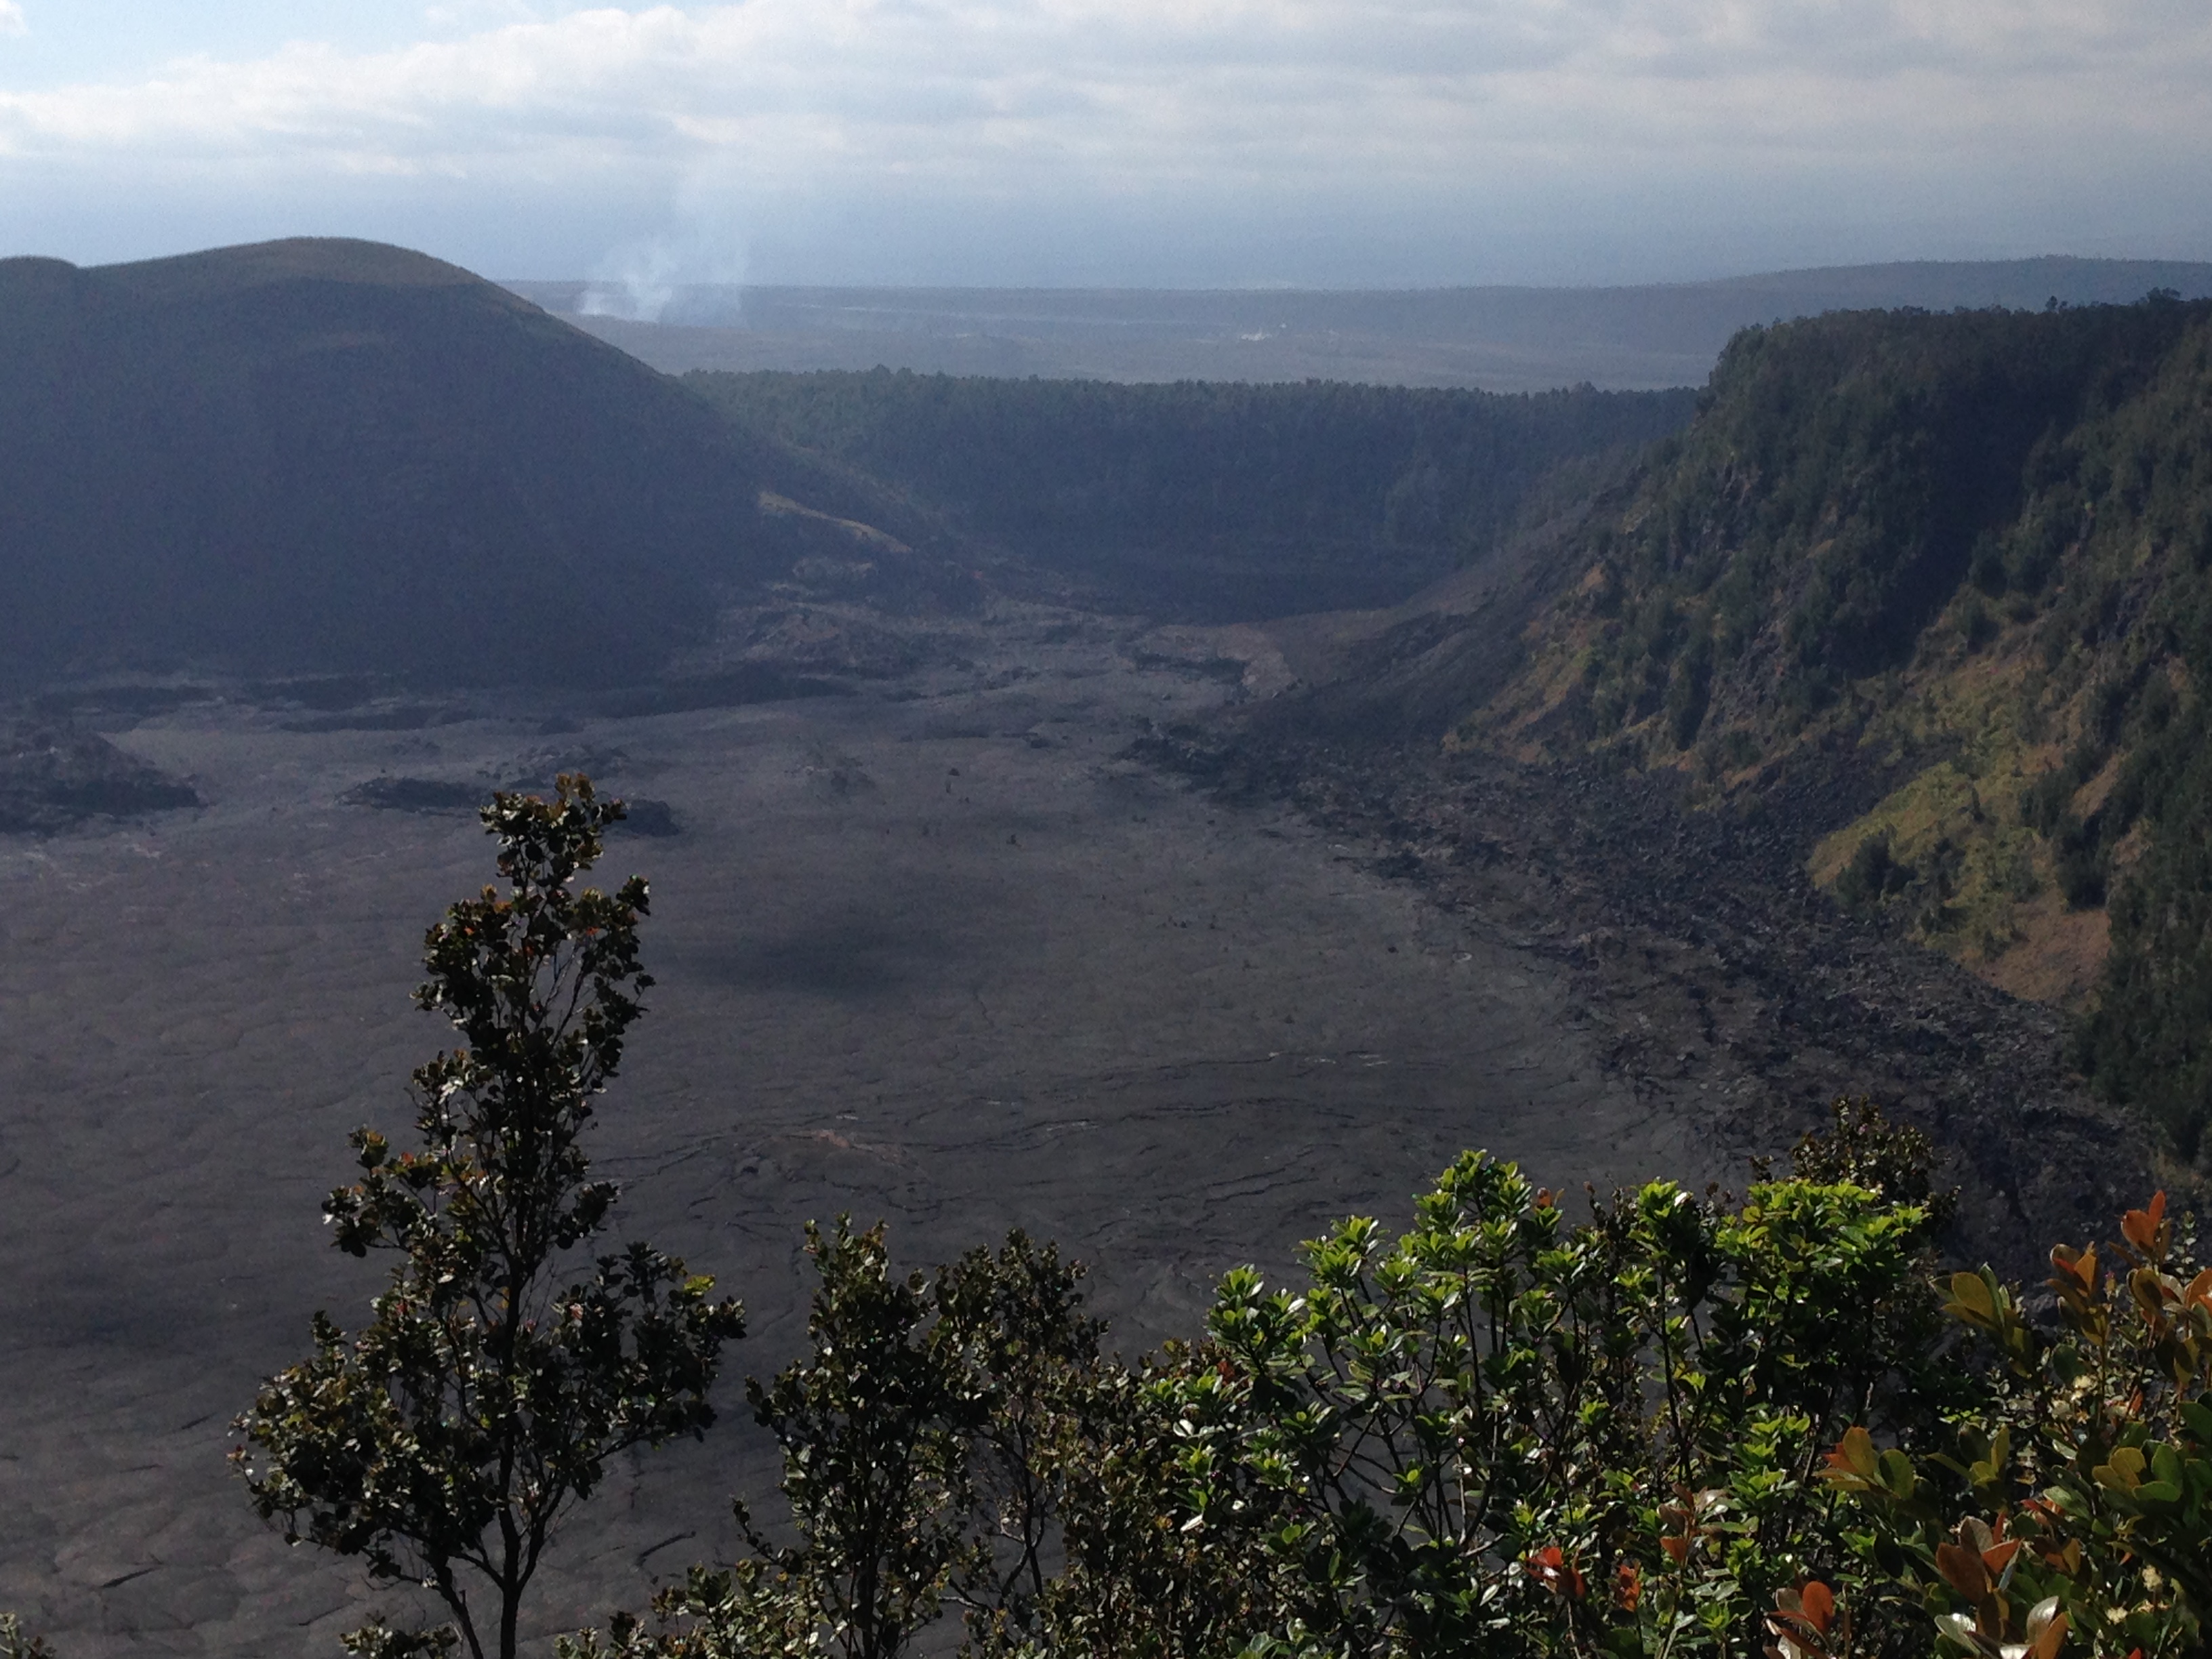
The Kilauea Iki Crater, the lava flows here are from 1959.

Hawaii Volcanoes National Park, Hawaii

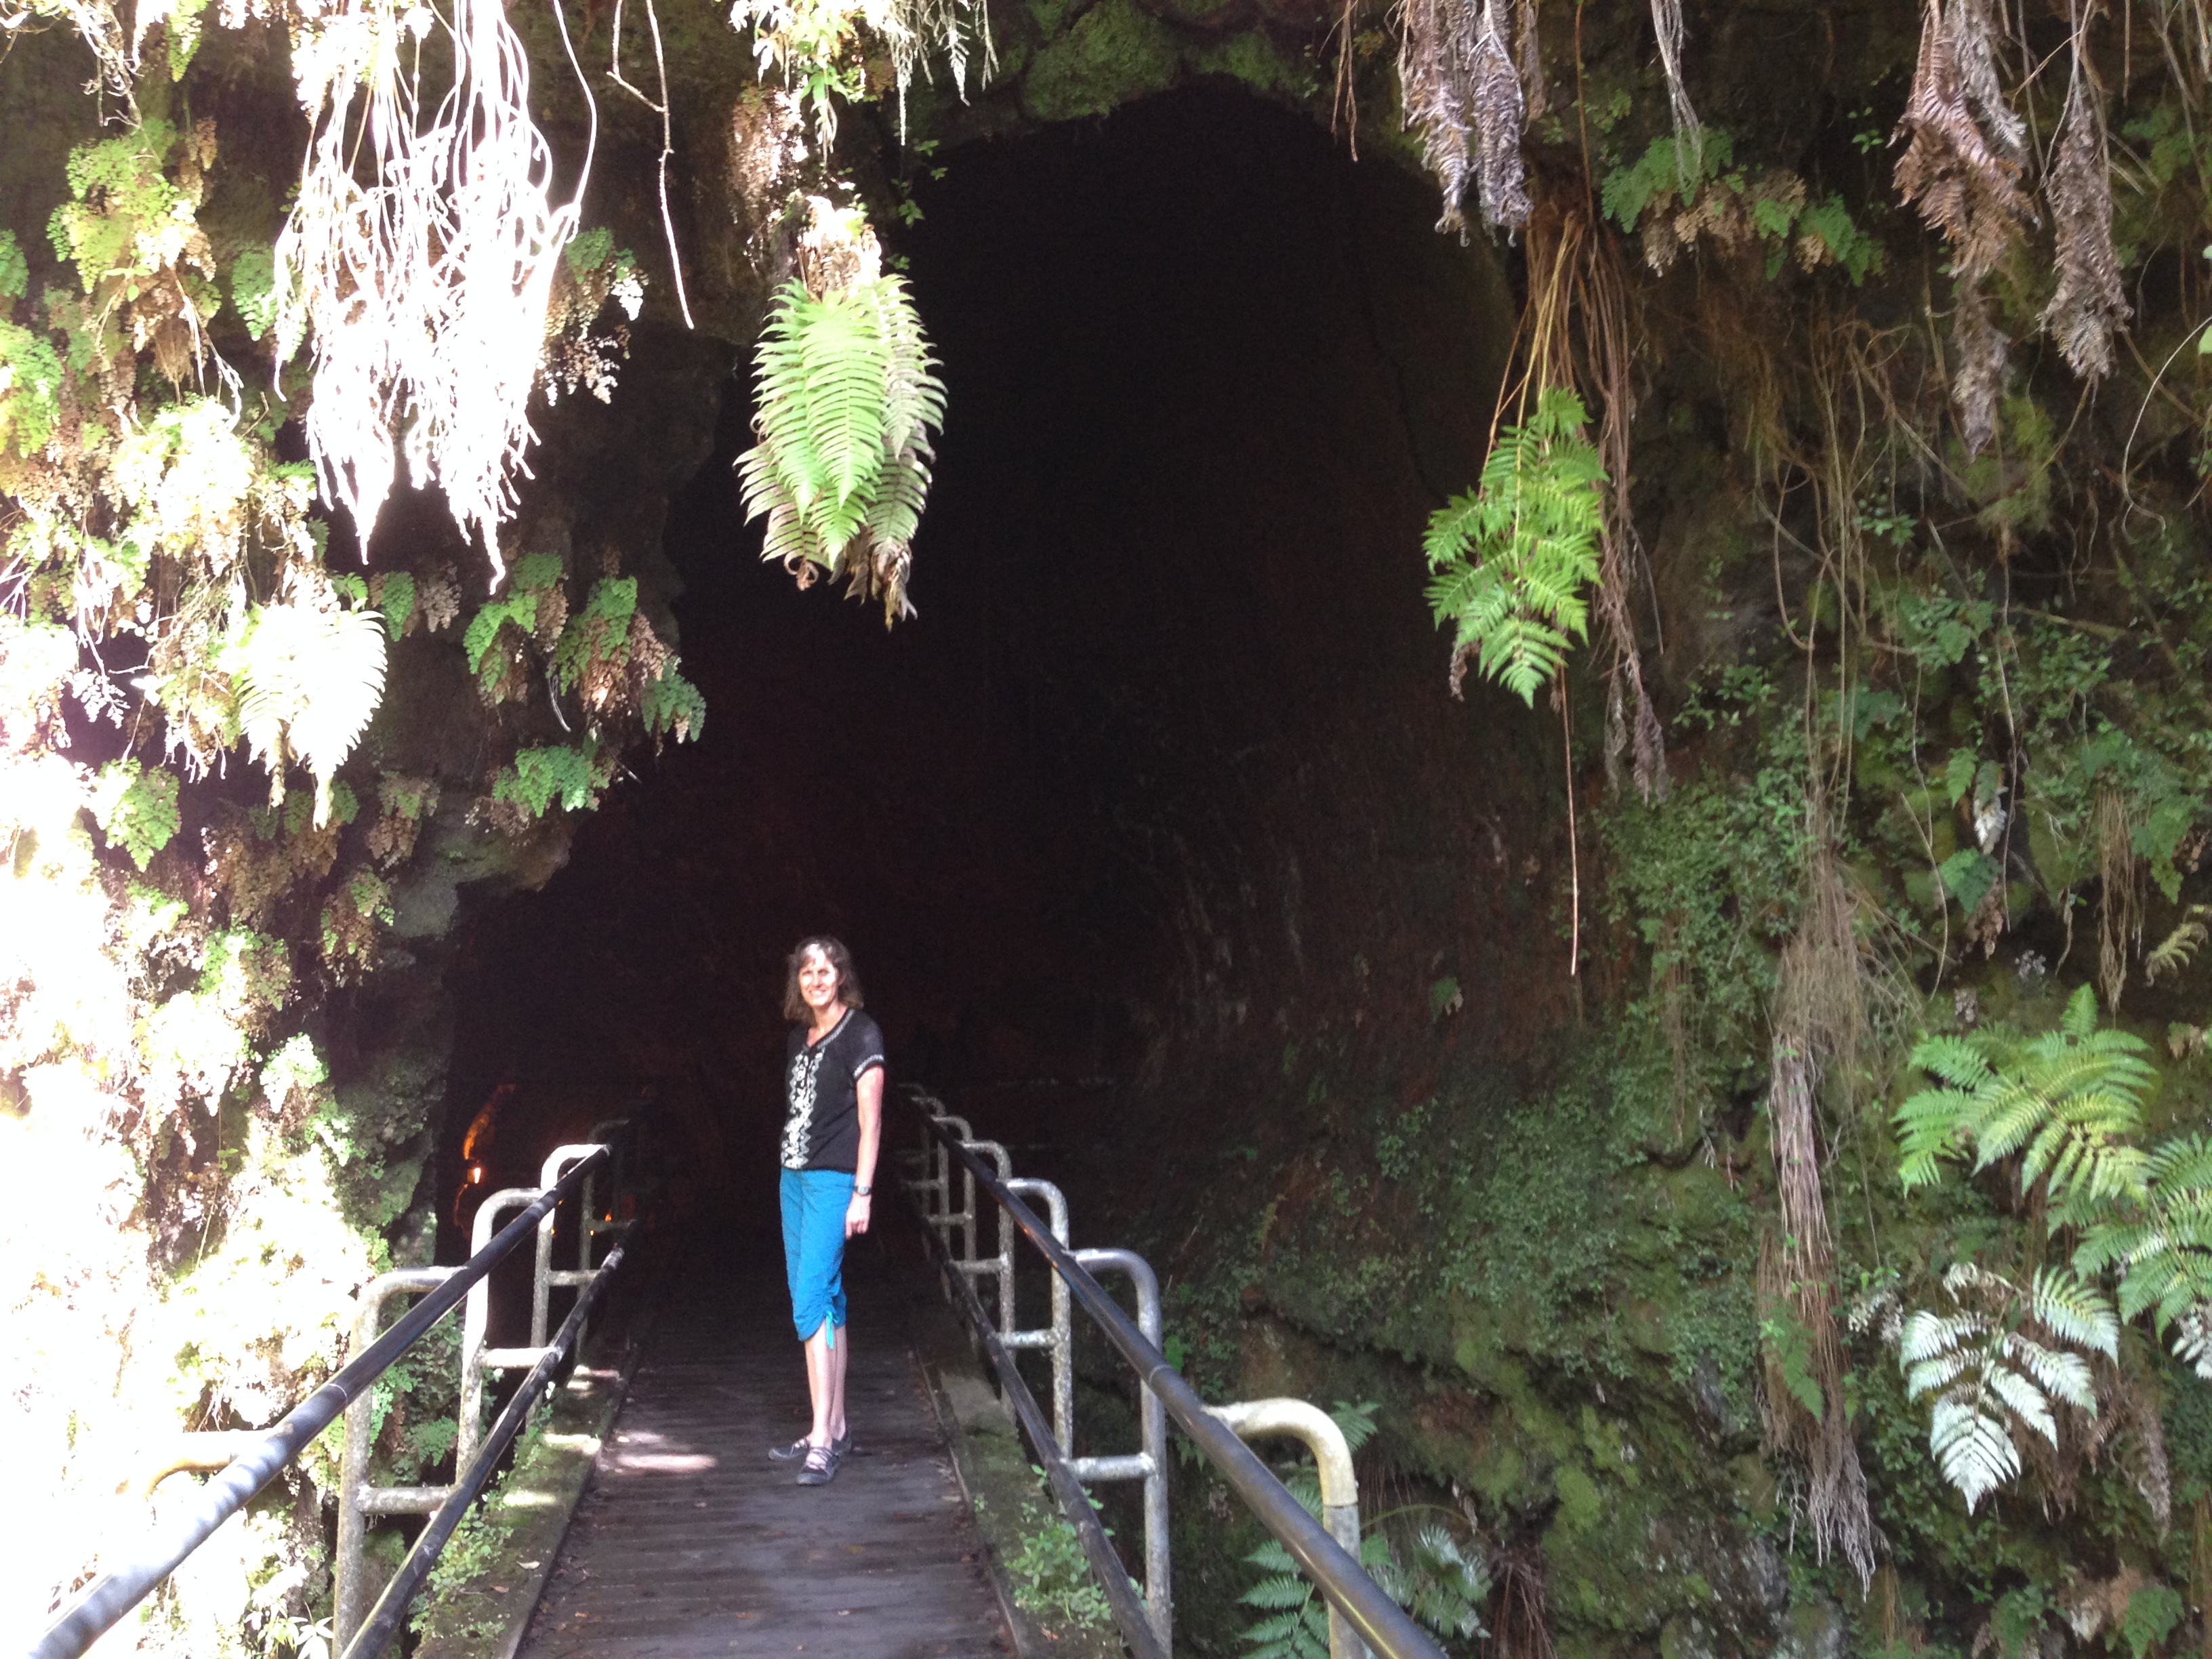
The entrance to Thurston Lava Tube, close to the Kilauea Iki Crater.

Volcanoes National Park17

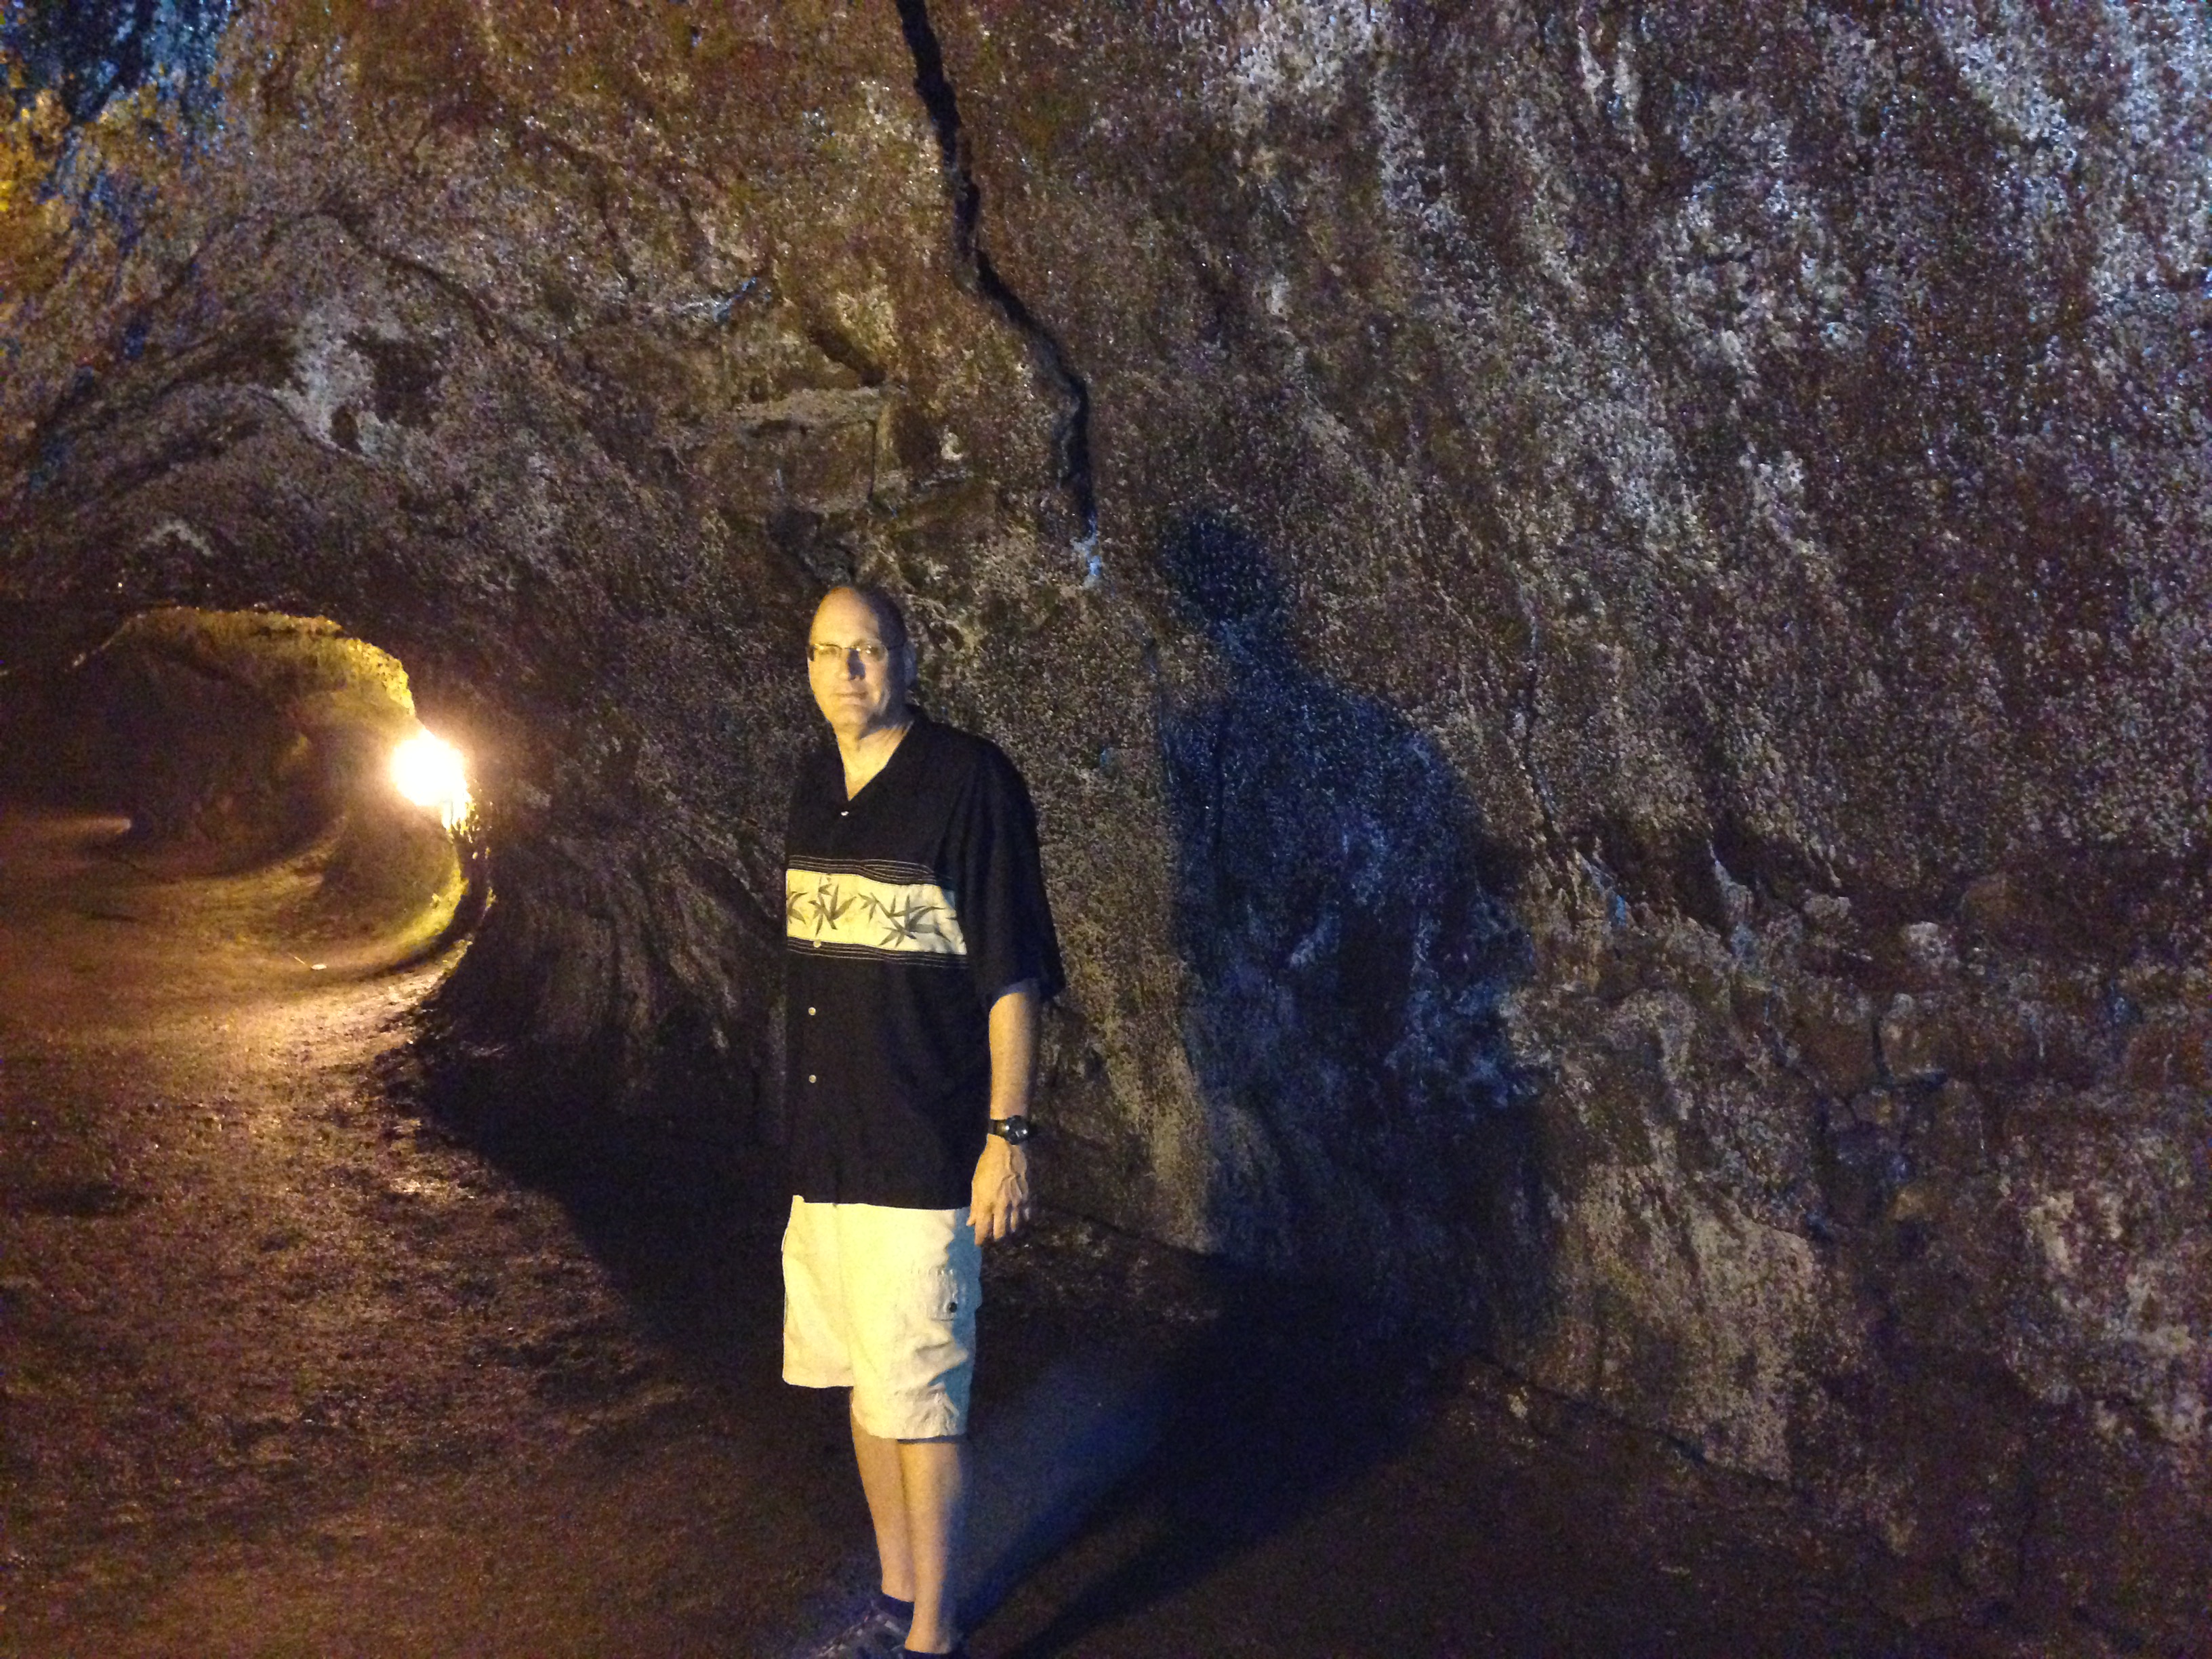
Inside the Thurston Lava Tube.

Volcanoes National Park2

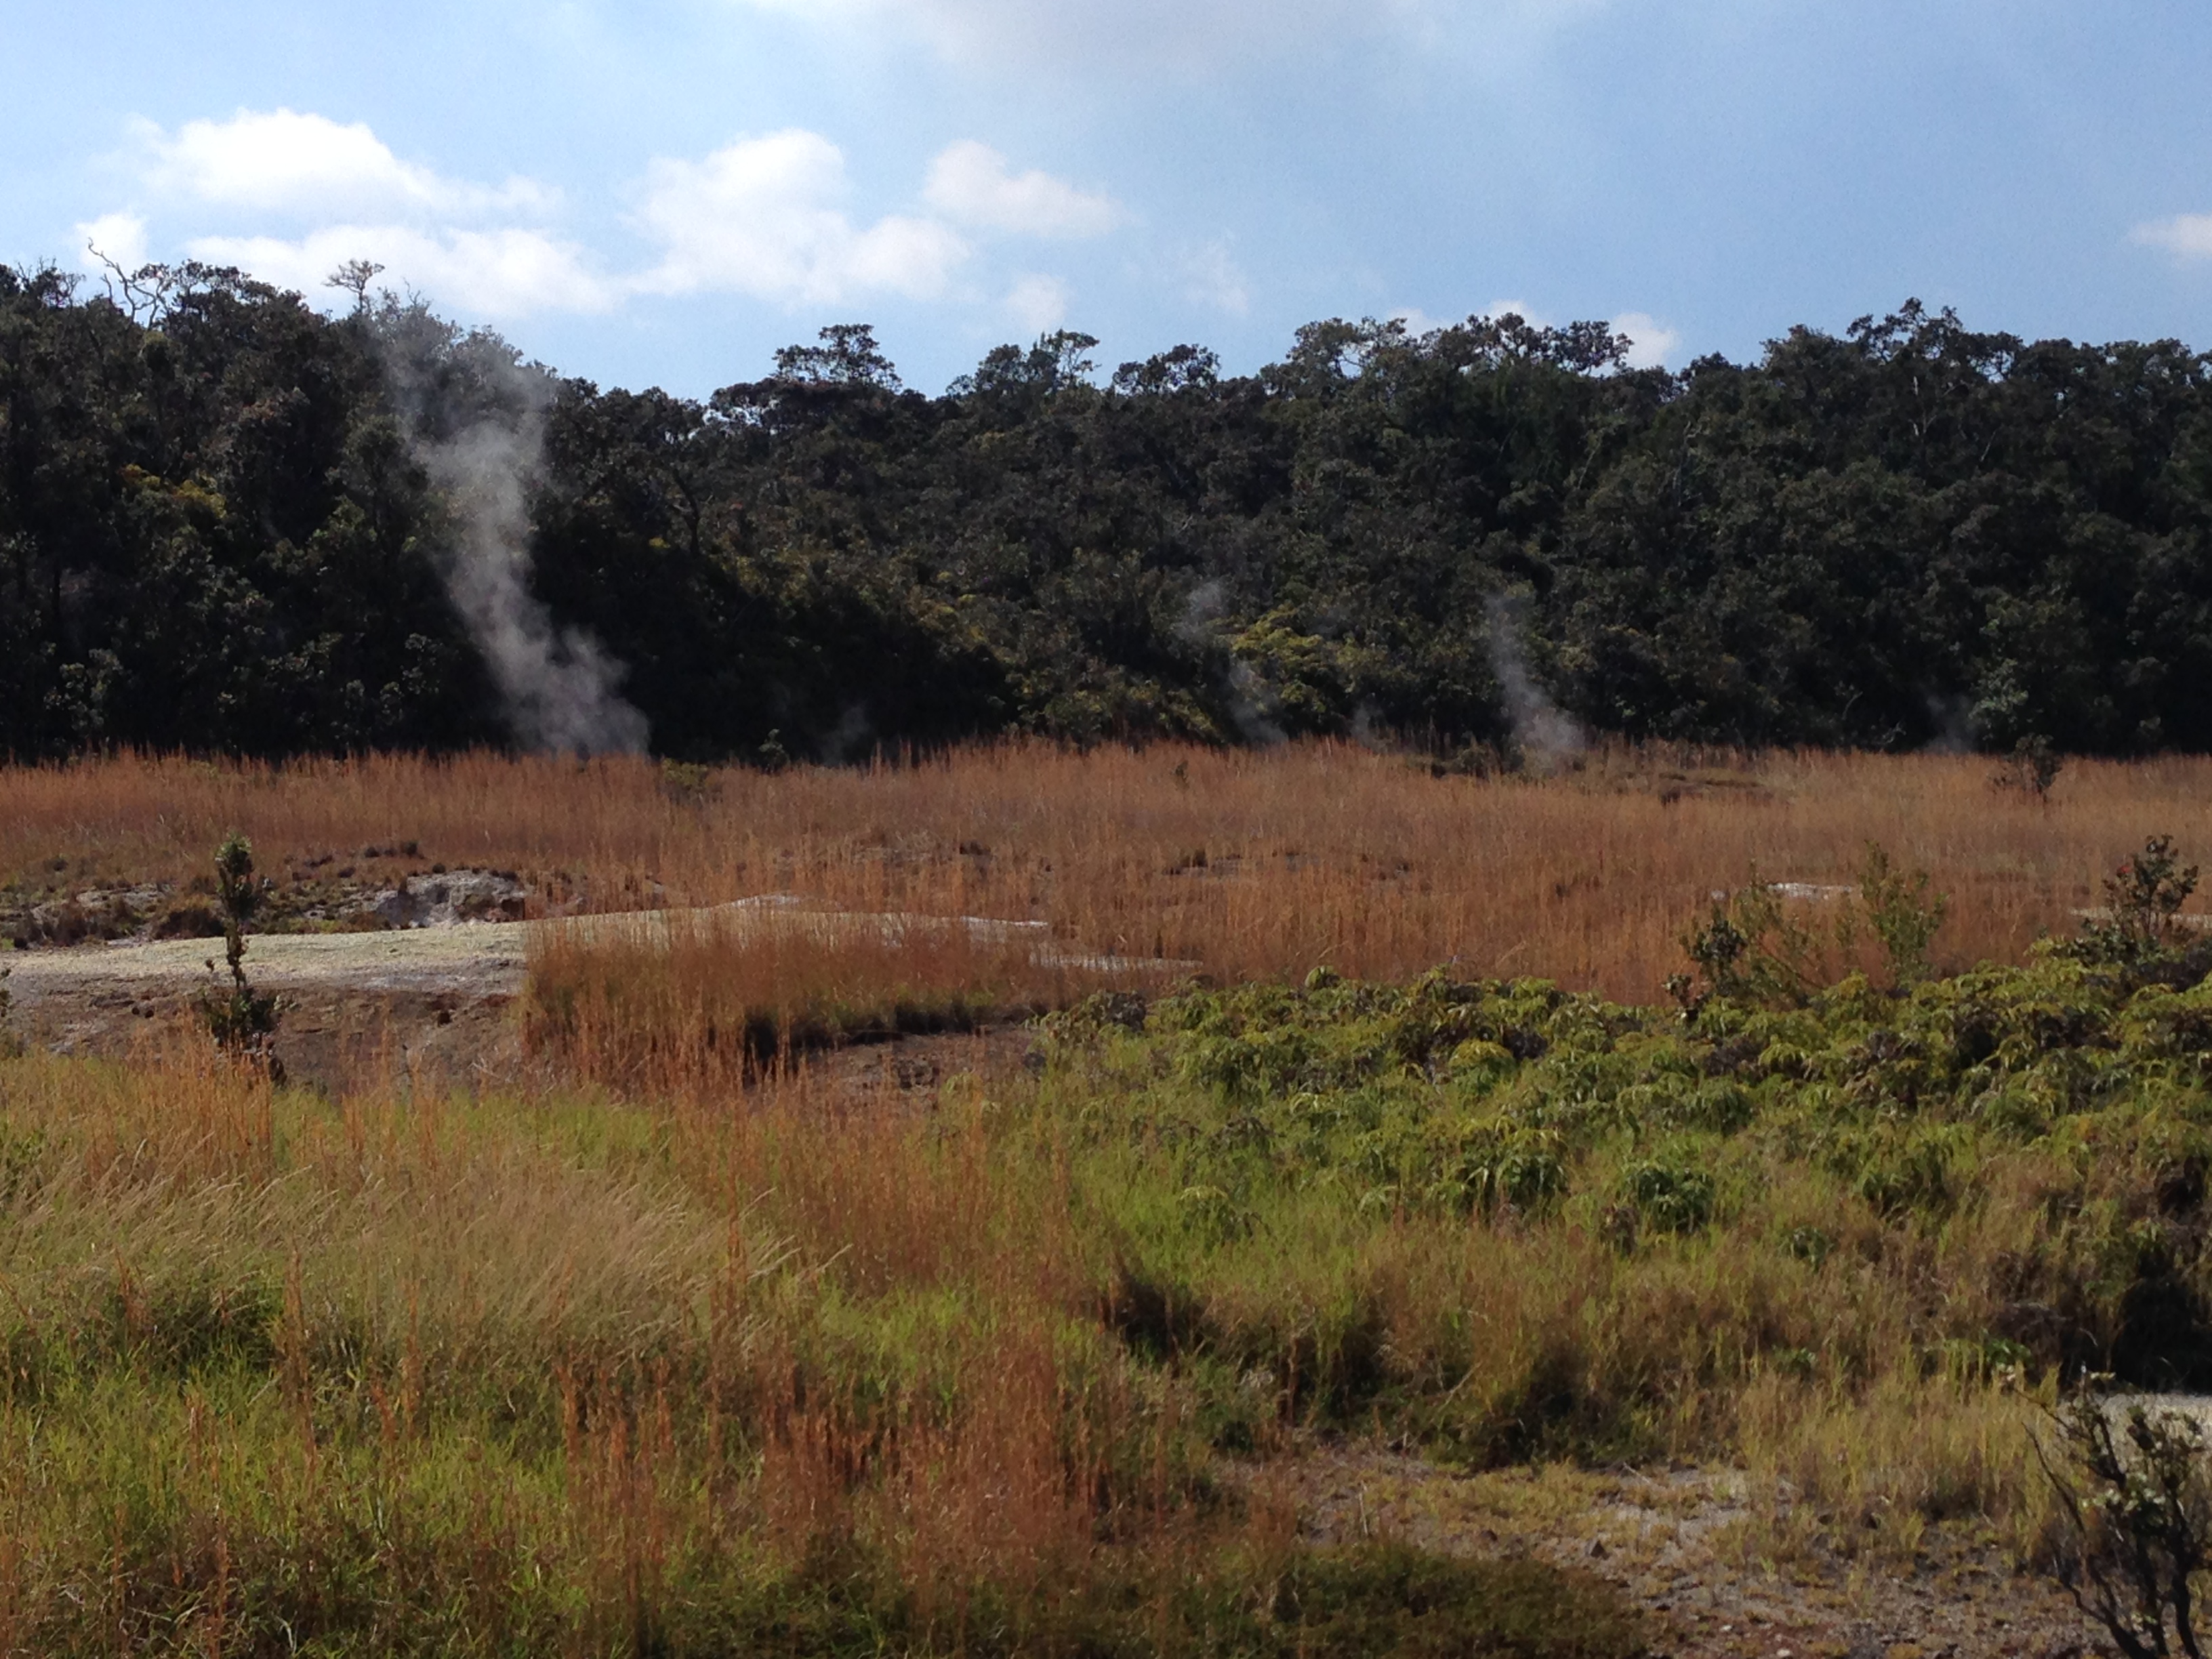
Steam vents in the National Park, everywhere you go there are reminders that you’re standing on active volcanic soil.

Volcanoes National Park1

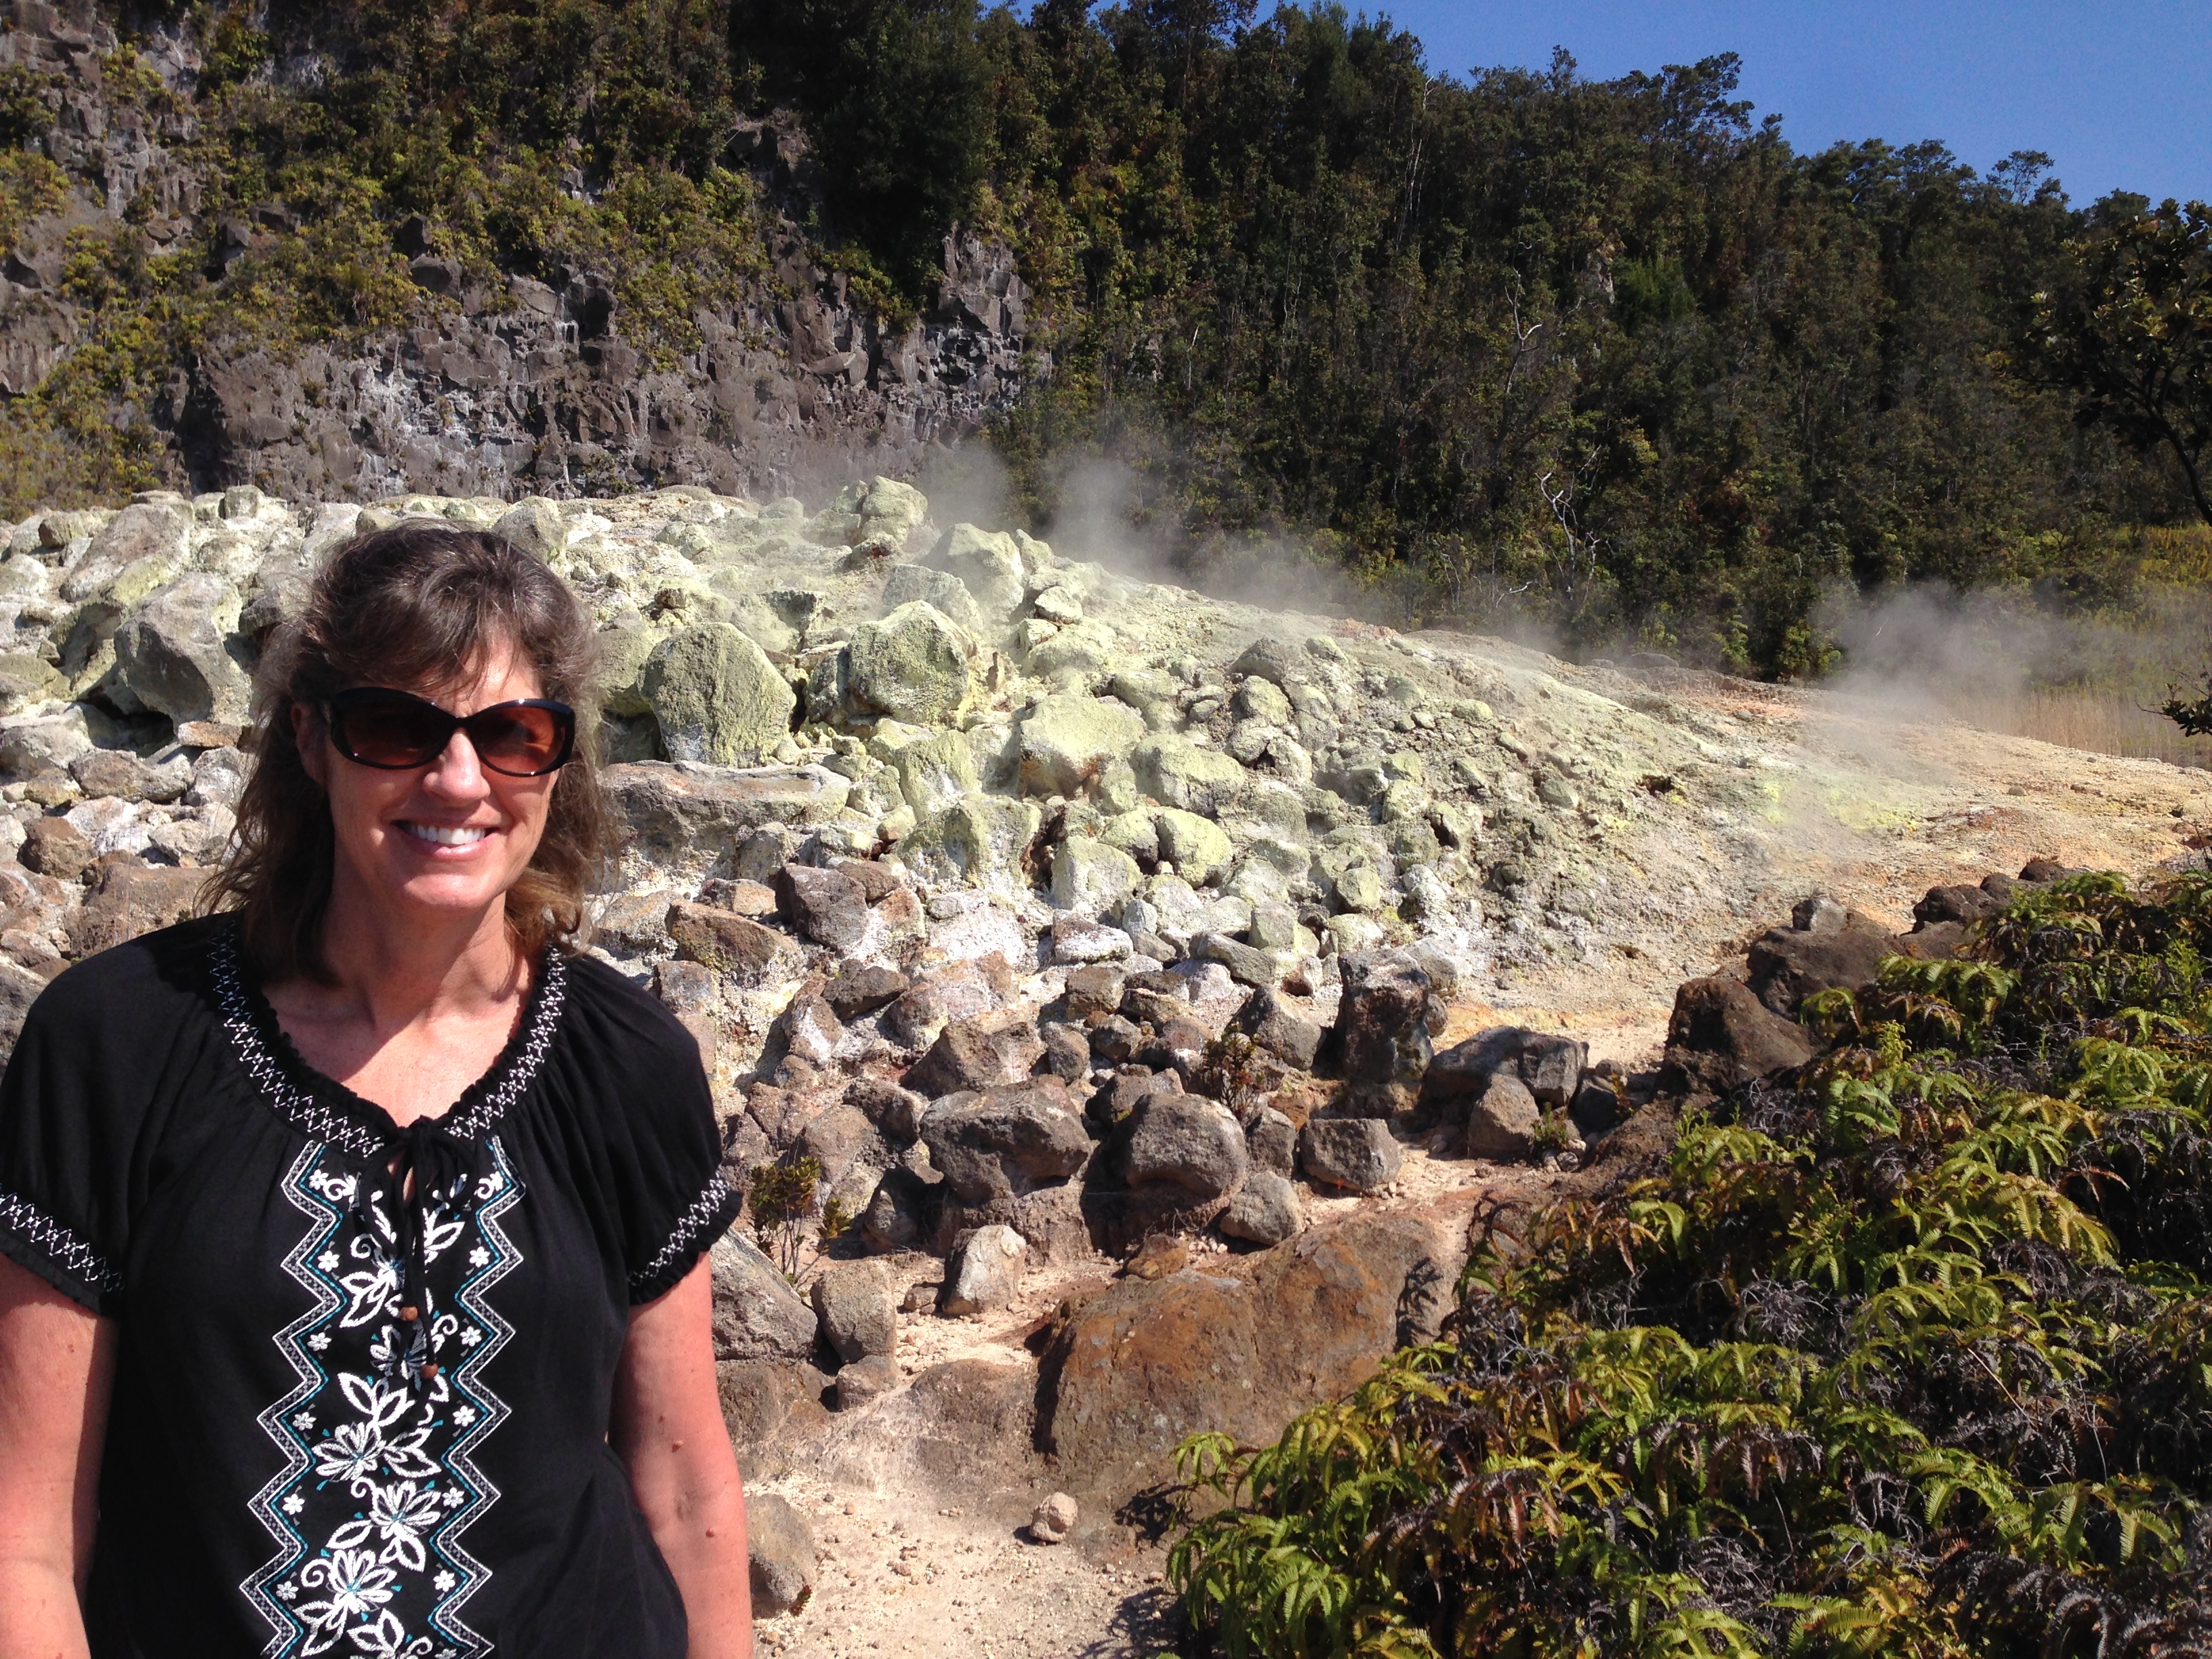
The sulphur banks near Kilauea Caldera, wow, you could smell the sulphur!

Kilauea Caldera, Hawaii Volcanoes National Park, Hawaii

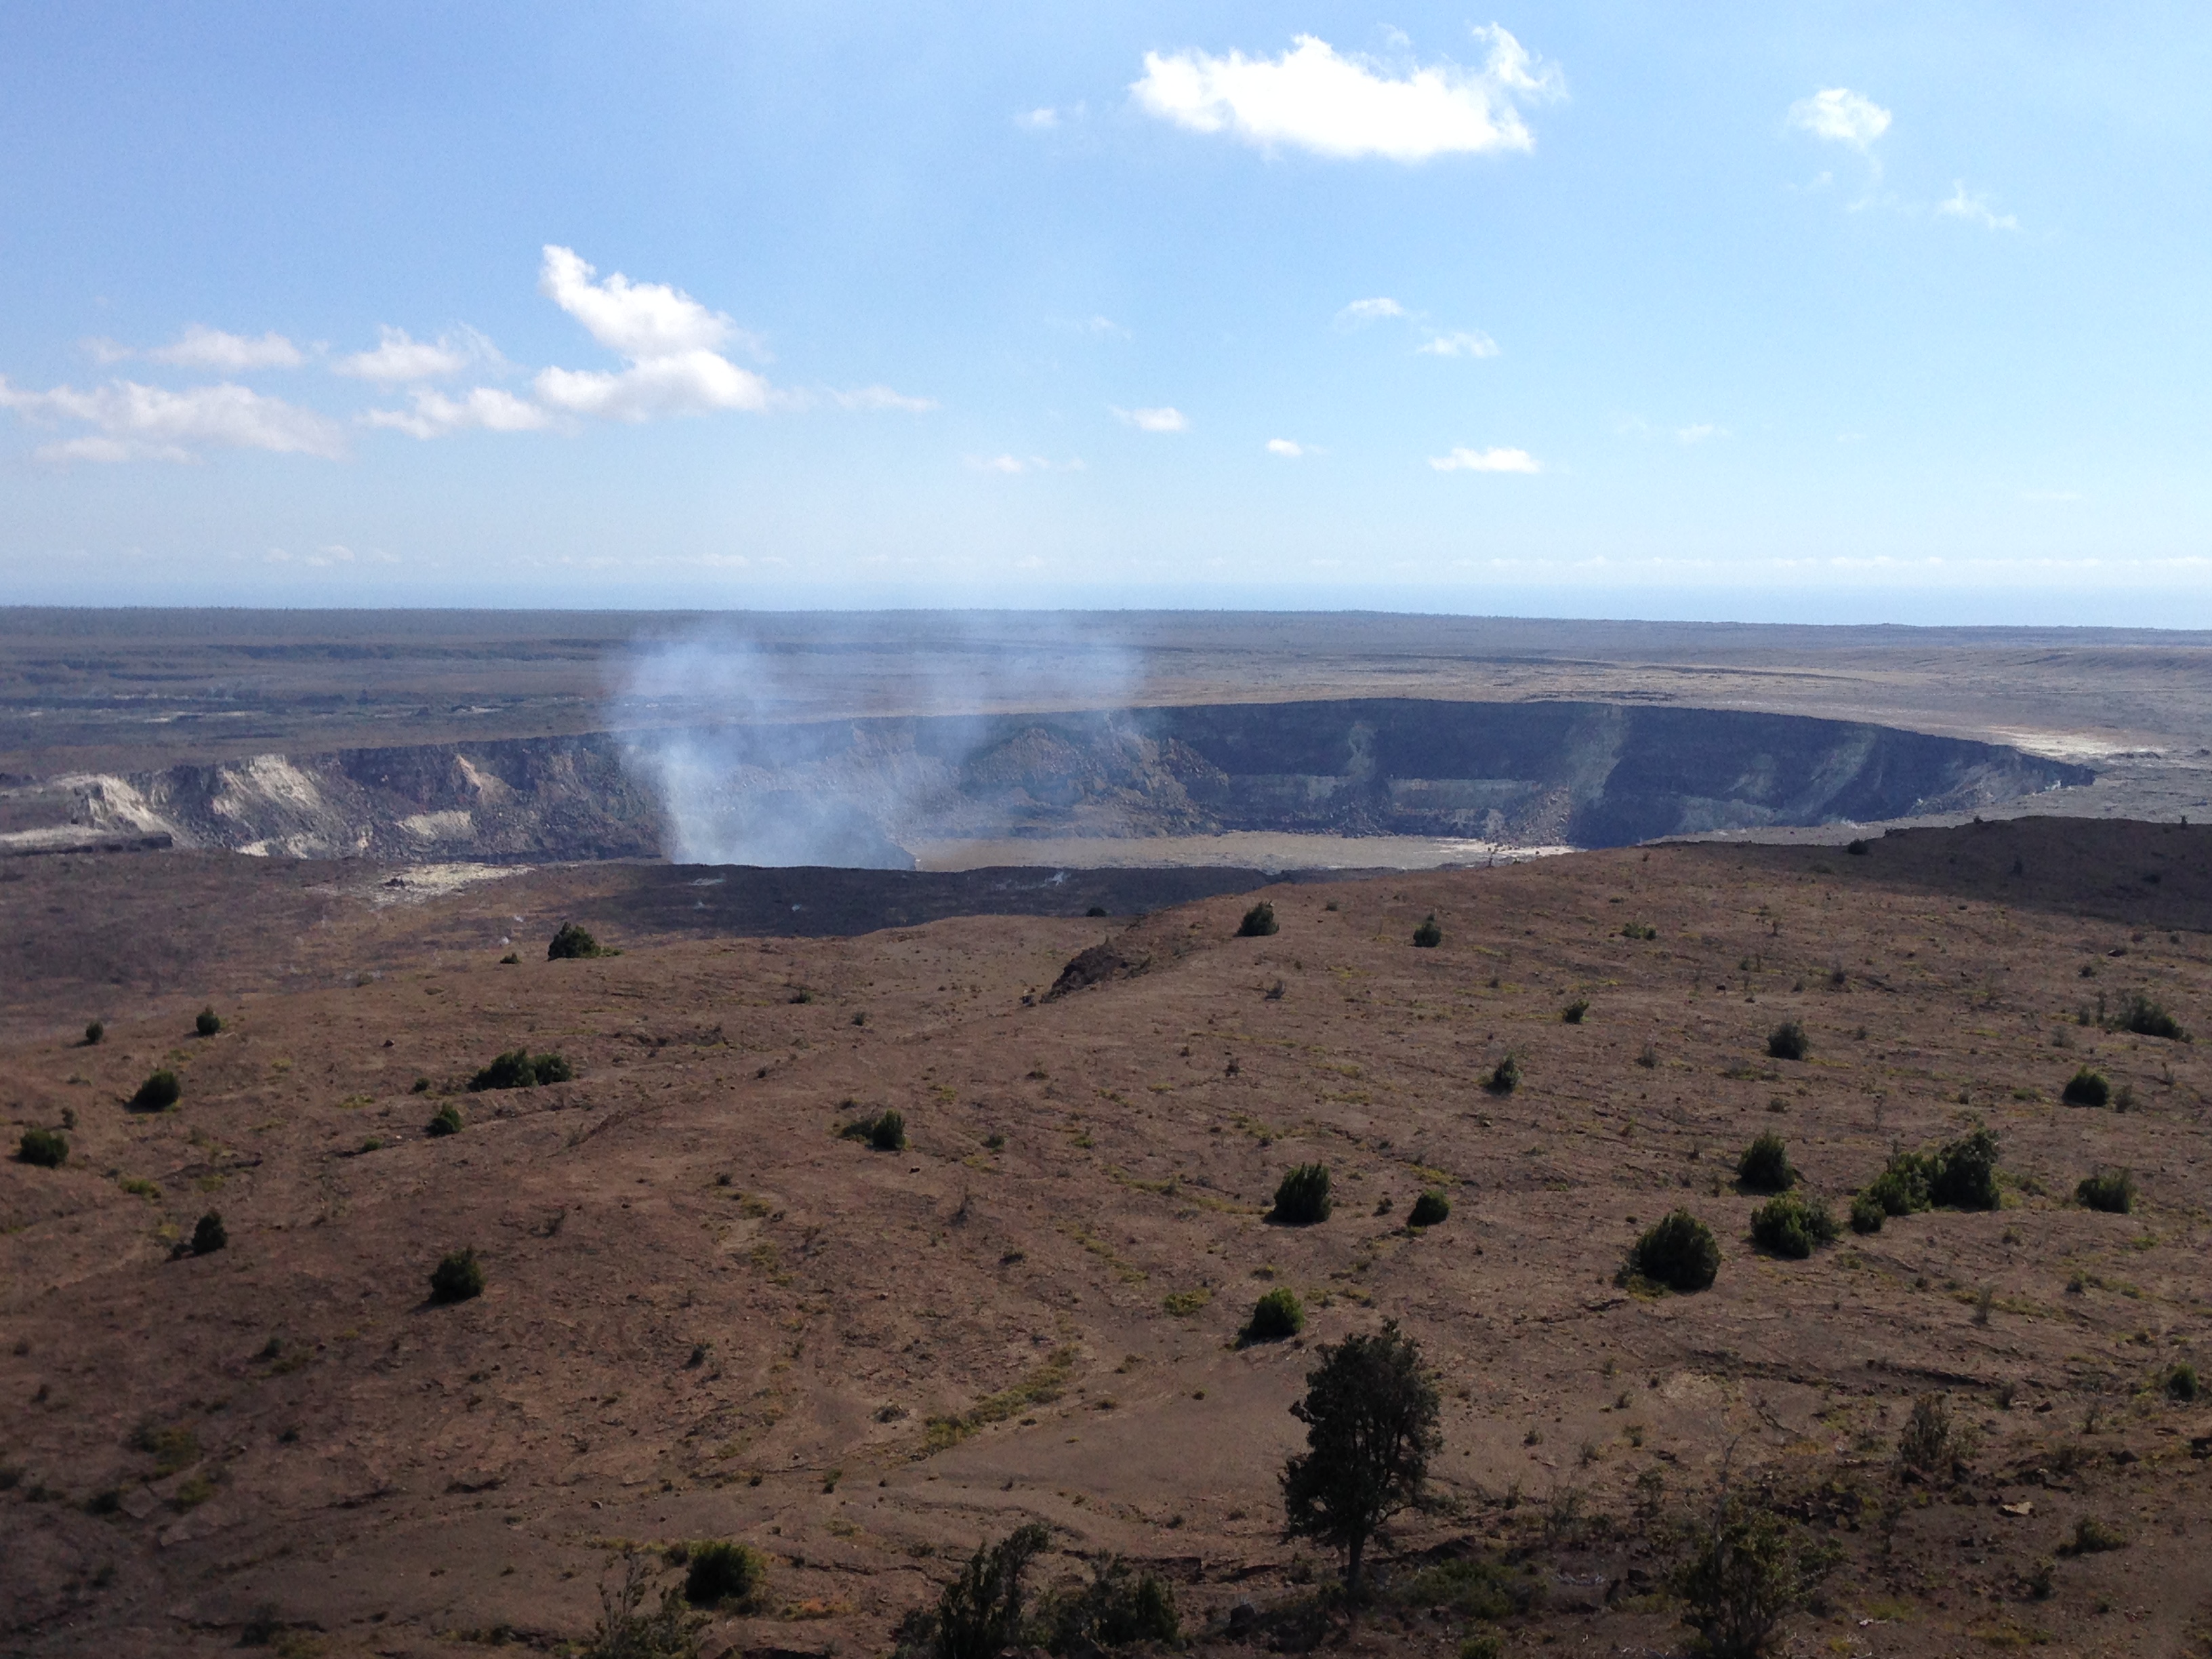
The huge Kilauea Caldera, this is about as close as you can get right now. There are trails in the Caldera, but they were closed due to volcanic activity during our stay.

If you enjoy exploring, try the Big Island of Hawai’i and remember there’s more to do than just hit the beach, pool or golf course!


Bryce Canyon National Park

24 Hours in Bryce Canyon National Park

When planning a trip to Southern Utah, it’s hard to go wrong when deciding between the five National Parks that span the area. Each park is quite unique, and all are spectacular. As the smallest of the National Parks in Southern Utah, Bryce Canyon National Park is suited perfectly for visitors who are dealing with a time constraint but would still like to experience nature and take in incredible views.

Bryce Canyon

Bryce Canyon as seen from the Rim Trail

On a recent adventure, a good friend and I spent 24 hours in Bryce Canyon and can confidently say that we saw and explored a great deal of the park. While the park is small (only 18 miles long with paved roads from north to south) there is plenty to explore and visitors could easily spend several days in the National Park.

Bryce Canyon

Durant and I at Bryce Point

My friend, Durant, and I planned to backpack Riggs Spring Loop Trail, an 8.6 mile loop out of Rainbow Point in the southern-most part of the park, and were also intent on stopping at as many viewpoints and exploring as many of the short hikes as we could.

Bryce Canyon

Taken near Sunrise Point along the Queens Garden Trail

A few notes on backpacking the Riggs Spring Loop: 1) backcountry permits are required and can be purchased at the Visitor Center for $5 per person, 2) backcountry camping is only permitted at designated campsites, of which there are four along the Riggs Spring Loop, 3) reservations may only be made at the Visitor Center, and only up to 48 hours in advance.

Bryce Canyon Thor's Hammer

Taken near Sunset Point. The large hoodoo in the center of the photo is appropriately named, “Thor’s Hammer”

We arrived to Bryce Canyon National Park and the Visitor Center just before noon on a Saturday in the spring and had no problem securing one of the campsites along Riggs Spring Loop for that night.

Bryce Canyon

Taken from the Rim Trail, close to Sunset Point. Afternoon showers are common

With a few hours to “burn” before starting our overnighter we hit as many of the viewpoints as we could on our way to Rainbow Point. Each observation point is slightly different, and all are well worth the stop.

Bryce Canyon Piracy Point

Taken from Piracy Point, with a view of Grand Staircase – Escalante National Monument to the East

To visitors who only have a couple of hours to explore Bryce Canyon, I would recommend the four viewpoints closest to the Visitor Center: Sunrise Point, Sunset Point, Inspiration Point, and Bryce Point. I would also recommend the 1.8 mile hike along the Queens Garden Trail.

Bryce Canyon Rainbow Point

Looking North from Rainbow Point

At around 3:30 pm, and after seeing both Rainbow and Yovimpa Points, we took off along the Riggs Spring Loop Trail heading east, clockwise around the Loop.

Riggs Spring Loop Bryce Canyon

Taken from Riggs Spring Loop Trail

The hike from Rainbow Point to Riggs Spring Campsite (where we spent the night) is 5.3 miles and is all downhill. Rainbow Point is the highest point in Bryce Canyon at 9,115 feet, while Riggs Spring Campsite sits at only 7,514 feet. In this situation, what goes down must come up, and 1,600 feet of elevation gain is significant over the remaining 3.3 miles of the hike while carrying a backpack.

Riggs Spring Loop Bryce Canyon

A view of Yovimpa Point from below

Corral Hollow Campsite Bryce Canyon

View from the Corral Hollow campsite along the Riggs Spring Loop Trail

We got to our campsite at about 6 pm (it’s typical to plan 2 miles per hour when backpacking), set up camp, ate our meager backpacking meals, and watched as the beautiful night sky crept over us.

Riggs Spring Loop Bryce Canyon

The night sky as seen from our campsite

Riggs Spring Loop Bryce Canyon

Surrounding cliffs on the climb to Yovimpa Pass from Riggs Spring campsite

After a typical night’s rest when camping (my small air mattress deflated on me several times throughout the night), we broke camp bright and early. We were out by 7:30 am, and made our way up Yovimpa Pass and back to Rainbow Point by 9 am.

Riggs Spring Loop Bryce Canyon

The view, looking South, between Yovimpa Pass and Rainbow Point

Once at Rainbow Point we got in our car and decided to stop at the remaining viewpoints we had yet to see. Several viewpoints and hundreds of photos later, we left Bryce Canyon National Park well before noon and headed home.

Bryce Canyon

Taken near Bryce Point

Bryce Canyon National Park features a great deal of amenities including two campgrounds, a lodge with 114 rooms (lodge suites, motel rooms, and cabins), showers, laundry, a restaurant, and a general store. Just outside of the park are several motels, gas stations, etc. There is also a $30 entrance fee per vehicle to enter the park.

Hoodoos in Bryce Canyon

Bryce Canyon is famous for having one of the highest concentrations of hoodoos on Earth

Bryce Canyon is open year round. We visited in the spring and there were still trace amounts of snow on the ground. Other than that, the temperature was quite comfortable, although it does get cold at night.

Bryce Canyon

Another view of Bryce Canyon taken from near Bryce Point

For information regarding Bryce Canyon National Park, including camping, hiking, weather, permits, etc., please visit the National Parks website.

Grand Canyon Toroweap

Toroweap, the Lesser Known Observation Point at Grand Canyon National Park

Boasting close to six million visitors, Grand Canyon National Park was the second most visited National Park in 2016. In fact, the Grand Canyon has been the second most visited National Park since 1990, with numbers ranging from 4 to 5 million visitors per year. And why wouldn’t people want to see the Grand Canyon? With stunning views and breath taking heights, the canyon is a marvel to behold! However, for those of us who like to enjoy nature’s splendors in relative peace and calm, making the more traditional visit to the North or South Rim of the Grand Canyon can be slightly dissatisfying. Dealing with busloads of people at every observation point, fighting the hoards for the perfect photo op; somewhere along the line the spiritual experience that comes with beholding something truly magnificent is tainted.

Toroweap Grand Canyon

Looking East from Toroweap Overlook on the North Rim of the Grand Canyon

There is one observation point along the North Rim of the Grand Canyon that is still widely undiscovered, a place where visitors can enjoy the Grand Canyon in complete solitude, Toroweap, also known as Tuweep.

Toroweap Grand Canyon

You don’t want to fall from there! The Colorado River lies 3,000 ft below

The names Toroweap and Tuweep are used interchangeably when referring to the area. “Tuweep” is the Paiute word for “the earth” and is used to refer to the general area. “Toroweap” is the Paiute word for “dry or barren valley” and refers specifically to the valley and the overlook.

Tuweep Grand Canyon

At the entrance to the Grand Canyon National Park

In 1870, John Wesley Powell was led to Tuweep by a Paiute guide. He spent time mapping out the area and naming many of the prominent features.

Toroweap Grand Canyon

With my mom, Robyn, and my Grandma, Donna. We visited in the Spring and had beautiful weather.

Despite not being very far from civilization as the crow flies, Toroweap is a very remote area, with no amenities, so visitors need to be prepared with whatever they need for the excursion, water, food, gas for their vehicles, etc.

Toroweap Grand Canyon

Looking West from Toroweap Overlook

From St. George, Toroweap is roughly an 80 mile drive on unpaved roads. Taking the final Utah I-15 exit before entering Arizona, head South on County Hwy 5. The paved road becomes a dirt road the moment you cross into Arizona. Follow County Hwy 5 South to the old Mt. Trumbull Schoolhouse. Originally built in 1918, Mt. Trumbull Schoolhouse is a fun stop along the way to Toroweap. From the Schoolhouse, head East on County Hwy 5. You will be driving over Mt. Trumbull. Continue to follow the road as it turns South and into Grand Canyon National Park. Total driving time from St. George to Toroweap is between 3 and 3 ½ hours.

Note that the last 3 miles before arriving to the observation point are very rough. There is parking available at this point for vehicles with low clearance. Only vehicles with high clearance are suited to continue.

Toroweap Grand Canyon

Taken from the 4-wheel drive section of the trip. Toroweap, dry or barren valley, was certainly named appropriately.

There is no entrance fee to enter the National Park at Toroweap. Near the overlook, there are several hikes to explore. There is also a campground with several available campsites, however, backcountry permits are required for camping and there is a small fee to spend the night. As I previously mentioned, there are no amenities. Be sure to bring sufficient water, food, clothing, gas for your vehicle, etc. Also be sure that your vehicle is in good condition, that you have a quality spare tire, and that you are ready to change a flat tire if needs be.

Toroweap Grand Canyon

Nothing more fun than exploring nature’s beauty!)

For information regarding current conditions at Toroweap, hiking and camping in the area, etc. the National Parks website is very helpful.

Black Canyon of the Gunnison National Park

Descending into Black Canyon of the Gunnison

In his book, Images of America: The Black Canyon of the Gunnison, Duane Vandenbusche put it best by saying, “Several canyons of the American West are longer and some are deeper, but none combines the depth, sheerness, narrowness, darkness, and dread of the Black Canyon.” With depths ranging anywhere from 1,800 to 2,722 feet (at Warner Point) and a width of only 40 feet at its narrowest point along the river, Black Canyon of the Gunnison owes its name to the fact that some places along the canyon only receive 30 minutes of sunshine each day. Black Canyon of the Gunnison was made an official National Park in 1999 so that visitors could enjoy the spectacular views, the daring climbs, the breathtaking (literally) hikes, and the Class V rapids that the canyon offers. The National Park encompasses 14 miles of the 48 mile canyon.

Black Canyon, Sunset View

A view of the Black Canyon, looking North West, taken from Sunset View

In our recent adventure to the Black Canyon of the Gunnison National Park, my father and I somewhat tiptoed the line between bold adventurer and casual sightseer. We decided to descend into the canyon following the Gunnison Route, which is the most popular, and supposedly the “easiest” route to the bottom.

Black Canyon, South Rim Visitor Center

Black Canyon of the Gunnison as seen from the South Rim Visitor Center

Permits for the descent to the river are required and are issued (free), on a first-come first-serve basis from the visitor center. To that end, we arrived at the South Rim Visitor Center when it opened (8 am), applied for our permits, and got an early start to, what we figured to be a physically exhausting day.

Gunnison Route, Black Canyon

Taken along the descent into the Black Canyon

The Gunnison Route begins at the South Rim Visitor Center and initially follows the Oak Flat Trail for 1/3 miles until you reach a sign, “River Access. Permit Required.”

Gunnison Route, Black Canyon

The Gunnison Route follows the drainage seen on the far right side of the photo

At that point the true descent begins. The descent is steep, but very doable, we just made sure to take it slowly, and followed a drainage nearly the entire way to the river.

Descent into Black Canyon

My father, Paul, using the chain to help with the descent

About 1/3 of the way down, there is an 80 foot length of chain to hold onto. Although the chain isn’t necessary to use, we found it helpful for extra balance.

Black Canyon chain descent

I too, found the chain to be helpful

As we descended closer to the river, the temperature began warming up and it seemed as though we were entering a lush paradise, complete with thick foliage and stunning views of the rushing river and towering cliffs.

Black Canyon

Our view as we neared the bottom of the canyon

Along the river there are several backcountry campsites available. Although we had originally thought about camping in the canyon we decided to camp at the South Rim Campground and descend into the Black Canyon as a day hike.

Gunnison river in Black Canyon

Taken near the campsites along the river

Total, the hike took us about an hour and a half each way. Remember that the descent into, and the ascent out of the canyon is about 1800 foot change in altitude, so be prepared with good hiking shoes, water, snacks, knee braces, ankle supports, etc. We also found it extremely helpful to use gloves while descending/ascending the portion of the trail that has chain.

Gunnison River in the Black Canyon

My dad and I near the campsites. Happy to have successfully descended into the Black Canyon, but nervously awaiting the ascent.)

The South Rim of the Black Canyon of the Gunnison National Park is roughly 15 miles from Montrose and 64 miles from Gunnison. To get there from Montrose take Colorado State Highway 50 (Main St. in Montrose) heading East. After about 7 miles you’ll exit onto Highway 347 heading North East. Follow the highway for about 7 miles into the National Park.

Black Canyon of the Gunnison National Park

One more view of the paradisiacal setting along the Gunnison River in the Black Canyon

There are several campgrounds with access to water and electricity within the National Park. For more information regarding amenities, weather conditions, visitor center information, trail conditions, etc. please see the National Park website.

Black Canyon descent

A view the Black Canyon, not far from the South Rim Visitor Center


Syncline Trail Campsite Canyonlands

Backpacking Upheaval Dome in Canyonlands National Park, Utah

At over 500 square miles, Canyonlands National Park, in southeast Utah, covers a vast area and offers visitors a wide array of activities, including hiking, backpacking, off-roading, mountain biking, kayaking, rafting, etc.

Mesa Arch Canyonlands

A view of La Sal Mountains from Mesa Arch

On our most recent adventure to Canyonlands, my father, Paul Terry, and I chose to explore the Upheaval Dome area in the northwest corner of the National Park, also known as the Island in the Sky District.

Upheaval Dome Canyonlands

At the entrance of the Upheaval Dome crater

Of the many incredible sights in Canyonlands, Upheaval Dome is one of the most intriguing. Upheaval Dome is a massive (three miles in diameter) almost-perfectly circular crater cut deep into the many rock layers. In the center of the crater there are enormous rocks and many layers of sediments pushed vertically upward forming a dome. While no one actually knows the origin of Upheaval Dome, there are two main theories of the formation, the Salt Dome Theory, and the Impact Crater Theory. You can read more information about these two theories on the park brochure.

Syncline Loop Trail Canyonlands

Descending from the high plateau into the canyon along the Syncline Loop Trail

Our backpacking adventure consisted of an 18 mile loop starting at the Upheaval Dome Trailhead and finishing at the Alpine Spring Trailhead, where my dad had parked the car (it is about a 0.5 mile walk between the two trailheads). We took three days and two nights to complete the loop, although we met a few people along the way who did the same loop in only two days.

Upheaval Dome Canyonlands

Paul, with a view of Upheaval Dome, taken from inside the crater

We took off around midday on the first day from the Upheaval Dome trailhead and worked our way along the southern portion of the Syncline Trail. The trail down into the canyon is steep, dropping roughly 1300 feet into the canyon, but well-marked with cairns, and very doable (just take your time). We set up camp for the night at the Syncline Campsite (see featured image), at the entrance to the Upheaval Dome, and spent a couple hours that same afternoon exploring the crater.

Upheaval Canyon Canyonlands

Looking westward from inside Upheaval Canyon

The next morning we packed up and headed down Upheaval Canyon, west to the Green River. The Green River is approximately a 3.5 mile hike from the Syncline Trail. From there we followed the White Rim Road north for about a half of a mile looking for a good place to fill up on water. The river is very muddy, and even after finding a spot where the water flowed very slowly, our water pump got clogged after only pumping out about a gallon of clean water. Not knowing how much water we would need for the rest of the journey, we collected another gallon of river water, for cleaning up, cooking, and boiling it to drink if it came down to it.

Panorama Upheaval Canyon Canyonlands

Taken from near the Green River, the Canyon to the right being Upheaval Canyon

Green River White Rim Road

Taken along the White Rim Road, the Green River flowing in the background

After collecting our water, we headed east from the White Rim Road into Taylor Canyon for another five miles, passing the picturesque Moses and Zeus pinnacles.

Moses and Zeus Taylor Canyon

Taylor Canyon with a view of Moses and Zeus in the background)

After a short rest in the shade of the Taylor Campsite outhouse, we cut off to the southeast following the Alcove Spring Trail for about a half of a mile until we found a suitable spot to set up camp. As long as you are out of the sight of the campers at the Taylor Campground, and 100 feet off of the main trail, you are free to set up camp anywhere in Taylor Canyon.

Moses and Zeus Canyonlands

The stunning Moses and Zeus spires

On the morning of the third day we broke camp early knowing that we had a long ascent in front of us. Total, it was about a five mile hike from our campsite to the Alcove Spring Trailhead, however that included a 1300 foot ascent to get out of the canyon. Unfortunately, most of that elevation is gained over the last quarter to half of a mile. Once again, we just took our time, took plenty of rests, and by midday we were able to reach the trailhead.

Alcove Spring Trail Canyonlands

Our campsite along the Alcove Spring Trail, with a view of Moses and Zeus in the background

We finally reached the car – thirsty, sunburned, sore, tired, and with hundreds of bug bites – but we had an amazing time. The scenery in Canyonlands is absolutely stunning. Walking through the desert canyons, seeing the incredible rock formations makes you feel as though you are a part of some old Western movie.

Alcove Spring Trail Canyonlands

Ascending Alcove Spring Trail

On a practical side, water is a must! We each brought a gallon and a half of water, hoping to be able to replenish our supply at the Green River. Always plan to have extra water, sometimes we forget that in addition to drinking it, water is very useful for cleaning up, for cooking, etc. While water can be pumped out of the river, make sure that you bring a pump with a filter that can be cleaned out easily, on the spot, or bring some other filtration system that can better handle the thick mud and silt in the river. There is some accessible water, that has seeped up from the ground, along the Syncline Trail. Once again, you are going to want to have some sort of filtration device to drink that water. Also make sure to pack plenty of energy replenishing foods, sunscreen, bug repellent, etc.

Alcove Spring Trail Canyonlands

A view from the plateau near the Alcove Spring Trailhead

We visited Canyonlands during Spring and had beautiful weather (temperatures in the mid 70’s during the day and reasonably warm at night), and I would highly recommend to others to visit either in the Spring or in the Fall as Summer temperatures can get extremely hot.

Taylor Canyon Canyonlands

Cooling off in the shade in Taylor Canyon, a half-gallon of river water in tote

Canyonlands is located in southeastern Utah, and is only about 30 miles southwest of Moab. For other information on Canyonlands, including campground information, refer to the National Parks website.